

An exception breakpoint is triggered when an exception gets caught and/or uncaught. When you have a big project, sometimes it is very annoying to go through the whole exception stack trace trying to figure out what line caused an exception to be thrown. With an exception breakpoint, you can specify what exception you want to set on the breakpoint, and whenever this particular exception is about to be thrown, the application will stop at the line that caused the exception.
Let's revert the changes we made in the previous steps.
Uncomment the if statement in setPosition(String) (on line 31 and 33), unset the conditional breakpoint (double-click on the breakpoint to unset it), and terminate the debugger.
We will modify line 112 again, but this time we will pass null as an argument. So your line 112 should look like the following line of code:
andrew.setPosition(null);
We will also add one extra line after line 112. Type andrew.getPosition().length().
In this line we have intentionally created NullPointerException, as we are trying to find the length of a string, which is equal to null. This is done to show how exception breakpoint works.
Go to the Debug Perspective, then to the Breakpoints view, and click on the
 icon. (Add Java Exceptions.)
We will be dealing with
NullPointerException. Thus, you need to find it in the list. See the following screenshot:
Click on Ok. Now you should see the
NullPointerExceptionbreakpoint added in the breakpoint list. If there is any other breakpoint checked, please uncheck it.Run the debugger.
If you did everything correctly, you should see that the application stopped at line 113, right before throwing an exception.
Click on the Resume
 icon.
icon.
After the application has finished executing, you should see an exception stack in your console as shown in the following screenshot:
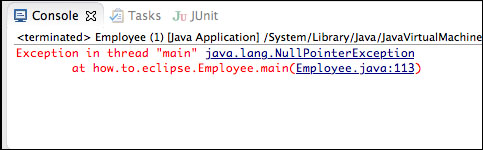
As you can see, the Eclipse debugger has stopped right before an exception has been thrown, thus allowing you to look around and possibly find a reason for the exception. This makes the exception breakpoint very useful when dealing with debugging applications that throw unexpected exceptions.