

You can load the sample data onto your development organization by using the LexiLoader (Apex Data Loader) in OS X by performing the following steps. Alternatively, for Chapter 2, The E-Commerce Framework, you can load the data as mentioned in the Importing with the Custom Object Import Wizard section. The steps to load the sample data onto your development organization for the Windows Apex Data Loader are identical to LexiLoader:
Select Insert from the main window.
Enter your Salesforce Username and Password. Note that your password must be appended with your security token. Click on Log in.
When you have logged in successfully, click on Next.
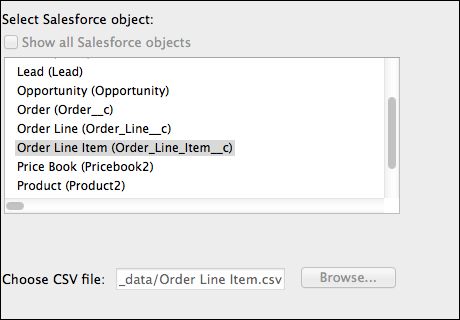
In step 2 of the import wizard, select the Order Line Item (Order_Line_Item_c) option and the Order Line Item.csv file. Click on Next, as shown in the following screenshot:
Click on OK in the dialog when the initialization is successful.
In step 3 of the import wizard, click on Create or Edit a Map.
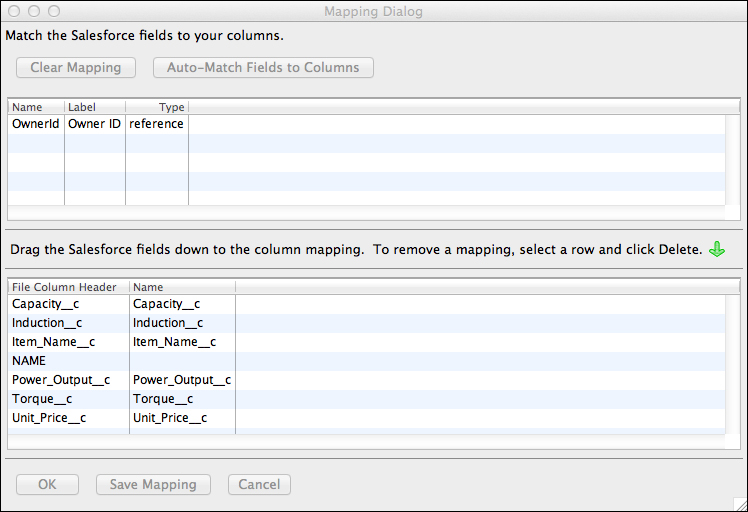
In the Mapping Dialog window, click on Auto-Match Fields to Columns. The Mapping Dialog window on your screen should resemble the following screenshot. Click on OK:
Upon doing this, you are returned to step 3 of the import wizard. Here, you need to click on Next.
In step 4 of the import wizard, select a folder for the success and error files and click on Finish.
Click on Yes in the dialog warning you have chosen to insert records.
The import process will begin importing records. When the import has completed, the Operation Finished dialog will be displayed, as shown in the following screenshot:
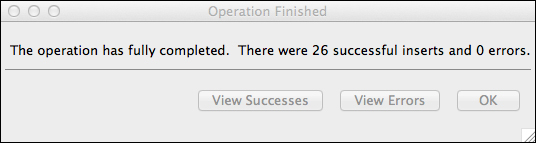
From this dialog, you can also view the audit reports for the import successes and failures by clicking on the View Successes or View Errors button.
Verify whether the import was successful by checking your development organization's order line items object.
Close the Data Loader.
Congratulations! You have now finished building the base application.