

In this section, we will take a look at how to create a simple Hello World Android Wear application by performing the following steps:
Launch Android Studio, and then navigate to the File | New Project option.
Next, enter in
HelloAndroidWearfor the Application name field.Then provide a name for the Company Domain field.
Next, choose Project location where you would like to save your application code:

Finally, click on the Next button to proceed to the next step. On the second wizard screen, we need to specify the form factors using which our application will run. On this screen, we choose the Minimum SDK versions for phone and tablet, Android TV, and Android Wear.
Click the Phone and Tablet option and choose the API 19: Android 4.4 (KitKat) option for Minimum SDK. Choosing this option allows your application to target more devices that are active on the Google Play Store, with the added cost of having fewer features available for these devices.
Next, click on the Wear option and choose the API 20: Android 4.4 (KitKat Wear) option for Minimum SDK:

Next, click on the Next button to proceed to the next step in the wizard.
In our next step, we will be taking a look at how to add a blank activity to our application for its mobile section.
Note
An activity is basically an application component that provides a screen with which users can interact in order to do something, such as dial the phone, take a photo, send an e-mail, or view a map.
Each activity is given a container to draw its user interface. The container typically fills the screen, but may be smaller than the screen and float on top of other windows.
Android Wear applications are actually built with two modules: mobile and wear. In this section, we will take a look at how to add a blank activity for the mobile portion of our Android Wear application. Although in this chapter we won't be using this to communicate with our Android wearable device, in later chapters, when we learn about notifications and how to send these between the mobile device and the wearable, we will be using this component in more detail.
To add an activity for mobile, perform the following steps:
From the Add an activity to Mobile screen, choose the Blank Activity option from the list of activities:

Now, click on the Next button to proceed to the next step in the wizard.
In our next step, we need to set up and customize our Blank Activity properties that can be used by our application. Here, we specify the name of the activity, layouts, and title, as well as its menu resource name that it will be using (if it contains a menu bar).
From the Customize the Activity screen, accept the default properties that have been created for you by the wizard:
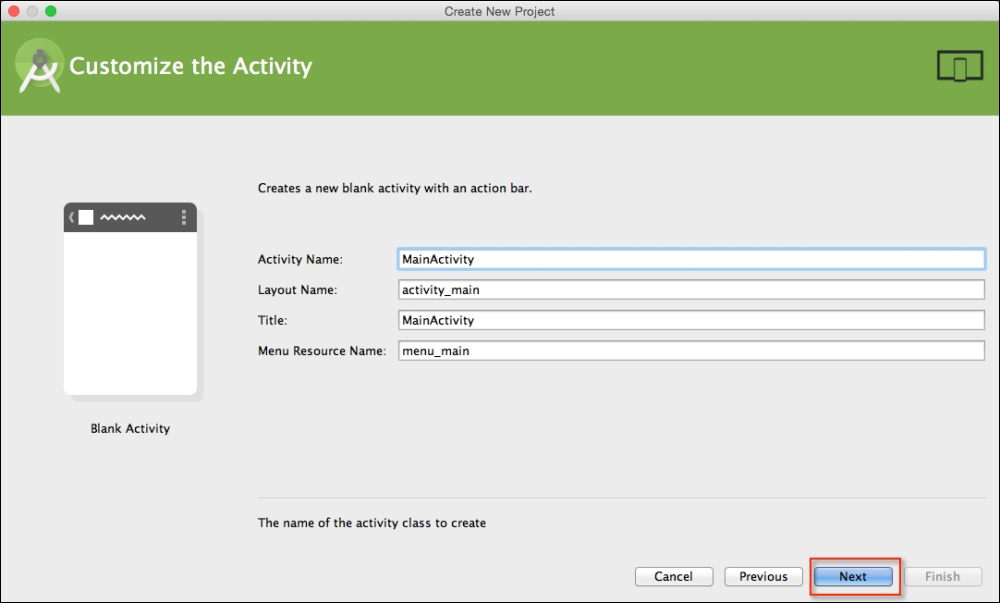
Click on the Next button to proceed to the next step in the wizard.
In this section, we will take a look at how to add a blank activity for the wearable portion of our Android Wear application. This will be used to determine how our Android wearable behaves. Once added, this will contain two different watch views: one containing round watch faces and the other containing a square watch look.
To add an activity for Wear, follow these steps:
From the Add an activity to Wear screen, choose the Blank Wear Activity option:
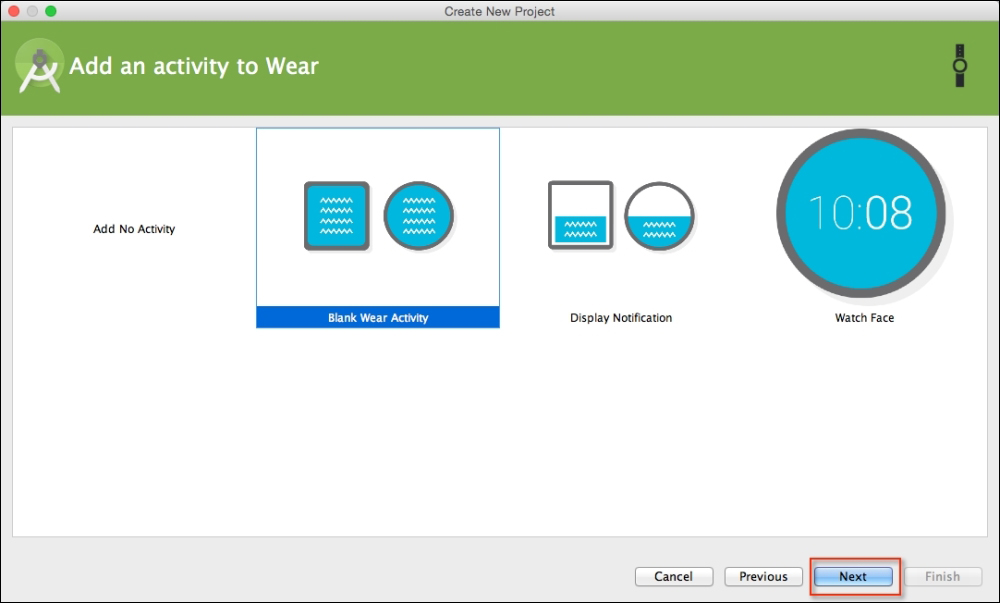
Click on the Next button to proceed to the final step in the wizard.
In our final step, we need to customize our
Blank Wear Activityproperties that can be used by our Android wearable. Here, we specify the name of the activity as well as the layouts for the watch faces for round and rectangle.From the Customize the Activity screen, accept the default properties that have been created for you by the wizard:

Next, click on the Finish button to proceed, and your Android wearable project will be generated for you. After a few moments, the Android Studio window will be displayed with your project loaded.
When you take a look at the project that the wizard created for you, the first thing you will notice is that it contains two modules: mobile and wear. The mobile portion of our project is the application that will run on a phone device that will be used to communicate with our wearable device. The wear portion is the application that will be installed on the Android wearable device.
Note
When developing Android wearable applications, these cannot simply be packaged separately and uploaded to the Google Play Store. You must package both your mobile and wearable app into a single APK application. This is so that when a user installs your application on their Android device, the wear app will automatically be transferred to the paired wear device.
As you can see in the following screenshot, the default project structure that our wizard created for us doesn't seem to do anything special—it simply contains the skeleton structure of any Android wearable app. In our next step, we will look at how we can write our own code for the Wear module of our application:
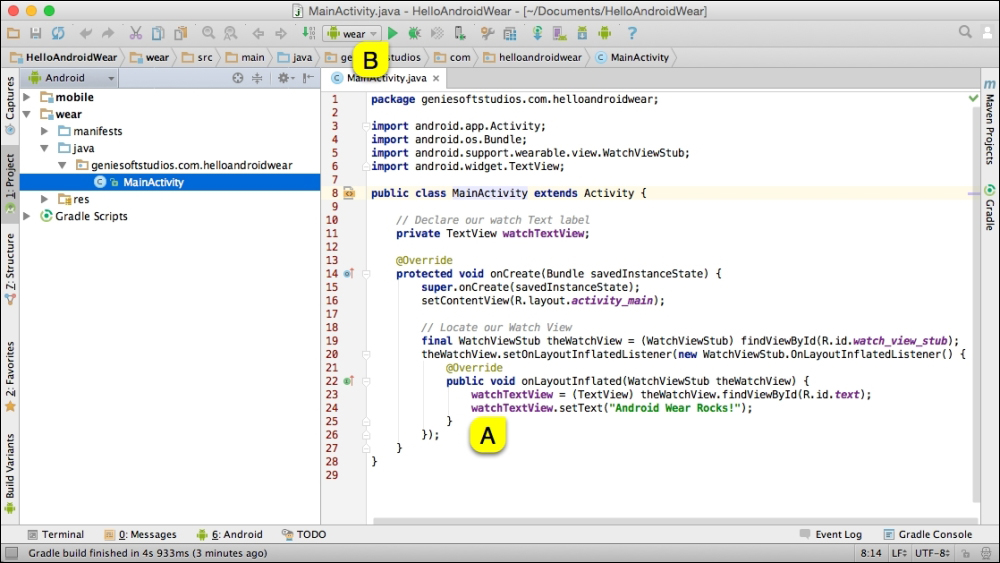
In our next step, we will begin modifying our MainActivity class file to display our custom Android wearable welcome message to the user within the wearable watch face :
Open the HelloAndroidWear project from within our Project Navigator window.
From the Project Navigator window, expand the Wear section, select, and expand the java section.
Modify the following code in the
MainActivity.javafile of the project:private TextView watchTextView; @Override protected void onCreate(Bundle savedInstanceState) { super.onCreate(savedInstanceState); setContentView(R.layout.activity_main); final WatchViewStub theWatchView = (WatchViewStub) theWatchView.setOnLayoutInflatedListener(new WatchViewStub.OnLayoutInflatedListener() { @Override public void onLayoutInflated(WatchViewStub theWatchView) { watchTextView = (TextView) theWatchView.findViewById(R.id.text); watchTextView.setText("Android Wear Rocks!"); } }); }Tip
Downloading the example code
You can download the example code files for all Packt books you have purchased from your account at http://www.packtpub.com. If you purchased this book elsewhere, you can visit http://www.packtpub.com/support and register to have the files e-mailed directly to you.
In the preceding code snippet, we start by creating a new activity, which is handled by the onCreate method. This method is responsible for starting the activity when the application is launched and the emulator sets up the content, prior to displaying the watch layouts on the screen using the setContentView method.
Next, we declare an instance of WatchViewStub, which is used to detect the specific watch type being used at runtime and allows you to inflate a rectangular or round layout. Since we cannot access these child views until inflation has completed, we implement the OnLayoutInflatedListener interface to handle this, which allows us to get a reference to the child views by using the findViewById class. Once we have established this reference, we can then proceed to update the watchTextView with our Android Wear Rocks! text.
Note
When we make a call to invoke the onLayoutInflated method from inside our WatchViewStub class, this will begin to load the corresponding layout resource for either the rect_activity_main.xml file for our square view or the round_activity_main.xml file for our round watch views. Once the view has inflated within its parent view, this will then get added to the view hierarchy chain of your application prior to making it visible.
If you would like to learn more about the activity lifecycle and the different states that it takes on, you can refer to the documentation at http://developer.android.com/reference/android/app/Activity.html#ActivityLifecycle.
Now, we can finally compile, build, and run our application. Click on the green button labeled B in the preceding screenshot or simply press CMD + F9, and choose Android Virtual Device from the list of Android Emulators:
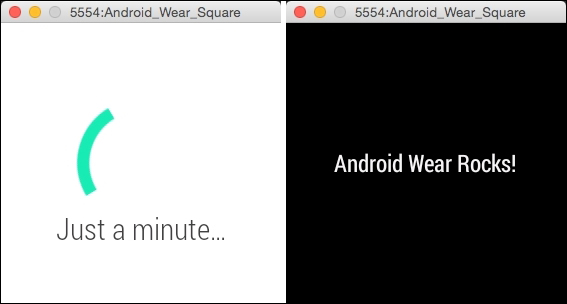
Once the emulator has launched and after a few moments, you should see your app displayed, as shown in the preceding screenshot.