

Spring Boot comes as an advantage over Spring with bootstrapping code and ease of development, with avoiding the tedious configurations. Spring Boot is not another framework; it is just made on the top of the Spring framework to reduce the development effort. It saves a lot of effort for much of the boiler plate code, XML configuration, and annotation. It integrates with other Spring modules very easily. It also has an HTTP web server embedded in the web application. It has CLI. Spring Boot, which fits with many build tools such as Maven and Gradle perfectly.
A sample application developed in Spring Boot will provide better evidence to prove the preceding claim. Here, we will develop a very small application with one controller class that will greet the user with a name that is sent by the user in a URL.
The environment required for this sample project will contain the following:
- Java 1.8
- STS (Spring Tools Suite)
- Maven
Create a new Maven project in STS with the name FirstBoot and modify the pom.xml file of your project, as shown in the following code:
<?xml version="1.0" encoding="UTF-8"?>
<project xmlns="http://maven.apache.org/POM/4.0.0" xmlns:xsi="http://www.w3.org/2001/XMLSchema-instance"
xsi:schemaLocation="http://maven.apache.org/POM/4.0.0 http://maven.apache.org/xsd/maven-4.0.0.xsd">

<modelVersion>4.0.0</modelVersion>
<groupId>com.sample</groupId>
<artifactId>firstboot</artifactId>
<version>0.0.1-SNAPSHOT</version>

<parent>
<groupId>org.springframework.boot</groupId>

 <artifactId>spring-boot-starter-parent</artifactId><version>1.2.0.RELEASE</version>
</parent>

<dependencies>

 <dependency>
 <groupId>org.springframework.boot</groupId>
<artifactId>spring-boot-starter-web</artifactId>

 </dependency>
</dependencies>
<!-- more dependency if required , like json converter -->
</project>
The spring-boot-starter-web dependency brings the number of dependencies, including Tomcat webserver.
In the /src/main/java/com/sample/firstboot/controller folder, create a called SampleController.java file. This will be the controller of the application to handle the HTTP request coming to Tomcat. The contents of this file are as follows:
package com.sample.firstboot.controller;

import org.springframework.boot.*;
import org.springframework.boot.autoconfigure.*;
import org.springframework.stereotype.*;
import org.springframework.web.bind.annotation.*;

@RestController
public class SampleController {

@RequestMapping("/greeting/{userName}")
String home(@PathVariable("userName")  String userName) {
return "Welcome, "+userName +"!";
}
}
A simple controller class would look like this. The @RequestMapping annotation identifies which URL this method is supposed to handle. It is supposed to handle the /greeting/{userName}URL, then}. Then, it will return a string with the Welcome and userName values. By default, it is for HTTP GET method. This is an example of a very small and straightforward controller class.
In the next step, create a new file with the name SampleApplication.java, with the following content:
packagecom.sample.firstboot.controller;

importorg.springframework.boot.SpringApplication;
importorg.springframework.boot.autoconfigure.SpringBootApplication;
importorg.springframework.context.ApplicationContext;

@SpringBootApplication
public class SampleApplication {

public static void main(String[] args) {
ApplicationContextctx = SpringApplication.run(SampleApplication.class, args);
System.out.println("Application Ready to Start. Hit the browser.");

}

}
The @SpringBootApplication annotation replaces the different annotation required in the Spring framework. It removes the use of @Configuration, @EnableAutoConfiguration, @Component annotations.
Now, to run the code, open the console and traverse to the path of the application and type the mvnspring-boot:run command.
This command searches for the file with the @SpringBootApplication annotation and runs the application. Successful execution of this command will result in the following line in the end:
Started SampleApplication in 2.174 secondsApplication Ready to Start. Hit the browser.
The application is ready to be tested. To test the sample application, open the browser and type http://localhost:8080/greeting/john. This a screen similar to the following one: the result will be as shown in the following screenshot:
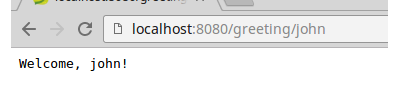
The localhost address is pointing to the user's computer, and 8080 is the port where Tomcat starts by default in Spring Boot. The /greeting/john is the part of the URL we mention in our controller class. The name can be anything, such as xyz, in place of John.
So, writing an application with Spring Boot is very easy. It saves the developer worrying about configuration and dependencies. The developer can focus on developing business logic and can be more productive.