Book Image

ASP.NET Core and Angular 2

By : Valerio De Sanctis
Book Image

ASP.NET Core and Angular 2

By: Valerio De Sanctis

Overview of this book

<p>Writing code is about striking a balance between maintainability and productivity—how quickly you can write it against how much more you have to write in the future. This is a guide to doing just that by combining the impressive capabilities of ASP.NET Core and Angular 2. It shows you how to successfully manage an API and use it to support and power a dynamic single-page application.</p> <p>We'll show you how to construct your data model and manage routing and redirects before wrapping it up and styling it, all with the help of ASP.NET and Angular 2. You'll also learn how to optimize your application for SEO, check and secure any vulnerabilities, implement a viable authentication mechanism and, last but not least, use the proper tools and strategies for successful deployment. From readable URIs to OData retrieval and authentication patterns, we'll make sure you have all the technical knowledge you need and, more importantly, bring it all together so you can focus on what's important: a high-quality application that performs for users.</p>
Table of Contents (16 chapters)
ASP.NET Core and Angular 2
Credits
About the Author
About the Reviewer
www.PacktPub.com
Preface

Installing SQL Server Management Studio


From here, we can click the Install tools button and download SQL Server Management Studio, a tool that we can use to create the OpenGameList database and also a dedicated user that can access it.

Note

SQL Server Management Studio is a separate product available for free download at the following URL:

https://msdn.microsoft.com/en-us/library/mt238290.aspx

Configuring the database

Once we've downloaded and installed it, launch the SQL Server Management Studio. We will be prompted by a Connect to Server modal window that will allow us to connect to our local SQL Server instance.

To do this, select the Database Engine server type and then, from the Server name combo box, choose <Browse for more...>. Another pop-up window will appear, from which we'll be able to select the database engine we just installed on our server:

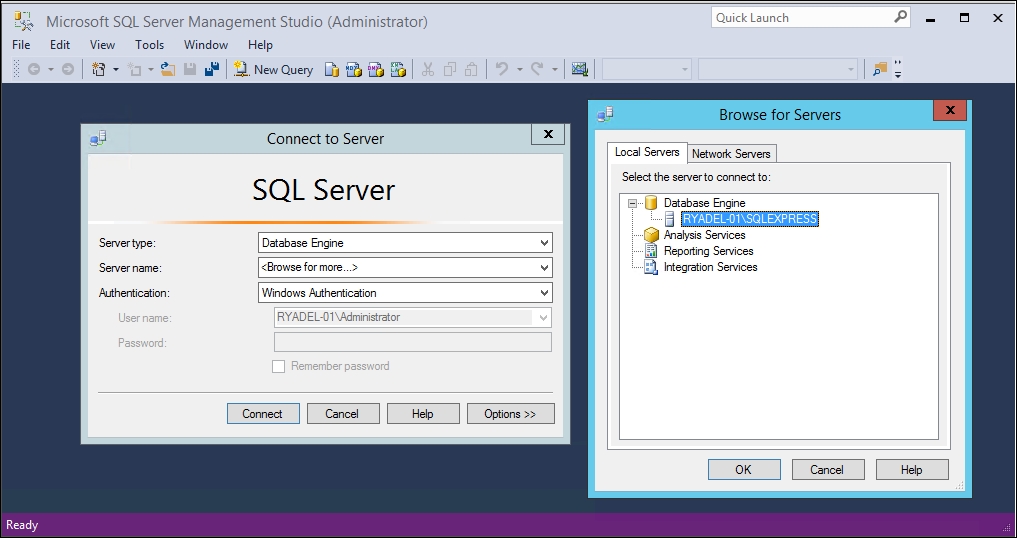
As for the Authentication part, we can leave Windows Authentication, the default SQL Server authentication mode.

When we're done, click...