

In Chapter 2, Serving and Routing, we explored how to route URLs to the different pages in our web application. In doing so, we built URLs that were dynamic and resulted in dynamic responses from our (very simple) net/http handlers.
We've just scratched the surface of what Go's templates can do, and we'll also explore further topics as we continue, but in this chapter we have tried to introduce the core concepts that are necessary to start utilizing the templates directly.
We've looked at simple variables as well as the implementing methods within the application using the templates themselves. We've also explored how to bypass injection protection for trusted content.
The presentation side of web development is important, but it's also the least engrained aspect. Almost any framework will present its own extension of built-in Go templating and routing syntaxes. What really takes our application to the next level is building and integrating an API for both general data access, as well as allowing our presentation layer to be more dynamically driven.
In this chapter, we'll develop a backend API for accessing information in a RESTful way and to read and manipulate our underlying data. This will allow us to do some more interesting and dynamic things in our templates with Ajax.
In this chapter, we will cover the following topics:
- Setting up the basic API endpoint
- RESTful architecture and best practices
- Creating our first API endpoint
- Implementing security
- Creating data with POST
- Modifying data with PUT
First, we'll set up a basic API endpoint for both pages and individual blog entries.
We'll create a Gorilla endpoint route for a GET request that will return information about our pages and an additional one that accepts a GUID, which matches alphanumeric characters and hyphens:
routes := mux.NewRouter()
routes.HandleFunc("/api/pages", APIPage).
  Methods("GET").
  Schemes("https")
routes.HandleFunc("/api/pages/{guid:[0-9a-zA\\-]+}", APIPage).
  Methods("GET").
  Schemes("https")
routes.HandleFunc("/page/{guid:[0-9a-zA\\-]+}", ServePage)
http.Handle("/", routes)
http.ListenAndServe(PORT, nil)
Note here that we're capturing the GUID again, this time for our /api/pages/* endpoint, which will mirror the functionality of the web-side counterpart, returning all meta data associated with a single page.
func APIPage(w http.ResponseWriter, r *http.Request) {
vars := mux.Vars(r)
pageGUID := vars["guid"]
thisPage := Page{}
fmt.Println(pageGUID)
err := database.QueryRow("SELECT page_title,page_content,page_date FROM pages WHERE page_guid=?", pageGUID).Scan(&thisPage.Title, &thisPage.RawContent, &thisPage.Date)
thisPage.Content = template.HTML(thisPage.RawContent)
if err != nil {
  http.Error(w, http.StatusText(404), http.StatusNotFound)
  log.Println(err)
  return
}
APIOutput, err := json.Marshal(thisPage)
    fmt.Println(APIOutput)
if err != nil {
  http.Error(w, err.Error(), http.StatusInternalServerError)
  return
}
w.Header().Set("Content-Type", "application/json")
fmt.Fprintln(w, thisPage)
}
The preceding code represents the simplest GET-based request, which returns a single record from our /pages
endpoint. Let's take a look at REST now, and see how we'll structure and implement other verbs and data manipulations from the API.
In the world of web API design, there has been an array of iterative, and sometimes competing, efforts to find a standard system and format to deliver information across multiple environments.
In recent years, the web development community at large seems to have—at least temporarily—settled on REST as the de facto approach. REST came after a few years of SOAP dominance and introduced a simpler method for sharing data.
REST APIs aren't bound to a format and are typically cacheable and delivered via HTTP or HTTPS.
The biggest takeaway to start with is an adherence to HTTP verbs; those initially specified for the Web are honored in their original intent. For example, HTTP verbs, such as DELETE and PATCH fell into years of disuse despite being very explicit about their purpose. REST has been the primary impetus for the use of the right method for the right purpose. Prior to REST, it was not uncommon to see GET and POST requests being used interchangeably to do myriad things that were otherwise built into the design of HTTP.
In REST, we follow a
Create-Read-Update-Delete (CRUD)-like approach to retrieve or modify data. POST is used majorly to create, PUT is used as an update (though it can also be used to create), the familiar GET is used to read and DELETE is used to delete, is well, just that.
Perhaps even more important is the fact that a RESTful API should be stateless. By that we mean that each request should exist on its own, without the server necessarily having any knowledge about prior or potential future requests. This means that the idea of a session would technically violate this ethos, as we'd be storing some sense of state on the server itself. Some people disagree; we'll look at this in detail later on.
One final note is on API URL structure, because the method is baked into the request itself as part of the header, we don't need to explicitly express that in our request.
In other words, we don't need something, such as /api/blogs/delete/1. Instead, we can simply make our request with the DELETE method to api/blogs/1.
There is no rigid format of the URL structure and you may quickly discover that some actions lack HTTP-specific verbs that make sense, but in short there are a few things we should aim for:
- The resources are expressed cleanly in the URL
- We properly utilize HTTP verbs
- We return appropriate responses based on the type of request
Our goal in this chapter is to hit the preceding three points with our API.
If there is a fourth point, it would say that we maintain backwards compatibility with our APIs. As you examine the URL structure here, you might wonder how versions are handled. This tends to vary from organization to organization, but a good policy is to keep the most recent URL canonical and deprecate to explicit version URLs.
For example, even though our comments will be accessible at /api/comments, the older versions will be found at /api/v2.0/comments, where 2 obviously represents our API, as it existed in version 2.0.
Note
Despite being relatively simple and well-defined in nature, REST is an oft-argued subject with enough ambiguity to start, most often for the better, a lot of debate. Remember that REST is not a standard; for example, the W3C has not and likely will not ever weigh in on what REST is and isn't. If you haven't already, you'll begin to develop some very strong opinions on what you feel is properly RESTful.
Given that we want to access data from the client-side as well as from server to server, we'll need to start making some of that accessible via an API.
The most reasonable thing for us to do is a simple read, since we don't yet have methods to create data outside of direct SQL queries. We did that at the beginning of the chapter with our APIPage method, routed through a /api/pages/{UUID} endpoint.
This is great for GET requests, where we're not manipulating data, but if we need to create or modify data, we'll need to utilize other HTTP verbs and REST methods. To do this effectively, it's time to investigate some authentication and security in our API.
When you think about creating data with an API like the one we've just designed, what's the first concern that comes to your mind? If it was security, then good for you. Accessing data is not always without a security risk, but it's when we allow for modification of data that we need to really start thinking about security.
In our case, read data is totally benign. If someone can access all of our blog entries via a GET request, who cares? Well, we may have a blog on embargo or accidentally exposed sensitive data on some resource.
Either way, security should always be a concern, even with a small personal project like a blogging platform, similar to the one we're building.
There are two big ways of separating these concerns:
- Are the requests to our APIs secure and private?
- Are we controlling access to data?
Lets tackle Step 2 first. If we want to allow users to create or delete information, we need to give them specific access to that.
There are a few ways to do this:
We can provide API tokens that will allow short-lived request windows, which can be validated by a shared secret. This is the essence of Oauth; it relies on a shared secret to validate cryptographically encoded requests. Without the shared secret, the request and its token will never match, and an API request can then be rejected.
The cond method is a simple API key, which leads us back to point number 1 in the preceding list.
If we allow cleartext API keys, then we might as well not have security at all. If our requests can be sniffed off the wire without much effort, there's little point in even requiring an API key.
So this means that no matter which method we choose, our servers should provide an API over HTTPS. Luckily, Go provides a very easy way to utilize either HTTP or HTTPS via Transport Layer Security (TLS); TLS is the successor of SSL. As a web developer, you must already be familiar with SSL and also be aware of its history of security issues, most recently its susceptibility to the POODLE vulnerability, which was exposed in 2014.
To allow either method, we need to have a user registration model so that we can have new users and they can have some sort of credentials to modify data. To invoke a TLS server, we'll need a secure certificate. Since this is a small project for experimentation, we won't worry too much about a real certificate with a high level of trust. Instead, we'll just generate our own.
Creating a self-signed certificate varies by OS and is beyond the scope of this book, so let's just look at the method for OS X.
A self-signed certificate doesn't have a lot of security value, obviously, but it allows us to test things without needing to spend money or time verifying server ownership. You'll obviously need to do those things for any certificate that you expect to be taken seriously.
To create a quick set of certificates in OS X, go to your terminal and enter the following three commands:
openssl genrsa -out key.pem
openssl req -new -key key.pem -out cert.pem
openssl req -x509 -days 365 -key key.pem -in cert.pem -out certificate.pem
In this example, I generated the certificates using an OpenSSL on Ubuntu.
Note
Note: OpenSSL comes preinstalled on OS X and most Linux distributions. If you're on the latter, give the preceding commands a shot before hunting for Linux-specific instructions. If you're on Windows, particularly newer versions such as 8, you can do this in a number of ways, but the most accessible way might be through the MakeCert tool, provided by Microsoft through MSDN.
Read more about MakeCert at https://msdn.microsoft.com/en-us/library/bfsktky3%28v=vs.110%29.aspx.
Once you have the certificate files, place them somewhere in your filesystem that is not within your accessible application directory/directories.
To switch from HTTP to TLS, we can use the references to these certificate files; beyond that it's mostly the same in our code. Lets first add the certificates to our code.
Earlier, we started our server by listening through this line:
http.ListenAndServe(PORT, nil)
Now, we'll need to expand things a bit. First, let's load our certificate:
  certificates, err := tls.LoadX509KeyPair("cert.pem", "key.pem")
  tlsConf := tls.Config{Certificates: []tls.Certificate{certificates}}
tls.Listen("tcp", PORT, &tlsConf)Now that we have a security certificate in place, we can switch to TLS for our API calls for both GET and other requests. Let's do that now. Note that you can retain HTTP for the rest of our endpoints or switch them at this point as well.
Note
Note: It's largely becoming a common practice to go the HTTPS-only way and it's probably the best way to future-proof your app. This doesn't solely apply to APIs or areas where explicit and sensitive information is otherwise sent in cleartext, with privacy on the forefront; major providers and services are stressing on the value of HTTPS everywhere.
Lets add a simple section for anonymous comments on our blog:
<div id="comments">
<form action="/api/comments" method="POST">
<input type="hidden" name="guid" value="{{Guid}}" />
<div>
<input type="text" name="name" placeholder="Your Name" />
</div>
<div>
<input type="email" name="email" placeholder="Your Email" />
</div>
<div>
<textarea name="comments" placeholder="Your Com-ments"></textarea>
</div>
<div>
<input type="submit" value="Add Comments" />
</div>
</form>
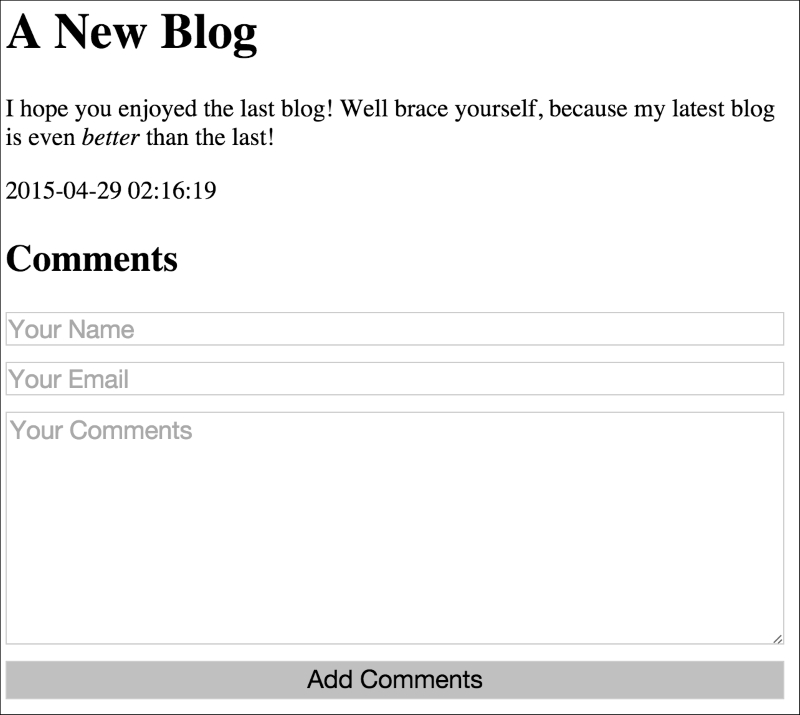
</div>This will allow any user to add anonymous comments to our site on any of our blog items, as shown in the following screenshot:
But what about all the security? For now, we just want to create an open comment section, one that anyone can post to with their valid, well-stated thoughts as well as their spammy prescription deals. We'll worry about locking that down shortly; for now we just want to demonstrate a side-by-side API and frontend integration.
We'll obviously need a comments table in our database, so make sure you create that before implementing any of the API:
CREATE TABLE `comments` (
`id` int(11) unsigned NOT NULL AUTO_INCREMENT,
`page_id` int(11) NOT NULL,
`comment_guid` varchar(256) DEFAULT NULL,
`comment_name` varchar(64) DEFAULT NULL,
`comment_email` varchar(128) DEFAULT NULL,
`comment_text` mediumtext,
`comment_date` timestamp NULL DEFAULT NULL,
PRIMARY KEY (`id`),
KEY `page_id` (`page_id`)
) ENGINE=InnoDB DEFAULT CHARSET=latin1;
With the table in place, let's take our form and POST it to our API endpoint. To create a general purpose and a flexible JSON response, you can add a JSONResponse struct that consists of essentially a hash-map, as shown:
type JSONResponse struct {
  Fields map[string]string
}
Then we'll need an API endpoint to create comments, so let's add that to our routes under main():
func APICommentPost(w http.ResponseWriter, r *http.Request) {
  var commentAdded bool
  err := r.ParseForm()
  if err != nil {
    log.Println(err.Error)
  }
  name := r.FormValue("name")
  email := r.FormValue("email")
  comments := r.FormValue("comments")

  res, err := database.Exec("INSERT INTO comments SET comment_name=?, comment_email=?, comment_text=?", name, email, comments)

  if err != nil {
    log.Println(err.Error)
  }

  id, err := res.LastInsertId()
  if err != nil {
    commentAdded = false
  } else {
    commentAdded = true
  }
  commentAddedBool := strconv.FormatBool(commentAdded)
  var resp JSONResponse
  resp.Fields["id"] = string(id)
  resp.Fields["added"] =  commentAddedBool
  jsonResp, _ := json.Marshal(resp)
  w.Header().Set("Content-Type", "application/json")
  fmt.Fprintln(w, jsonResp)
}
There are a couple of interesting things about the preceding code:
First, note that we're using commentAdded as a string and not a bool. We're doing this largely because the json marshaller does not handle booleans elegantly and also because casting directly to a string from a boolean is not possible. We also utilize strconv and its FormatBool to handle this translation.
You might also note that for this example, we're POSTing the form directly to the API endpoint. While an effective way to demonstrate that data makes it into the database, utilizing it in practice might force some RESTful antipatterns, such as enabling a redirect URL to return to the calling page.
A better way to approach this is through the client by utilizing an Ajax call through a common library or through XMLHttpRequest natively.
Note
Note: While internal functions/method names are largely a matter of preference, we recommend keeping all methods distinct by resource type and request method. The actual convention used here is irrelevant, but as a matter of traversing the code, something such as APICommentPost, APICommentGet, APICommentPut, and APICommentDelete gives you a nice hierarchical way of organizing the methods for better readability.
Given the preceding client-side and server-side code, we can see how this will appear to a user hitting our second blog entry:
As mentioned, actually adding your comments here will send the form directly to the API endpoint, where it will silently succeed (hopefully).
Depending on whom you ask, PUT and POST can be used interchangeably for the creation of records. Some people believe that both can be used for updating the records and most believe that both can be used for the creation of records given a set of variables. In lieu of getting into a somewhat confusing and often political debate, we've separated the two as follows:
- Creation of new records:
POST - Updating existing records, idempotently:
PUT
Given these guidelines, we'll utilize the PUT verb when we wish to make updates to resources. We'll allow comments to be edited by anyone as nothing more than a proof of concept to use the REST PUT verb.
In Chapter 6, Session and Cookies, we'll lock this down a bit more, but we also want to be able to demonstrate the editing of content through a RESTful API; so this will represent an incomplete stub for what will eventually be more secure and complete.
As with the creation of new comments, there is no security restriction in place here. Anyone can create a comment and anyone can edit it. It's the wild west of blog software, at least at this point.
First, we'll want to be able to see our submitted comments. To do so, we need to make minor modifications to our Page struct and the creation of a Comment struct to match our database structure:
type Comment struct {
  Id    int
  Name   string
  Email  string
  CommentText string
}

type Page struct {
  Id         int
  Title      string
  RawContent string
  Content    template.HTML
  Date       string
  Comments   []Comment
  Session    Session
  GUID       string
}
Since all the previously posted comments went into the database without any real fanfare, there was no record of the actual comments on the blog post page. To remedy that, we'll add a simple query of Comments and scan them using the .Scan method into an array of Comment struct.
First, we'll add the query to ServePage:
func ServePage(w http.ResponseWriter, r *http.Request) {
  vars := mux.Vars(r)
  pageGUID := vars["guid"]
  thisPage := Page{}
  fmt.Println(pageGUID)
  err := database.QueryRow("SELECT id,page_title,page_content,page_date FROM pages WHERE page_guid=?", pageGUID).Scan(&thisPage.Id, &thisPage.Title, &thisPage.RawContent, &thisPage.Date)
  thisPage.Content = template.HTML(thisPage.RawContent)
  if err != nil {
    http.Error(w, http.StatusText(404), http.StatusNotFound)
    log.Println(err)
    return
  }

  comments, err := database.Query("SELECT id, comment_name as Name, comment_email, comment_text FROM comments WHERE page_id=?", thisPage.Id)
  if err != nil {
    log.Println(err)
  }
  for comments.Next() {
    var comment Comment
    comments.Scan(&comment.Id, &comment.Name, &comment.Email, &comment.CommentText)
    thisPage.Comments = append(thisPage.Comments, comment)
  }

  t, _ := template.ParseFiles("templates/blog.html")
  t.Execute(w, thisPage)
}
Now that we have
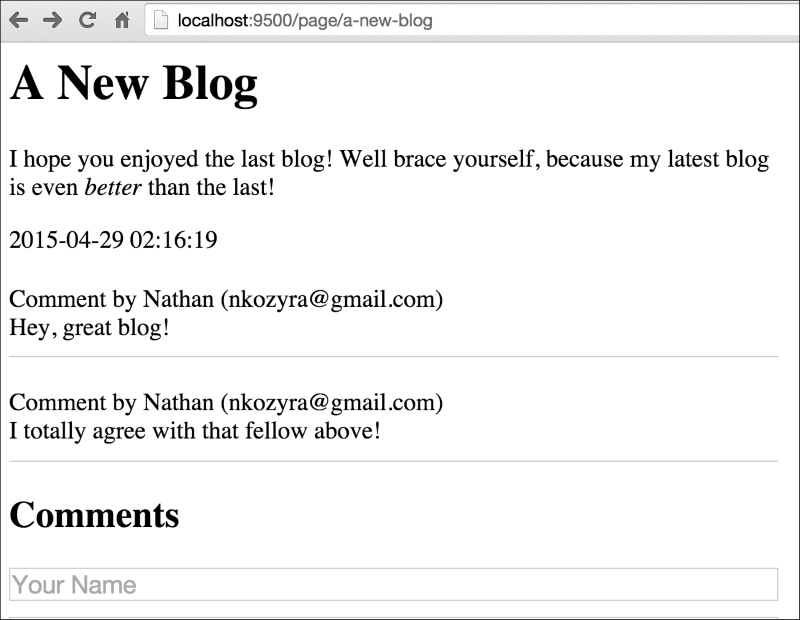
Comments packed into our Page struct, we can display the Comments on the page itself:

Since we're allowing anyone to edit, we'll have to create a form for each item, which will allow modifications. In general, HTML forms allow either GET or POST requests, so our hand is forced to utilize XMLHttpRequest to send this request. For the sake of brevity, we'll utilize jQuery and its ajax() method.
First, for our template's range for comments:
{{range .Comments}}
  <div class="comment">
    <div>Comment by {{.Name}} ({{.Email}})</div>
    {{.CommentText}}

    <div class="comment_edit">
    <h2>Edit</h2>
    <form onsubmit="return putComment(this);">
      <input type="hidden" class="edit_id" value="{{.Id}}" />
      <input type="text" name="name" class="edit_name" placeholder="Your Name" value="{{.Name}}" />
     <input type="text" name="email" class="edit_email" placeholder="Your Email" value="{{.Email}}" />
      <textarea class="edit_comments" name="comments">{{.CommentText}}</textarea>
      <input type="submit" value="Edit" />
    </form>
    </div>
  </div>
{{end}}
And then for our JavaScript to process the form using PUT:
<script>
    function putComment(el) {
        var id = $(el).find('.edit_id');
        var name = $(el).find('.edit_name').val();
        var email = $(el).find('.edit_email').val();
        var text = $(el).find('.edit_comments').val();
        $.ajax({
            url: '/api/comments/' + id,
            type: 'PUT',
            succes: function(res) {
                alert('Comment Updated!');
            }
        });
        return false;
    }
</script>
To handle this call with the PUT verb, we'll need an update route and function. Lets add them now:
  routes.HandleFunc("/api/comments", APICommentPost).
    Methods("POST")
  routes.HandleFunc("/api/comments/{id:[\\w\\d\\-]+}", APICommentPut).
    Methods("PUT")
This enables a route, so now we just need to add the corresponding function, which will look fairly similar to our POST/Create method:
func APICommentPut(w http.ResponseWriter, r *http.Request) {
  err := r.ParseForm()
  if err != nil {
  log.Println(err.Error)
  }
  vars := mux.Vars(r)
  id := vars["id"]
  fmt.Println(id)
  name := r.FormValue("name")
  email := r.FormValue("email")
  comments := r.FormValue("comments")
  res, err := database.Exec("UPDATE comments SET comment_name=?, comment_email=?, comment_text=? WHERE comment_id=?", name, email, comments, id)
  fmt.Println(res)
  if err != nil {
    log.Println(err.Error)
  }

  var resp JSONResponse

  jsonResp, _ := json.Marshal(resp)
  w.Header().Set("Content-Type", "application/json")
  fmt.Fprintln(w, jsonResp)
}
In short, this takes our form and transforms it into an update to the data based on the comment's internal ID. As mentioned, it's not entirely different from our POST route method, and just like that method it doesn't return any data.
In this chapter, we've gone from exclusively server-generated HTML presentations to dynamic presentations that utilize an API. We've examined the basics of REST and implemented a RESTful interface for our blogging application.
While this can use a lot more client-side polish, we have GET/POST/PUT requests that are functional and allow us to create, retrieve, and update comments for our blog posts.
In Chapter 6, Session and Cookies, we'll examine user authentication, sessions, and cookies, and how we can take the building blocks we've laid in this chapter and apply some very important security parameters to it. We had an open-ended creation and updates of comments in this chapter; we'll restrict that to unique users in the next.
In doing all of this, we'll turn our proof-of-concept comment management into something that can be used in production practically.