

Unlike NetBeans, Eclipse does not come with GlassFish support out of the box. Fortunately, it is very easy to add GlassFish support. Eclipse can be downloaded from http://www.eclipse.org.
The first step to follow in order to add GlassFish support is to install the Web Tools Project Eclipse plug-in. This plug-in can be easily installed via the Eclipse Update Manager, refer to the Web Tools Project website at http://www.eclipse.org/webtools/main.php.
After installing the Web Tools Project plug-in, we need to create a Java EE project by clicking on File|New|Project... then selecting a Java EE project type from the list of project categories. Most projects under the EJB, J2EE, JPA, and Web categories are Java EE projects that need to be deployed to an application server such as GlassFish.
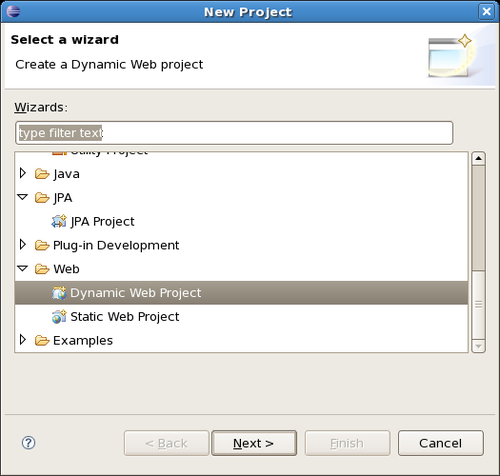
In our example, we will use a project of type Dynamic Web Project, but the procedure is very similar for other Java EE project types.
After selecting the project type and clicking Next >, Eclipse will ask, among other things, for the Target Runtime for the project. Target Runtime is "Eclipse Speak" for a Java EE application server.
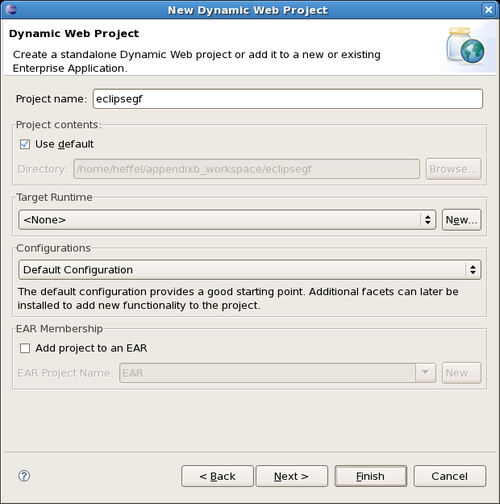
At this point we should click on the New... button in order to select a new target runtime.
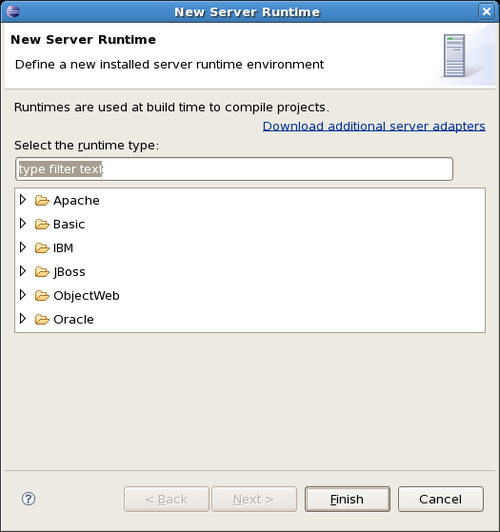
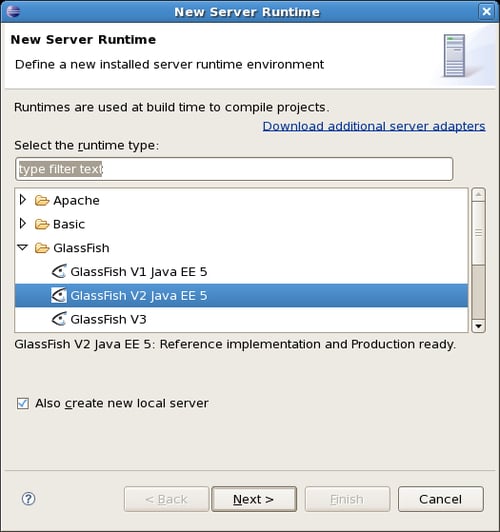
In order to add GlassFish integration, we need to click on the Download additional server adapters link.
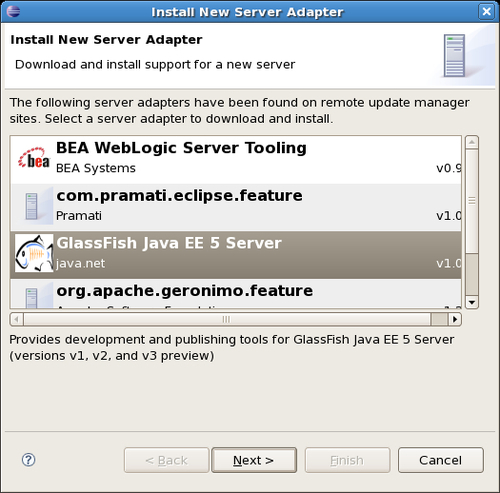
At this point, a number of additional server adapters will be listed, with GlassFish being one of them. Selecting Glassfish and clicking on the button labeled Next > will download the GlassFish server adapter. Once it is downloaded, Eclipse will ask to be restarted. It is recommended that we do so.
Once Eclipse restarts, we need to start creating the project once again. This second time around, there will be an option to select GlassFish as the server runtime when clicking on the New... button next to the target runtime selection dropdown.
The next couple of windows will ask for a Java Runtime Environment to use with GlassFish, the directory where GlassFish is installed, and for the server address, port, domain name, etc. Sensible defaults are presented for all fields.
At this point, we can continue going through the wizard and creating our project.
We should now see GlassFish in the servers view, which is typically at the bottom of the screen.
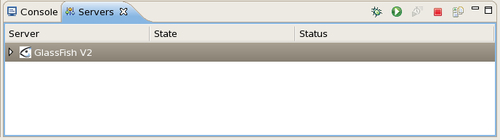
If the servers view is nowhere to be seen, it can be opened by clicking on Window|Show View|Servers.
At this point, we are ready to start developing our application. When we are at a point where we need to deploy it, we can do so by clicking on the GlassFish server icon in the Servers view, and selecting Publish.

At this point, Eclipse will build, package, and deploy the application.
For web applications, we can execute the application as soon as it is deployed by right-clicking on the project and selecting Run As|Run on Server.
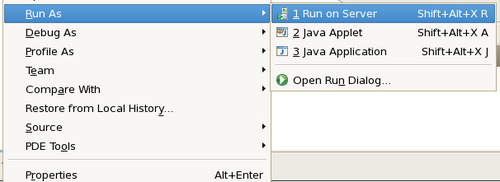
At this point, Eclipse will build, package, deploy the application, and open it in a browser window embedded in Eclipse.
If we wish to debug the application using Eclipse's debugger, we can do so by right-clicking on the project and selecting Debug As|Debug on Server. This will cause Eclipse to start or restart GlassFish in debug mode, if necessary, and deploy the application. We can then debug it using Eclipse's built in debugger.