

Before we can start sending e-mails from our Java EE applications, we need to do some initial GlassFish configuration. A new JavaMail session needs to be added by logging into the GlassFish web console, expanding the Resources node in the tree at the left-hand side of the page, then clicking on the JavaMail Sessions node.
This can be seen in the following screenshot:
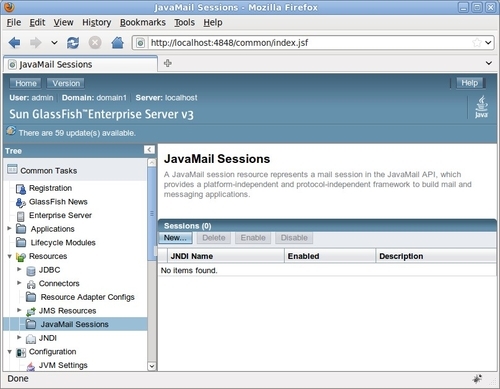
To create a new JavaMail session, we need to click on the New... button. The main area of the screen will look as shown in the following screenshot:
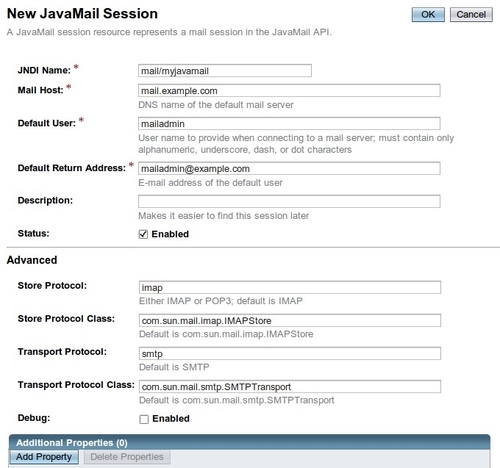
In the JNDI Name field, we need to provide a JNDI name for our JavaMail session. This name must be a valid, unique name of our choosing. Applications will use this name to access the mail session.
In the Mail Host field, we need to specify the DNS name of the mail server we will be using to send e-mails.
In the Default User field, we need to specify the default username to use to connect to the mail server.
In the Default Return Address field, we need to specify the default e-mail address that e-mail recipients can use to reply to messages sent by our applications.
Tip
Specifying a fake return address
The default return address does not have to be a real e-mail address; we can specify an invalid e-mail address here. Keep in mind that if we do this, then users will be unable to reply to e-mails sent from our applications. Therefore, it would be a good idea to include a warning in the message body letting the users know that they cannot reply to the message.
We can optionally add a description for the JavaMail session in the Description field.
The Status checkbox allows us to enable or disable the JavaMail session. Disabled sessions are not accessible by applications.
The Store Protocol field is used to specify the value of the storage protocol of the mail server, which is used to allow our applications to retrieve e-mail messages from it. Valid values for this field include imap, imaps, pop3, and pop3s. Consult your system administrator for the correct value for your server.
Tip
Store protocol ignored if applications only send e-mails
It is a lot more common to have our applications send e-mails than it is to have them receive e-mails. If all applications using our mail session will only be sending e-mails, then the value of the Store Protocol field (and the Store Protocol Class field, discussed next) will be ignored.
The Store Protocol Class field is used to indicate the service provider implementation class corresponding to the specified store protocol. Valid values for this field include:
com.sun.mail.imap.IMAPStore for a store protocol of imap
com.sun.mail.imap.IMAPSSLStore for a store protocol of imaps
com.sun.mail.pop3.POP3Store for a store protocol of pop3
com.sun.mail.pop3.POP3SSLStore for a store protocol of pop3s
The Transport Protocol field is used to specify the value of the transport protocol of the mail server, which is used to allow our applications to send e-mail messages through it. Valid values for this field include smtp and smtps. Consult your system administrator for the correct value for your server.
The Transport Protocol Class field is used to specify the service provider implementation class corresponding to the specified transport protocol. Valid values for this field include:
com.sun.mail.smtp.SMTPTransport for a transport protocol of smtp
com.sun.mail.smtp.SMTPSSLTransport for a transport protocol of smtps
The Debug checkbox allows us to enable or disable debugging for the JavaMail session.
If we need to add additional properties to the JavaMail session, we can do so by clicking on the Add Property button near the bottom of the page, then entering the property name and value in the corresponding fields.
Once we have entered all the required information for our server, we need to click on the OK button at the top right of the page to create the JavaMail session. Once it is created, it is ready to be used by deployed applications.