

It is now time to run your first OpenCV application. Since OpenCV is about processing images, this task will show you how to perform the most fundamental operations needed in the development of imaging applications. These are loading an input image from a file, displaying an image on a window, applying a processing function, and storing an output image on a disk.
Using your favorite IDE (for example, MS Visual Studio or Qt), create a new console application with a main function that is ready to be filled.
The first thing to do is to include the header files, declaring the classes and functions you will use. Here, we simply want to display an image, so we need the core library that declares the image data structure and the highgui header file that contains all the graphical interface functions:
#include <opencv2/core/core.hpp>
#include <opencv2/highgui/highgui.hpp>
Our main function starts by declaring a variable that will hold the image. Under OpenCV 2, define an object of the cv::Mat class:
cv::Mat image; // create an empty image
This definition creates an image of the size 0 x 0. This can be confirmed by accessing the cv::Mat size attributes:
std::cout << "This image is " << image.rows << " x "
          << image.cols << std::endl;
Next, a simple call to the reading function will read an image from the file, decode it, and allocate the memory:
image= cv::imread("puppy.bmp"); // read an input imageYou are now ready to use this image. However, you should first check whether the image has been correctly read (an error will occur if the file is not found, if the file is corrupted, or if it is not in a recognizable format). The validity of the image is tested using the following code:
if (image.empty()) {  // error handling
   // no image has been created…
   // possibly display an error message
   // and quit the application
   …
}
The empty method returns true if no image data has been allocated.
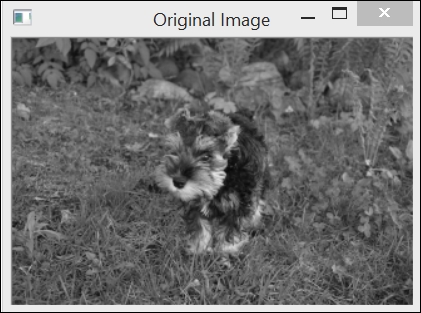
The first thing you might want to do with this image is to display it. You can do this using the functions of the highgui module. Start by declaring the window on which you want to display the images, and then specify the image to be shown on this special window:
// define the window (optional)
cv::namedWindow("Original Image");
// show the image
cv::imshow("Original Image", image);
As you can see, the window is identified by a name. You can reuse this window to display another image later, or you can create multiple windows with different names. When you run this application, you will see an image window as follows:
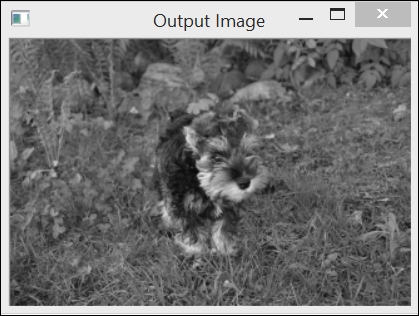
Now, you would normally apply some processing to the image. OpenCV offers a wide selection of processing functions, and several of them are explored in this book. Let's start with a very simple one that flips an image horizontally. Several image transformations in OpenCV can be performed in-place, meaning that the transformation is applied directly on the input image (no new image is created). This is the case of the flipping method. However, we can always create another matrix to hold the output result, and that is what we will do:
cv::Mat result; // we create another empty image
cv::flip(image,result,1); // positive for horizontal
                          // 0 for vertical,
                          // negative for both
The result is displayed on another window:
cv::namedWindow("Output Image"); // the output window
cv::imshow("Output Image", result);
Since it is a console window that will terminate when it reaches the end of the main function, we add an extra highgui function to wait for a user key before ending the program:
cv::waitKey(0); // 0 to indefinitely wait for a key pressed
                // specifying a positive value will wait for
                // the given amount of msec
You can then see that the output image is displayed on a distinct window, as shown in the following screenshot:
Finally, you will probably want to save the processed image on your disk. This is done using the following highgui function:
cv::imwrite("output.bmp", result); // save resultThe file extension determines which codec will be used to save the image. Other popular supported image formats are JPG, TIFF, and PNG.
All classes and functions in the C++ API of OpenCV are defined within the cv namespace. You have two ways to access them. First, precede the main function's definition with the following declaration:
using namespace cv;
Alternatively, prefix all OpenCV class and function names with the namespace specification, that is, cv::, as we will do so in this book. The use of this prefix makes the OpenCV classes and functions easier to identify.
The highgui module contains a set of functions that allow you to easily visualize and interact with your images. When you load an image with the imread function, you also have the option to read it as a gray-level image. This is very advantageous since several computer vision algorithms require gray-level images. Converting an input color image on the fly as you read it will save you time and minimize your memory usage. This can be done as follows:
// read the input image as a gray-scale image
image=  cv::imread("puppy.bmp", CV_LOAD_IMAGE_GRAYSCALE);
This will produce an image made of unsigned bytes (unsigned char in C++) that OpenCV designates with the CV_8U defined constant. Alternatively, it is sometimes necessary to read an image as a 3-channel color image even if it has been saved as a gray-level image. This can be achieved by calling the imread function with a positive second argument:
// read the input image as a 3-channel color image
image=  cv::imread("puppy.bmp", CV_LOAD_IMAGE_COLOR);
This time, an image made of 3 bytes per pixel will be created, designated as CV_8UC3 in OpenCV. Of course, if your input image has been saved as a gray-level image, all three channels will contain the same value. Finally, if you wish to read the image in the format in which it has been saved, then simply input a negative value as the second argument. The number of channels in an image can be checked by using the channels method:
std::cout << "This image has "
          << image.channels() << " channel(s)";
Pay attention when you open an image with imread without specifying a full path (as we did here). In that case, the default directory will be used. When you run your application from the console, this directory is obviously the one of your executable file. However, if you run the application directly from your IDE, the default directory will most often be the one that contains your project file. Consequently, make sure that your input image file is located in the right directory.
When you use imshow to display an image made up of integers (designated as CV_16U for 16-bit unsigned integers, or as CV_32S for 32-bit signed integers), the pixel values of this image will be divided by 256 first, in an attempt to make it displayable with 256 gray shades. Similarly, an image made of floating points will be displayed by assuming a range of possible values between 0.0 (displayed as black) and 1.0 (displayed as white). Values outside this defined range are displayed in white (for values above 1.0) or black (for values below 1.0).
The highgui module is very useful to build quick prototypal applications. When you are ready to produce a finalized version of your application, you will probably want to use the GUI module offered by your IDE in order to build an application with a more professional look.
Here, our application uses both input and output images. As an exercise, you should rewrite this simple program such that it takes advantage of the function's in-place processing, that is, by not declaring the output image and writing it instead:
cv::flip(image,image,1); // in-place processing
The highgui module contains a rich set of functions that help you to interact with your images. Using these, your applications can react to mouse or key events. You can also draw shapes and write text on images.
You can program your mouse to perform specific operations when it is over one of the image windows you created. This is done by defining an appropriate callback function. A callback function is a function that you do not explicitly call but which is called by your application in response to specific events (here, the events that concern the mouse interacting with an image window). To be recognized by applications, callback functions need to have a specific signature and must be registered. In the case of the mouse event handler, the callback function must have the following signature:
void onMouse( int event, int x, int y, int flags, void* param);
The first parameter is an integer that is used to specify which type of mouse event has triggered the call to the callback function. The other two parameters are simply the pixel coordinates of the mouse location when the event occurred. The flags are used to determine which button was pressed when the mouse event was triggered. Finally, the last parameter is used to send an extra parameter to the function in the form of a pointer to any object. This callback function can be registered in the application through the following call:
cv::setMouseCallback("Original Image", onMouse,
                     reinterpret_cast<void*>(&image));
In this example, the onMouse function is associated with the image window called Original Image, and the address of the displayed image is passed as an extra parameter to the function. Now, if we define the onMouse callback function as shown in the following code, then each time the mouse is clicked, the value of the corresponding pixel will be displayed on the console (here, we assume that it is a gray-level image):
void onMouse( int event, int x, int y, int flags, void* param)  {

  cv::Mat *im= reinterpret_cast<cv::Mat*>(param);

  switch (event) {  // dispatch the event

    case CV_EVENT_LBUTTONDOWN: // left mouse button down event

      // display pixel value at (x,y)
      std::cout << "at (" << x << "," << y << ") value is: "
        << static_cast<int>(
                  im->at<uchar>(cv::Point(x,y))) << std::endl;
      break;
  }
}
Note that in order to obtain the pixel value at (x,y), we used the at method of the cv::Mat object here; this has been discussed in Chapter 2, Manipulating Pixels. Other possible events that can be received by the mouse event callback function include CV_EVENT_MOUSEMOVE, CV_EVENT_LBUTTONUP, CV_EVENT_RBUTTONDOWN, and CV_EVENT_RBUTTONUP.
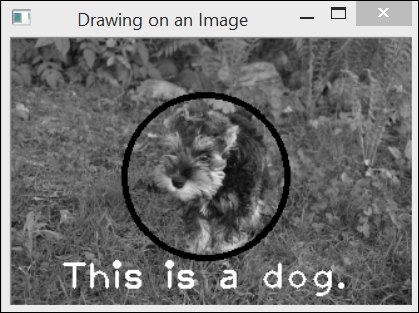
OpenCV also offers a few functions to draw shapes and write text on images. The examples of basic shape-drawing functions are circle, ellipse, line, and rectangle. The following is an example of how to use the circle function:
cv::circle(image,             // destination image
        cv::Point(155,110),   // center coordinate
        65,                   // radius
        0,                    // color (here black)
        3);                   // thickness
The cv::Point structure is often used in OpenCV methods and functions to specify a pixel coordinate. Note that here we assume that the drawing is done on a gray-level image; this is why the color is specified with a single integer. In the next recipe, you will learn how to specify a color value in the case of color images that use the cv::Scalar structure. It is also possible to write text on an image. This can be done as follows:
cv::putText(image,                  // destination image
        "This is a dog.",           // text
        cv::Point(40,200),          // text position
        cv::FONT_HERSHEY_PLAIN,     // font type
        2.0,                        // font scale
        255,                        // text color (here white)
        2);                         // text thickness
Calling these two functions on our test image will then result in the following screenshot:
If you wish to use Qt to run your OpenCV applications, you will need to create project files. For the example of this recipe, here is how the project file (loadDisplaySave.pro) will look:
QT       += core
QT       -= gui

TARGET = loadDisplaySave
CONFIG   += console
CONFIG   -= app_bundle

TEMPLATE = app

SOURCES += loadDisplaySave.cpp
INCLUDEPATH += C:\OpenCV2.4.9\build\include
LIBS += -LC:\OpenCV2.4.9\build\x86\MinGWqt32\lib \
-lopencv_core249 \
-lopencv_imgproc249 \
-lopencv_highgui249
This file shows you where to find the include and library files. It also lists the library modules that are used by the example. Make sure to use the library binaries compatible with the compiler that Qt is using. Note that if you download the source code of the examples of this book, you will find the CMakeLists files that you can open with Qt (or CMake) in order to create the associated projects.
The
cv::Matclass is the data structure that is used to hold your images (and obviously, other matrix data). This data structure is at the core of all OpenCV classes and functions; the next recipe offers a detailed explanation of this data structure.You can download the source code of the examples of this book from https://github.com/laganiere/.