Securing App Service resources using different security providers
Most web applications must be secured in some way, either by using your own security system or third-party identity providers (IdPs), such as Facebook, Google, or Twitter. While working with the traditional application hosted on-premises, you often must configure everything on your own. PaaS solutions, such as Azure App Service, already possess this functionality and make it easily accessible, thanks to the Authentication feature. In this section, you will learn how to set this up so that users will be prompted to log in.
Configuring authentication in the Azure portal
As with most PaaS services, you can configure the features of App Service directly from the portal. Thanks to such an approach, you have all options in one place and can easily switch between them.
Using Azure Active Directory to secure App Service resources
Go to your App Service resource and then find the Authentication blade on the left, next to Configuration, as mentioned previously. When you click on it, you will see a screen for configuration, as illustrated here:
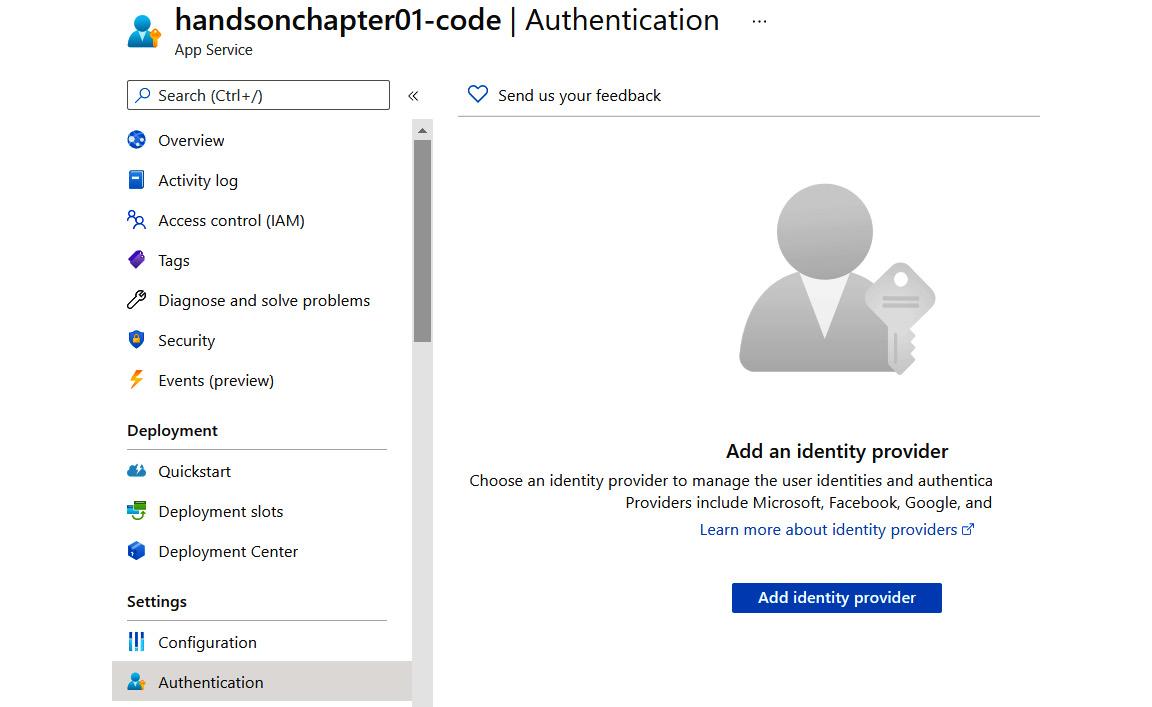
Figure 1.35 – Authentication blade
As you can see, it is currently disabled. When you click the Add identity provider button, you will see new options available, as illustrated in the following screenshot. We will use them to configure how authentication is performed for our application:
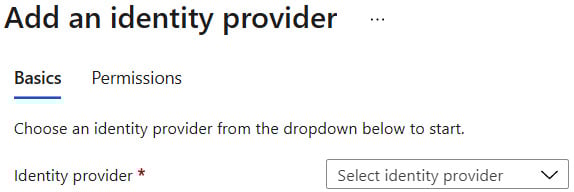
Figure 1.36 – Adding an IdP
Change the Identity provider setting to Microsoft. The screen will change its appearance and display additional options, as illustrated here:
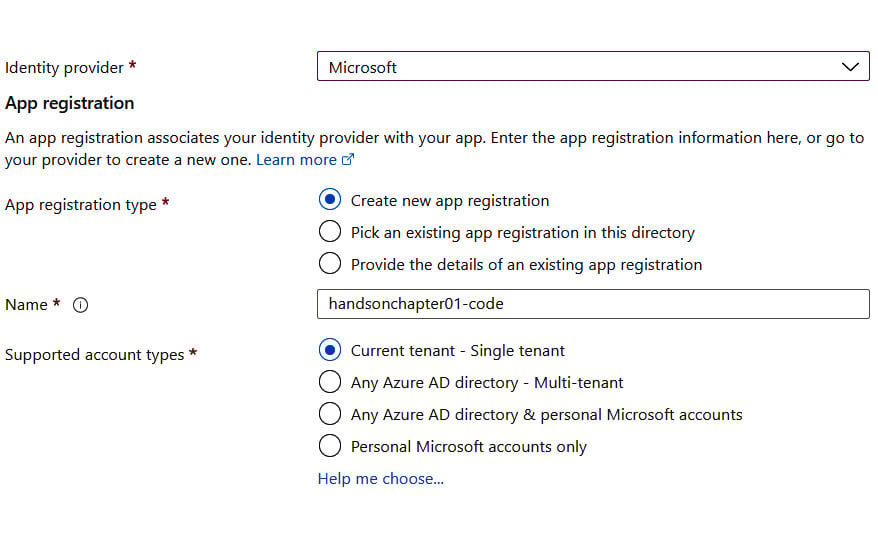
Figure 1.37 – Microsoft IdP configuration
Note
You do not have to be an expert in Azure Active Directory (Azure AD) to use it with App Service, especially now that there is the possibility to let the Azure portal configure it for you. However, if you would like to learn more about this service, the best place to start is its documentation: https://docs.microsoft.com/en-us/azure/active-directory/active-directory-whatis.
To avoid going into unnecessary details, we will use a shortcut and let Azure configure everything for us. Let's leave the default options provided by the wizard (as you can see in Figure 1.38) and verify the authentication settings, as illustrated here:
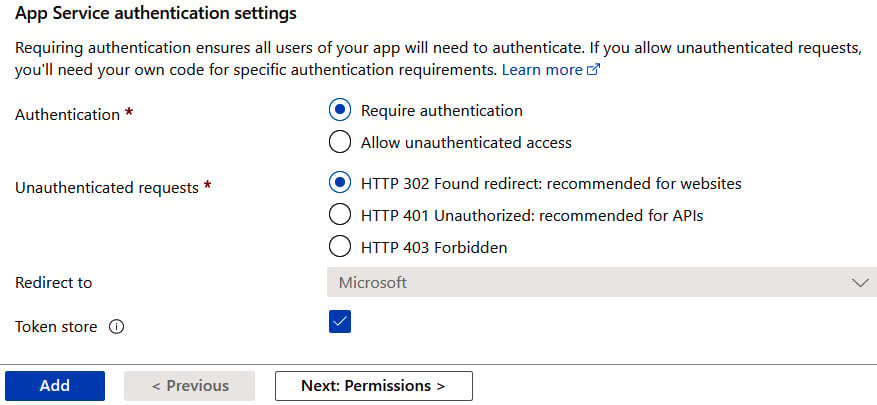
Figure 1.38 – Default authentication settings
As you can see, once we enable authentication, unauthenticated access will be disallowed, and such requests will receive HTTP 302 as a response. You can go for any option you like.
Now, let's click the Add button. After a moment, everything should be set, and you can now access your application to see whether securing it works. Go to the Overview blade and click on the URL link or enter it directly in your browser. When a default page is loaded, you will not see it, but rather will be redirected to the login page and asked to give the application permissions, as illustrated in the following screenshot:
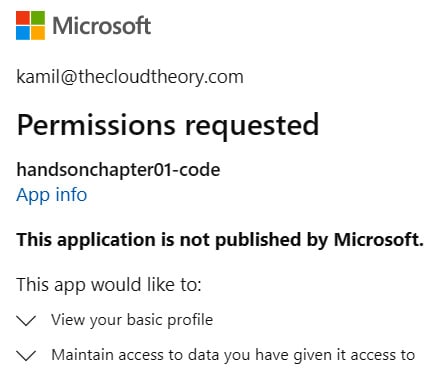
Figure 1.39 – Requesting permissions screen
Note
For this exercise, I have assumed that you have your application already deployed. If you did not, please go back to the previous sections and deploy your code with one of the described deployment methods.
Since we configured Azure AD as our authentication provider, a user will be asked to give this application consent to access their information.
Note
We will not cover in this book how to create an application in other authentication providers. However, proper instructions can be found at https://developers.facebook.com/docs/apps/register/, https://developers.google.com/identity/sign-in/web/sign-in, and https://developer.twitter.com/en/docs/basics/authentication/guides/access-tokens.html.
The last topic in this chapter will give you some insights related to networking in Azure App Service.


