
Macros are commands that represent a series of commands or key strokes and can take the drudgery out of repetitive tasks. Macro recording can be used to automate tasks that don't warrant full blown script programming. This recipe will cover the steps required to record, edit, and run a macro.
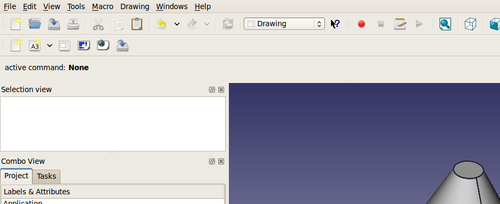
Press the red record button shown in the following screenshot:

The macro recording dialog box will pop up. Give your macro a name and save it:

Perform the tasks that you want recorded. You can create a macro of whatever you normally do in FreeCAD. Macros that deal with simple part creation are easiest to start with. Try creating a box in the Part workbench and change its width to 20 mm.
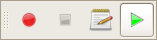
When you are done recording the tasks, press the green button to stop recording:

Run your macro by selecting the button that looks like a sketch pad:

Select the name of the macro that you created and click on Execute:

In FreeCAD, macros are
just a step-by-step representation of the commands that are saved as a Python script, with a FreeCAD macro file extension *.FCMacro. As you perform tasks in FreeCAD, they have a corresponding Python command that is running in the background. A FreeCAD macro just captures those commands and saves them into a file that you can reuse.
If you have problems saving macros, it could be because of a setting in macro preferences for FreeCAD. Open general preferences by clicking on Edit | Preferences | General and then click on the Macro tab. Under Macro recording settings the Macro path should have a valid path to a file directory in it. If it doesn't, click on the button to the right of it and correct it with a valid directory name.
Most FreeCAD commands can be accessed with macros and Python scripting.
Macros actually record Python instructions as they are executed. We also have the ability to read and edit them later. Open our new macro with the Edit button in the macro dialog. This will open our macro in FreeCAD's built-in macro editor. The following is our code:
# Macro Begin: /home/freecad/10x10x20mm box.FCMacro ++
import FreeCAD
import Part

#Gui.activateWorkbench("PartWorkbench")
App.ActiveDocument.addObject("Part::Box","Box")
#App.ActiveDocument.recompute()
#Gui.SendMsgToActiveView("ViewFit")
FreeCAD.getDocument("Unnamed").getObject("Box").Width = 20.00

# Macro End: /home/freecad/10x10x20mm box.FCMacro ++
Note
Downloading the example code
You can download the example code files for all Packt books you have purchased from your account at http://www.PacktPub.com. If you purchased this book elsewhere, you can visit http://www.PacktPub.com/support and register to have the files e-mailed directly to you.
The lines that begin with # are not executed by FreeCAD; they are Python comments. Comments help us understand what is happening in the code. The only lines of code that are actually executed are as follows:
import FreeCAD
import Part

App.ActiveDocument.addObject("Part::Box","Box")
FreeCAD.getDocument("Unnamed").getObject("Box").Width = 20.00
The statements that start with import open some major modules that are needed for our macro to be able to function. import Part lets us make geometric objects such as boxes, cylinders, spheres, and a lot more. App.ActiveDocument.addObject("Part::Box","Box") actually creates the box.
You can edit macros to do things that they didn't do originally, while they were being recorded. Open the macro in the built-in FreeCAD editor by pressing the button that looks like a text edit pad. Select your macro and then select the Edit button. You could change the values of parameters for many different objects. In our example macro, you could change the following two lines to have a different name and length:
App.ActiveDocument.addObject("Part::Box","newbox")
FreeCAD.getDocument("Unnamed").getObject("newbox").Width=20.5
Save your changes by selecting File | Save in the top menu. Then you can press the green playback icon to try out your altered macro:
Creating and editing macros is a good way of learning how to use Python within FreeCAD. Open your macros in the editor and play with them by changing different parameters and rerun them.
To learn more about the Python programming language, go to http://docs.python.org/tutorial.