Book Image

Sencha Architect App Development

By : Loiane Groner
Book Image

Sencha Architect App Development

By: Loiane Groner

Overview of this book

<p>Sencha Architect is a visual app builder that empowers a developer (and a development team) to design, develop, and deploy apps from a single and integrated environment. It also provides support for Ext JS and Sencha Touch development.</p> <p>Sencha Architect App Development is a practical, hands-on guide that will teach you how to develop a complete application with Ext JS and Sencha Touch. You will learn everything from creating the project, including creating the models, views, controllers and stores, to the build to production. Along the way, this book also highlights the Sencha Architect features that will help you to improve your productivity.</p> <p>Sencha Architect App Development starts by describing Sencha Architect, the Toolbox, Project Inspector, Confi Panel, Toolbar, the Canvas: Design View, and Code Editor.</p> <p>You will then learn how to develop a complete application with Ext JS using the MVC architecture, and also how to integrate Sencha Architect with server side code such as PHP and MySQL. You will also learn how to develop a complete application with Sencha Touch, and how to integrate Sencha Architect with PhoneGap (a third-party mobile open source library).</p> <p>At the end of the book, you will be given some tips and tricks that will help your development even more, and you will also learn how to build, publish, and package an application natively using Sencha Command and Sencha Architect.</p>
Table of Contents (13 chapters)
Sencha Architect App Development
Credits
About the Author
About the Reviewer
www.PacktPub.com
Preface
Index

Creating the project


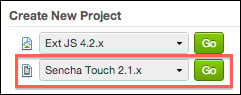
First, create a new Sencha Touch project; we can do this by selecting the New Project option from the welcome screen or from the toolbar:

Right after the project is created, we will see the landing screen, with the toolbar, canvas, project inspector, config panel, and toolbox. We will save our project immediately. To do so, click on Save in the toolbox or press Ctrl + S (cmd + S on Mac OS). The Save Project screen will be displayed.

We will save the project as SenchaContacts inside the sencha-architect directory, the same directory we saved our Ext JS project to. The following screenshot shows the Save Project screen:

Now that the project is saved, we can start implementing it. We will use the following development workflow: first we will implement the Model, then the Store, then the View, lastly the Controller, and repeat it until our project is finished.