
Navigate into a folder of your choice that will hold your project files. Don't worry—we don't need to set up servers, virtual hosts, or anything of that sort. The Vue CLI will actually set up a development server for us every time we run our project's scripts, so you can create it wherever you prefer.
The command you want to run now is vue create <name>, where <name> is the name of your project—and the folder that will be created.
We will create our new project by running the following:
> vue create vuetiful-forms
The vuetiful-forms part of the command will name the project folder. Feel free, of course, to name it as you best see fit.
Once you run this command, the Vue CLI will display a wizard that will let you configure the way you want your project to be set up:
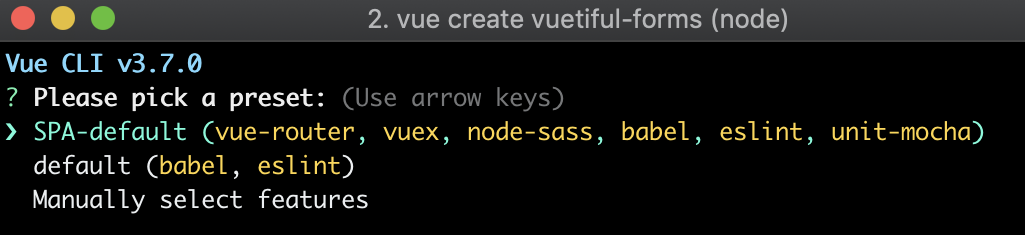
We will go ahead and select Manually select features as we want to play around and see what options we can toggle on and off. Please be aware that the decisions we make here are not final. Anything can be added or removed later on, so don't worry!
The first screen presents us with different features and packages that we can choose:
- Select Babel and Lint/Formatter, which are the default two options. Later on in this book, we will add Vuex to our project manually.
- Hit the spacebar to select any options and the Enter key to proceed to the next screen.
- In the linter/formatter configuration screen, use the ESLint with error prevention only configuration.
- On the next screen, we will pick Lint on save. (Feel free to pick the other option if you don't like auto-linting.)
- For our configuration, choose to store it In dedicated config files to keep our package.json file as neat as possible.
- Finally, you can Save this as a preset for future projects if you would like to do so.
As a side note, please be aware that, depending on the choices you make, you may be presented with different configurations than the ones I have explained here.
The Terminal will once again go to work, and behind the scenes, it will create the project structure for your new project:

With this easy-to-follow wizard, you can easily scaffold all of your projects, but don't worry if you didn't select a particular option during this phase; the Vue CLI makes it super easy to add and remove plugins later on! Let's take a quick look at our project now.