In this recipe, we will learn how to create a mind map that shows what the writer is trying to say without writing a full text, that is, the mind map will speak for itself. Therefore, we must bear in mind the following tips, in order to achieve this goal. We have to think of the topic of the mind map as well as underlying ones.
Having installed both the JRE and the FreeMind software, we will double-click on the FreeMind icon on the desktop, in order to run the software. The topic for the mind map of this chapter is English history, so we are going to focus on the monarchs of Britain. The information provided in the mind map is from the following website:
After running the software, we have to create a new file. Mind mapping is the process of getting ideas, analyzing them (in order to arrange a logical development), and then arriving at a synthesis, when the data makes sense to us. So, we have to develop a process that moves from data, to information, to knowledge.
We have to bear in mind that the mind map has a logical order, which is to say that there is a connection from one topic to the other. Apart from thinking how to organize it, we must think about what the reader understands while reading it, as the reader might find it messy. We must take into account that the communication at the end of the mind mapping process has to be clear.
We are going to create a mind map on the monarchs of Britain, but we are going to group them first. Perform the following steps for doing so:
Click on File |New or press Ctrl + N.
Click on File | Save as…, and type in a name for the mind map. Click on Save.
Click on the root node to enter the main topic of the mind map, as shown in the following screenshot:

Click on the root node, and then click on Insert | New Child Node. Another option is to press the Insert key or click on the icon for the child node in the formatting bar, as shown in the following screenshot:

Repeat step 3 for all the nodes you want to insert. When ready, enter the names of the groups of the British monarchs and organize the mind map clockwise, so that the groups can be read clearly, by dates.
Click on each child node to enter the groups of the monarchs of Britain.
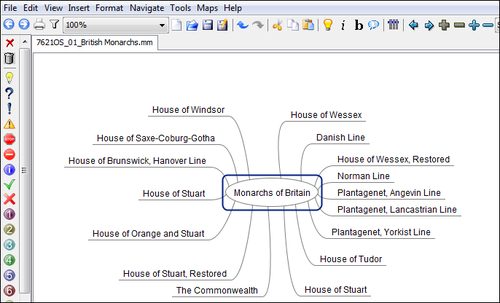
The final step of this recipe is very simple, because the result is the mind map that we have just created. In our case, we organized the mind map in a clockwise manner, so that it can be read according to the dates the monarchs had ruled Britain. Depending on the topic to be taught or the type of activity to be designed, we can change the organization of the mind map. The mind map looks as shown in the following screenshot:
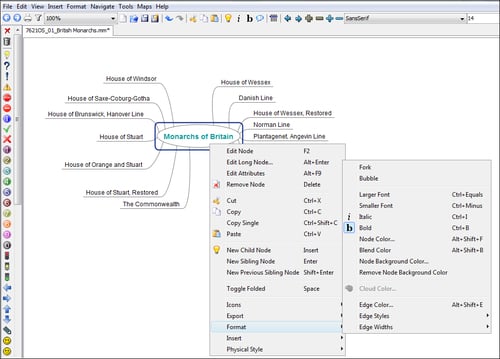
Changing the font in the root node is very basic as well as simple. Right-click with the mouse on the root node and select what you want to change, in order to make the topic of the mind map easy to spot.
A menu appears, and if you hover the mouse over Format, another submenu appears, where you will find many options available to change the font of the root node. It is shown in the following screenshot: