
In IT, automation is often the key to improving the overall efficiency of a process while reducing the surface area of recurring exceptions due to human errors. Despite the intensive use of PaaS, which can reduce the amount of configuration effort required to set up complex environments by design, the provisioning process (even for those advanced PaaS solutions) is probably still a manual one.
Try to think about this scenario:
CloudMakers.XYZ needs an HTTP proxy to simulate the web surfing activity coming in from the US despite the offices being located in Italy
The proxy is used a few hours per day and only during working hours (9 to 18 or 9 A.M. to 6 P.M. +1 UTC)
Luke says that it is a waste of money to keep the proxy running outside the boundary of the working hours mentioned
As per the preceding scenario, Owen must set up a process where he (or a colleague) has to switch off the VM at 6 PM and bring it back online at 9 AM. Needless to say, this process itself is a waste of time; if, for some reason, the person in charge of carrying it out is temporarily unavailable, employees cannot use the proxy as it may lead to bad consequences.
We approach this section with this scenario in mind using Azure Automation and Azure Scheduler.
Azure Automation is a comprehensive set of features that provide automation over Azure resources as well as on-premise ones using PowerShell in conjunction with Azure APIs and other services. Think about Azure Automation as PowerShell-as-a-Service, since it provides an isolated execution engine for arbitrary PowerShell code.
Tip
Currently, cmdLets modules supported out of the box are Azure, AzureRM (Compute and Profile only), PowerShell.Core, PowerShell.Diagnostics, PowerShell.Management, PowerShell.Security, PowerShell.Utility, plus some management and orchestration modules.
After creating an automation account, it is possible to import existing PowerShell modules by entering the Assets tile in the Automation Account blade and then selecting Modules.
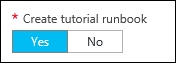
During the creation process, you can choose to create a sample hello world
A custom module can be added to the built-in ones by uploading the corresponding ZIP archive, as follows:
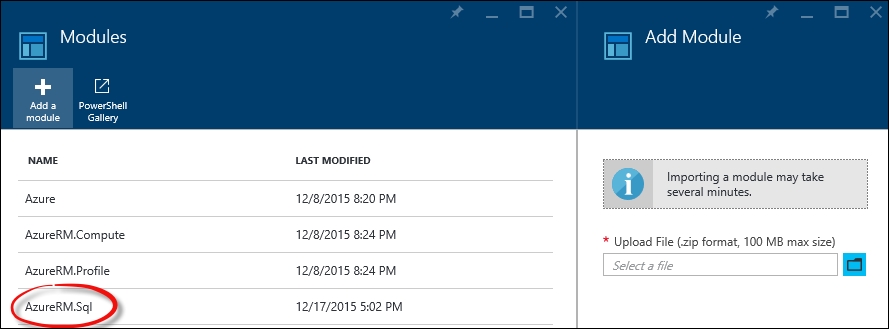
A custom module added to the built-in ones
To be able to write code against actual Azure resources, a valid credential or management certificate is required (in fact, there is no trust between the automation account and the subscription that hosts it).
It is strongly recommended that you create an Azure AD credential with specific permissions in order to place it in the automation code. Azure Automation provides an efficient mechanism to hide the actual credentials for the various Runbooks (scripts) by storing them in advance in the Assets folder.
The Assets folder actually contains resources, as follows:
Schedules: This is the representation of an agnostic schedule without any information about what is to be scheduled.
Modules: This refers to PowerShell modules, and contains built-in ones (global modules that cannot be deleted) as well as user-uploaded ones.
Certificates: These are
.ceror.pfxcertificates that are to be used in the runbooks but securely stored as assets.Variables: These are the custom key-value pairs to be used as variables in the runbooks. The supported value types are String, Boolean, DateTime, and Integer.
Credentials: The credentials set (just key pairs of
usernameandpasswordstrings) to be used in runbooks. It is not necessary that they be related to Azure or Azure AD as they can also be custom credentials.
It is recommended that you provide default credentials with permissions to operate of the decider Azure subscriptions
When creating a new automation account, if specified during creation, a sample runbook (named Get-AzureVMTutorial) is added to the collection. The purpose of this runbook is to list the first 10 Azure VMs in the default subscription.
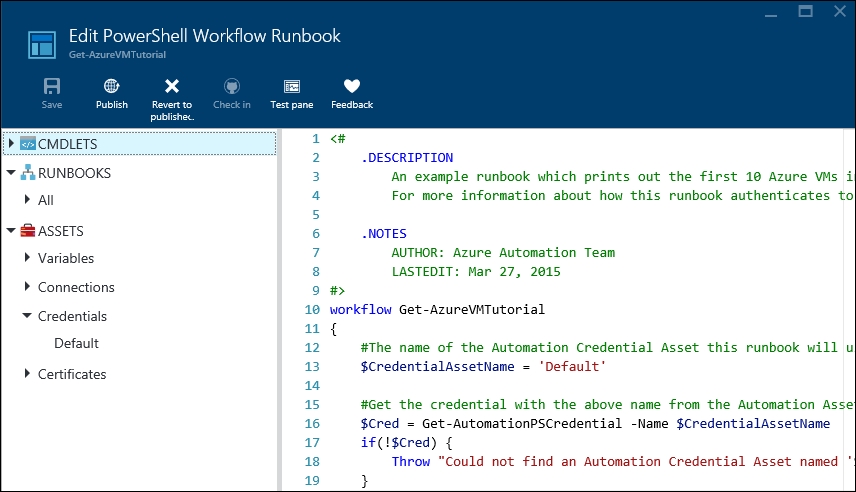
In this sample runbook, we edit $CredentialAssetName to reflect the Credential asset that we have in the Assets folder
With automation, we can write PowerShell code directly into browser windows and test it using the managed execution engine of Azure. After some tests using the Test pane window (also shown in the preceding screenshot), a runbook can be published, which means that it is available in the Runbooks collection and can be used by other runbooks as a child activity.
In the next few pages, we set up the scenario mentioned earlier, where a well-known VM must be shut down after 6 P.M. and brought back online at 9 AM. To do this, we use a graphical runbook, which is, as the name suggests, a runbook created and edited completely with a GUI composer without touching a line of PowerShell code directly.
We start by creating the runbook, as follows:
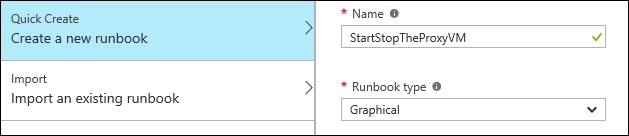
We specify the name and the Graphical type
We can now search for the Add-AzureAccount CmdLet and add it in the central canvas.
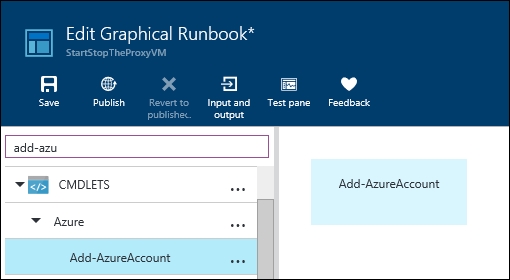
In the left-hand side pane, we search for CmdLets and add them in the right canvas
Each PowerShell CmdLet has its own set of parameters. The GUI of a Graphical runbook provides a complete and strongly typed mapping between these parameters and the user interface. In fact, for the Add-AzureAccount command, it recognizes the mandatory parameter as follows:
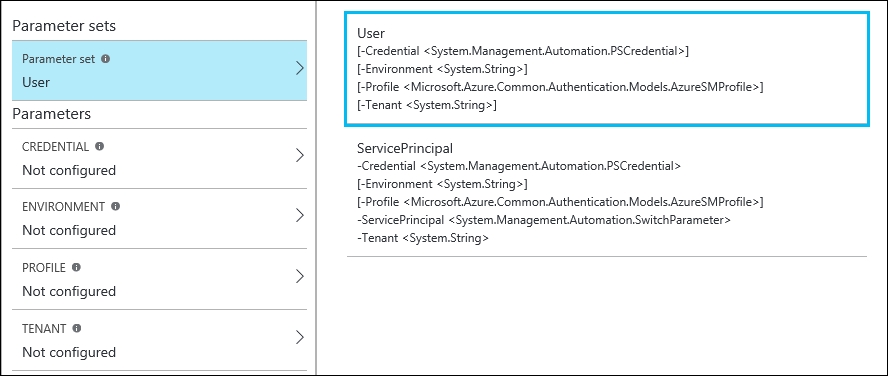
The GUI lets you choose between different parameter sets, and for each set, it provides assistance in filling the expected values
In the preceding example, we just need to select Credential and specify that we need to pick it from the Credentials assets. We can find (if previously set up) the Default credential and use it for the sample.
Following this pattern, we can now add Get-AzureVM, Start-AzureVM and Stop-AzureVM to the canvas.
Tip
Each of these activities can be joined by connecting the dots to each other. However, the connection itself has two different behaviors that can be controlled by clicking on the connection and editing its properties in the right-hand side pane.
The Get-AzureVM activity required at least the ServiceName parameter, but VMName can also be specified to get a specific VM instance. We provide this information without hardcoding it into the runbook in two ways:
Defining variables in the
AssetsfolderDefining inputs in the Input and Output pane of the runbook
Using the second method, we define two inputs with default values, as follows:
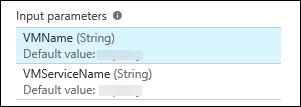
We specify both input parameters to keep the runbook implementation generic. Default values are used in case no values are provided by the runbook executor.
We can now connect the dots to obtain the following structure:
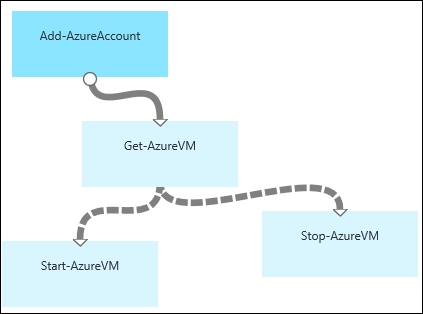
We linked the three activities in a single workflow. The connections between Get-AzureVM and the lower nodes are different because they apply conditions
The connections from Get-AzureVM to the lower nodes are dashed because we specify a condition to navigate them. By clicking on the single connection, we can specify a set of parameters.
Type: Choosing by
PipelineorSequence, we can specify whether the target activity has to be run for each result of the source activity (Pipeline) or just once (Sequence)Apply condition: If specified
Yes, a PowerShell expression can be specified in the Condition expression text area
The respective conditions for the two tasks are as follows:
For Start-AzureVM, run the following code:
$ActivityOutput['Get-AzureVM'].Status -eq "StoppedDeallocated" -and ((Get-Date).Hour -lt 18 -or (Get-Date).Hour -gt 9)
For Stop-AzureVM, run the following code:
$ActivityOutput['Get-AzureVM'].Status -ne "StoppedDeallocated" -and ((Get-Date).Hour -gt 18 -or (Get-Date).Hour -lt 9)
Tip
Detailed steps to download the code bundle are mentioned in the Preface of this book. Please have a look.
The code bundle for the book is also hosted on GitHub at https://github.com/PacktPublishing/Mastering-Cloud-Development-using-Microsoft-Azure. We also have other code bundles from our rich catalog of books and videos available at https://github.com/PacktPublishing/. Check them out!
Each activity can have an output: in the preceding case, we check the Status property of the output of the Get-AzureVM activity, and in conjunction with a temporal condition, we activate the appropriate node.
For the Start-AzureVM and Stop-AzureVM activities, the VM can be specified by name using the runbook input, as mentioned earlier or using the activity output data source with one of the available sources for parameter values.
Tip
The available data sources are runbook input, activity output, PowerShell expression, variable asset, credential asset, connection asset, and certificate asset.
The runbook can now be saved, published, or scheduled on an hourly basis. We can run a runbook in these three ways:
Using the Start button in the Runbook blade: This command immediately puts a new job based on the runbook definition in the execution queue. There is some delay between the
Startoperation and the job execution, but that is completely normal.Triggering a webhook by a remote location: A webhook is a specific URL (it is often a hard-to-remind URL) which, called with an HTTP POST, triggers the execution of a new job. It requires no authentication, and it can be configured to have an expiration.
By setting up a schedule from inside the runbook blade: This method can link an existing schedule (remember that it is created in the assets and is agnostic) to the runbook. The current options for the scheduling of a job are very limited, so it is often recommended that you use the Azure Scheduler service in connections to webhooks.
There are a lot of other advanced features in Azure Automation. It provides complete support in order to help you avoid mistakes during repetitive actions, while encouraging the IT staff to use Platform-as-a-service as the execution engine for their scripts.
Azure Scheduler lets us create scheduled actions against an HTTP(s) endpoint as a storage queue. By implementing complex infrastructures, we often need to schedule some actions with specific recurrence: also, Windows Task Scheduler helps us run custom processes in a scheduled fashion. However, having a task scheduler running on a user-managed virtual machine involves maintenance and skills, not to mention that it is not a highly available solution, as the underlying VM represents a single point of failure.
Azure Scheduler, via the Azure Portal or the Management API, lets us submit jobs of two types:
The HTTP endpoint call
Message in Queue
In the former case, we can customize the request by appending custom headers and choosing the appropriate method (GET, POST, and so on); in the latter, we can place a message in a storage queue, assuming there is someone on the other side ready to process it before or later.
Azure Scheduler does not run custom code in .NET or other runtimes: triggered by Azure itself and following the recurrence rules, its purpose is to start a user process. It can be used, for example, in conjunction with Azure Automation webhooks to start specific runbook jobs on an advanced schedule basis.
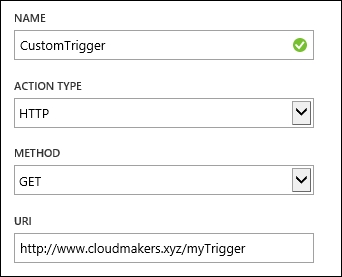
From the old portal, in the Scheduler section, we can create a new job like this. In this case, we call a plain HTTP endpoint with the GET method
Jobs are created in Job collections and stored in a specific region (the call will happen from this region to the target endpoint specified in the action).
As mentioned earlier, Azure Scheduler is more powerful than the Azure Automation built-in scheduler. In the following figure, we see an example of this:
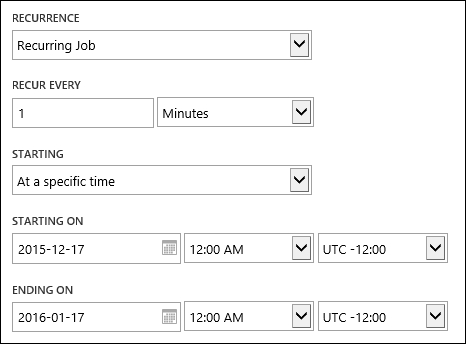
In this example, we set up a schedule every 1 minute with accurate starting and ending times
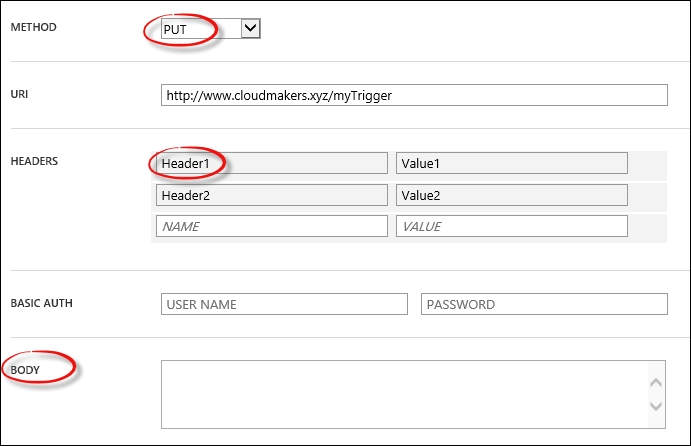
We can even specify a body for the HTTP method that allows it, in addition to specific HTTP headers and basic authorization