

Most web applications have to be secured in some way, either by using your own security system or third-party identity providers, such as Facebook, Google, or Twitter. While working with the traditional application hosted on-premises, you often have to configure everything on your own. PaaS solutions, such as Azure App Services, already possess this functionality and make it easily accessible, thanks to the Authentication / Authorization feature. In this section, you will learn how to set it up so users will be prompted to log in.
Securing App Services using different security providers
Configuring authentication/authorization in the Azure Portal
As with most PaaS services, you can configure the features of App Services directly from the portal. Thanks to such an approach, you have all options in one place and can easily switch between them.
Using Azure Active Directory to secure App Services
Go to your App Service and the find Authentication / Authorization blade on the left, next to Application settings as mentioned previously. When you click on it, you will see a screen for configuration:
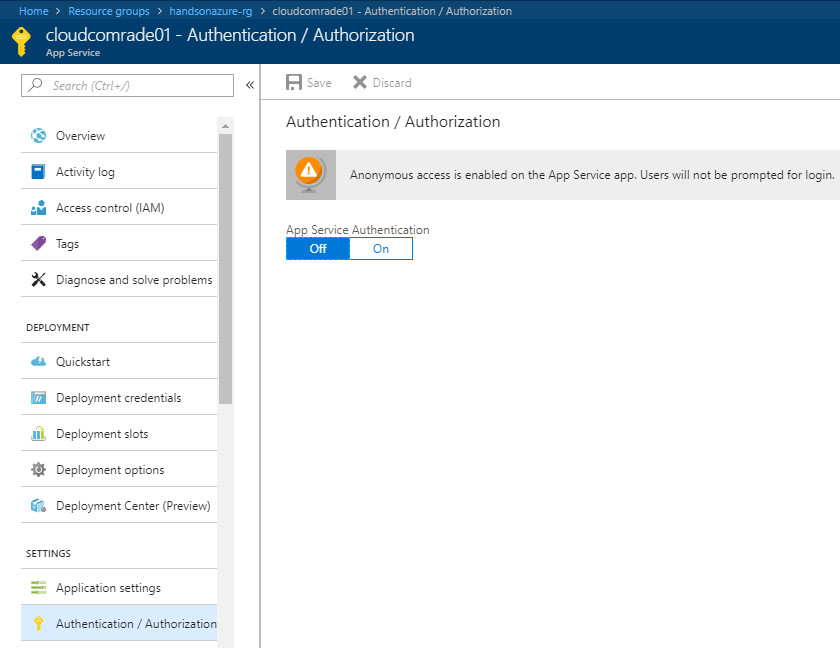
As you can see, it is currently disabled. When you toggle the App Service Authentication feature to On, you will see new options available, with which you can configure authentication for your web app:
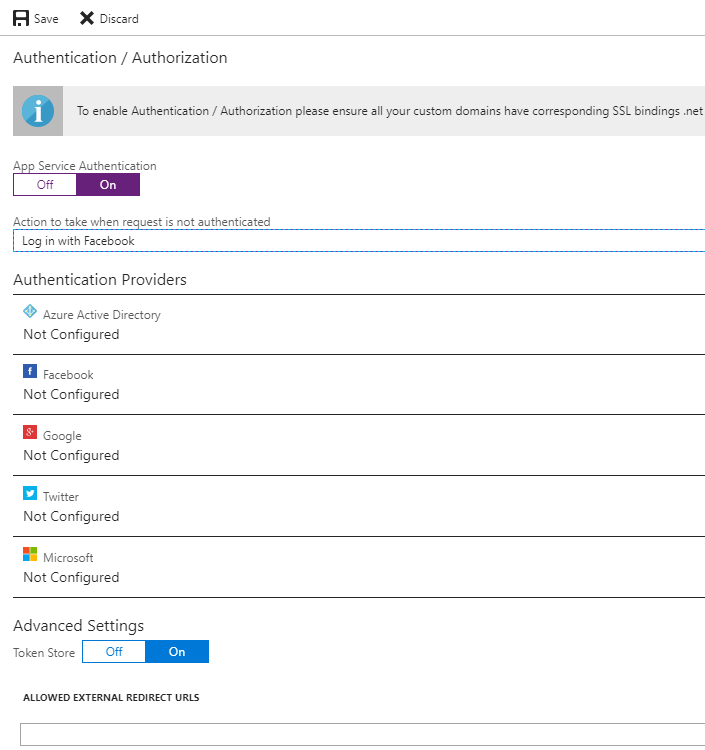
Change the Action to take when request is not authenticated field to any value available. The portal will display the following information:
To enable Authentication / Authorization please ensure all your custom domains have corresponding SSL bindings .net version is configured to "4.5" and manage pipeline mode is set to "Integrated".
Since we do not have a custom domain now, no action needs to be taken. The same applies to the .NET version and pipeline mode—if you have not changed the default parameters of your application, everything should be set correctly already. Let's now select one authentication provider and configure it—we will start with Azure Active Directory.
You do not have to be an expert with Azure Active Directory to use it with App Service, especially now there is the possibility to let the Azure Portal configure it for you. However, if you would like to learn more about this service, the best place to start is its documentation: https://docs.microsoft.com/en-us/azure/active-directory/active-directory-whatis.
When you click on the Azure Active Directory option, you will see a new screen where you can configure integration. Firstly, you have to select the Management Mode:
- Off: Azure Active Directory authentication is disabled.
- Express: A quick way to configure authentication for your App Service using Azure AD. You will have to either select an already existing Azure Active Directory application or let the Azure Portal create a new one for you.
- Advanced: If Express is not enough for you, you can always enter all necessary parameters on your own. With this option, you will be able to configure integration by providing information about Client ID, Issuer URL, and optionally, Client Secret. All of these parameters can be found when browsing your Azure Active Directory application.
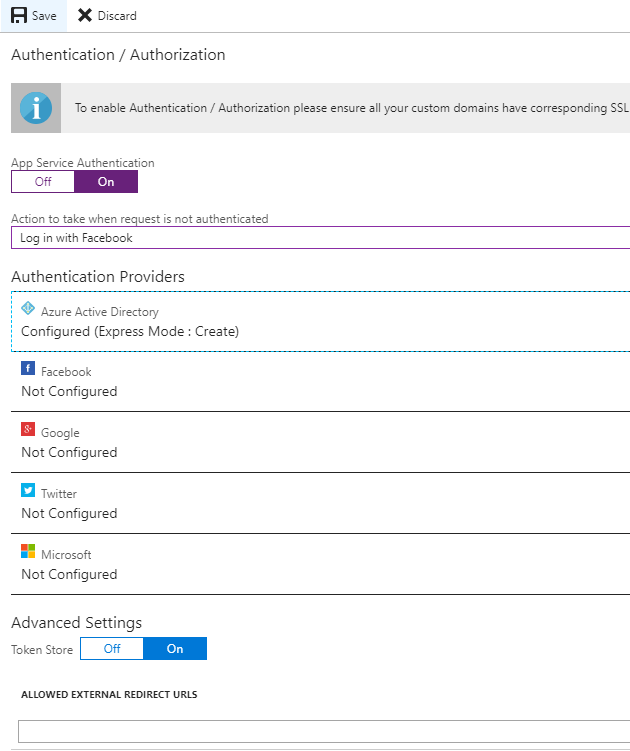
To start, I recommend using the Express option, as configuring applications in Azure Active Directory is beyond scope of this book. For now, you only need to provide a name for the application and click OK. You will go back to the previous screen, where you should be able to see that one authentication provider is already configured:
Now, let's click the Save button. After a moment, everything should be set and you can now access your application to see whether securing it works. Go to the Overview blade and click on the URL link, or enter it directly in your browser. When a default page is loaded, you will not see it, but rather will be redirected to the login page.
For this particular exercise, I have assumed that you have your application already deployed. If you have not, please go back to the previous sections and deploy your code with either Visual Studio or FTP.
Since we configured Azure Active Directory as our authentication provider, a user will be asked to give this particular application consent to access their information.
Using other authentication providers
As you can see, Azure Active Directory is not the only security provider available for App Services. We can select Facebook, Google, or even Twitter to handle authentication and authorization for us. This is especially helpful when you have a public application for people using different social media websites, as they can use their accounts from other applications and quickly sign in when entering your website. To use other authentication providers than Azure Active Directory, you have to create an application in one of the mentioned portals. In fact, there is no difference whether you select Facebook, Google, or Twitter—you will have to provide two fields:
- An App ID and App Secret for Facebook
- A Client Id and Client Secret for Google
- An API Key and API Secret for Twitter
We will not cover in this book how to create an application in other authentication providers. However, proper instructions can be found at https://developers.facebook.com/docs/apps/register/, https://developers.google.com/identity/sign-in/web/sign-in, https://developer.twitter.com/en/docs/basics/authentication/guides/access-tokens.html.