
About the Book
From the Bash shell to traditional UNIX programs, and from redirection and pipes to automating tasks, Command Line Fundamentals teaches you all you need to know about how command lines work.
The most basic interface to a computer, the command line, remains the most flexible and powerful way of processing data and performing and automating various day-to-day tasks. Command Line Fundamentals begins by exploring the basics and then focuses on the most common tool, the Bash shell (which is standard on all Linux and macOs/iOS systems). As you make your way through the book, you'll explore the traditional UNIX command-line programs implemented by the GNU project. You'll also learn how to use redirection and pipelines to assemble these programs to solve complex problems. Next, you'll learn how to use redirection and pipelines to assemble those programs to solve complex problems.
By the end of this book, you'll have explored the basics of shell scripting, which will allow you to easily and quickly automate tasks.
About the Author
Vivek N is a self-taught programmer who has been programming for almost 30 years now, since the age of 8, with experience in X86 Assembler, C, Delphi, Python, JavaScript, and C++. He has been working with various command-line shells since the days of DOS 4.01, and is keen to introduce the new generation of computer users to the power it holds to make their lives easier. You can reach out to him through his Gmail ID rep.movsd.
Objectives
- Use the Bash shell to run commands
- Utilize basic Unix utilities such as
cat,tr,sort, anduniq - Explore shell wildcards to manage groups of files
- Apply useful keyboard shortcuts in shell
- Employ redirection and pipes to process data
- Write both basic and advanced shell scripts to automate tasks
Audience
Command Line Fundamentals is for programmers who use GUIs but want to understand how to use the command line to complete tasks more quickly.
Approach
Command Line Fundamentals takes a hands-on approach to the practical aspects of exploring UNIX command-line tools. It contains multiple activities that use real-life business scenarios for you to practice and apply your new skills in a highly relevant context.
Hardware Requirements
For the optimal student experience, we recommend the following hardware configuration:
- Processor: Any modern processor manufactured after 2010
- Memory: 4 GB RAM
- Storage: 4 GB available hard disk space
Software Requirements
The ideal OS for this book is a modern Linux distribution. However, there are many dozens of flavors of Linux, with different versions, and several other OS platforms, including Windows and macOS/iOS, which are widely used. In order to make the book accessible to students using any OS platform or version, we will use a virtual machine to ensure a uniform isolated environment. If you are not familiar with the term, a virtual machine lets an entire computer be simulated within your existing one; hence, you can use another OS (in this case, a tiny cut-down Linux distribution) as if it were running on actual hardware, completely isolated from your regular OS. The advantage of this approach is a simple, uniform experience for all students, regardless of the system used. Another advantage is that the VM is sandboxed and anything performed within it will not interfere in any way with the existing system. Finally, VMs allow snapshotting, which allows you to undo any serious mistakes you may make with little effort. Once you have completed the exercises and activities in this book in the VM, you can experiment with the command-line support that is available on your individual system. Those who wish to use the commands learned in this book on their systems directly should refer to the documentation for their specific platforms, to ensure that they work as expected. For the most part, the behaviors are standard, but some platforms might only support older versions of some commands, might lack some options for some commands, or completely lack support for certain commands:
- Linux: All up-to-date Linux distributions will support all the commands and techniques taught in this book. Some may require the installation of additional packages.
- Windows: The Windows Linux Subsystem allows a few Linux distributions, such as Ubuntu and Debian, to run from within Windows. Some packages may require installation to support everything covered in this book.
- macOS and iOS: These OSes are based on FreeBSD, which is a variant of UNIX, and they include most of the GNU tools. Some packages may require installation to support everything covered in this book.
Note
If you use the VM, all the sample data required to complete the exercises and activities in this book will automatically be fetched and installed in the correct location, when the VM is started the first time. On the other hand, if you decide to use your native OS install, you will have to download the ZIP files (
Lesson1.ziptoLesson4.zip) present in the code repository on GitHub and extract them into the home directory of your user account. The data consists of four folders, calledLesson1toLesson4, and several commands in the exercises rely on the data being in the locations~/Lesson1and so on. It is recommended that you stick to the VM approach unless you know what you are doing.
Installation and Setup
Before you start this book, you need to install the following software. You will find the steps to install these here:
Installing VirtualBox
Download the latest version of VirtualBox from https://www.virtualbox.org/wiki/Downloads and install it.
Setting up the VM
- Download the VM appliance file,
Packt-CLI.ova, from the Git repository here: https://github.com/TrainingByPackt/Command-Line-Fundamentals/blob/master/Packt-CLI.ova. - Launch VirtualBox and select File | Import Appliance:

Figure 0.1: A screenshot showing how to make the selection
The following dialog box will appear:

Figure 0.2: A screenshot displaying the dialog box
- Browse for the
Packt-CLI.ovafile downloaded earlier and click Next, after which the following dialog box should be shown. The path where the Virtual Disk Image is to be saved can be changed if you wish, but the default location should be fine. Ensure there is at least 4 GB of free space available:
Figure 0.3: A screenshot showing the path where the Virtual Disk Image will be saved
- Click Import to create the virtual machine. After the process completes, the VM name will be visible in the left-hand panel of the VirtualBox window:

Figure 0.4: A screenshot showing the successful installation of VirtualBox
- Double-click the VM entry,
Packt-CLI, to start the VM. You will see a lot of text scroll by as it boots up, and after a few seconds a GUI desktop will show up. The window may maximize to your entire screen; however, you can resize it to whatever is convenient. The desktop inside will adjust to fit in. Your system is called a host and the VM within is called a guest. VirtualBox may show a couple of information popups at the top of the VM. Read the information to understand how the VM mouse and keyboard capture works. You can click the little buttons at the extreme right of the popups that have the message Do not show this message again to prevent them from showing up again. More information can be found at https://www.virtualbox.org/manual/ch01.html#keyb_mouse_normal.Note
In case the VM doesn't start at all, or you see an error message "Kernel Panic" in the VM window, you can usually solve this by enabling the virtualization settings in BIOS. See https://www.howtogeek.com/213795/how-to-enable-intel-vt-x-in-your-computers-bios-or-uefi-firmware/ for an example tutorial.
When the VM starts up for the first time, it will download the sample data and snippets for this book automatically. The following window will appear:

Figure 0.5: A screenshot displaying the first-time setup script progress
There are four launcher icons in the toolbar on top, which are shown here:
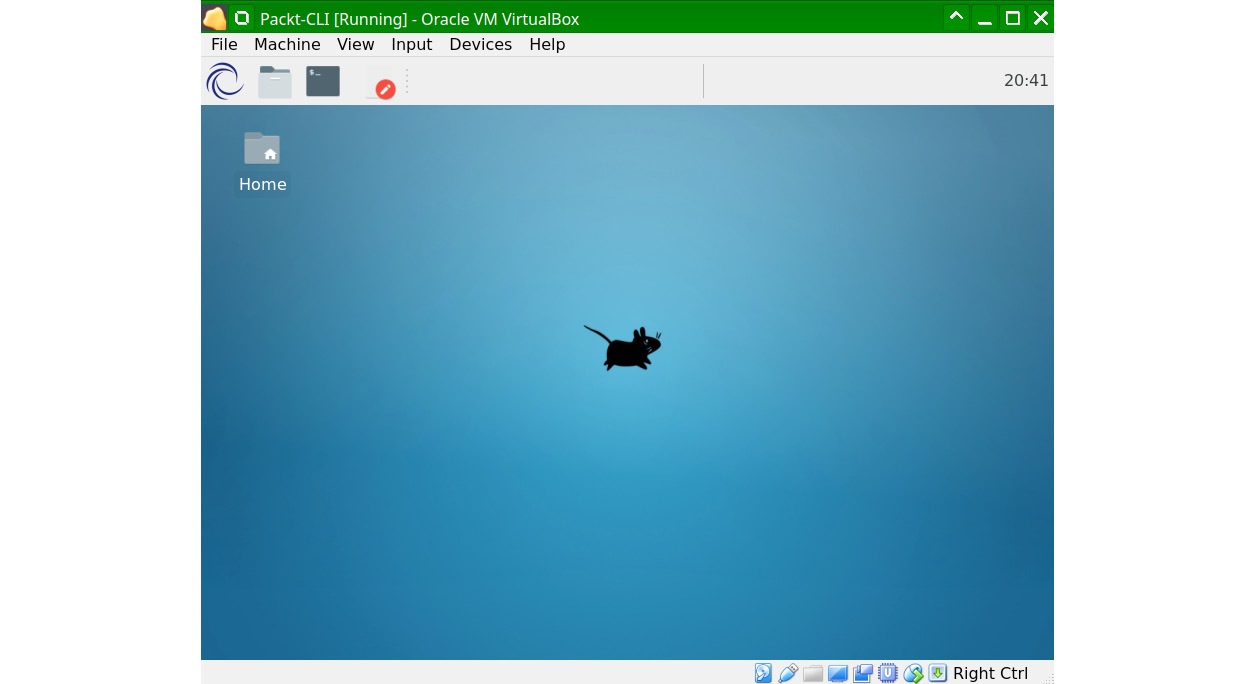
Figure 0.6: A screenshot displaying the launcher icons
- The first launcher is the Root menu, which is like the Start menu of Windows. Since the guest OS is a minimal, stripped-down version, many of the programs shown there will not run. The only entry you will need to use during this book is the Log Out option.
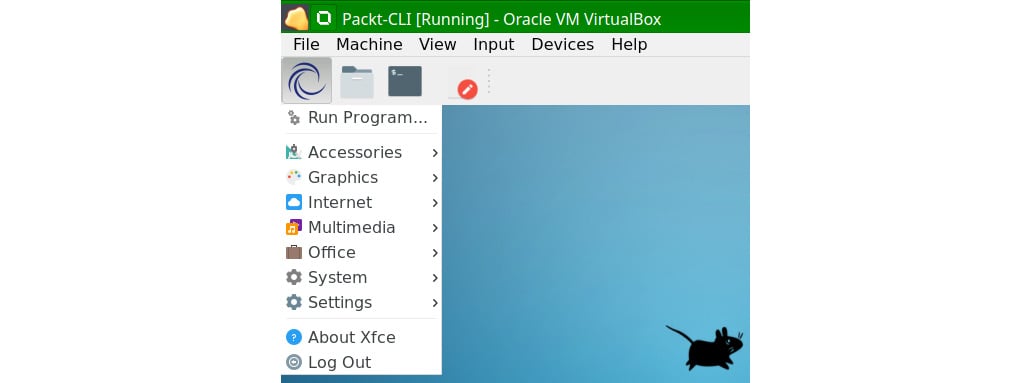
Figure 0.7: A screenshot showing the Root menu
- The second launcher is the Thunar file manager. By default, it opens the home directory of the current user, called guest (note that the guest username has no connection to the term "guest" used in the context of virtual machines). The sample data for the chapters is in the folders
Lesson1toLesson4. All the snippets and examples in the book material assume this location. TheSnippetsfolder contains a subfolder for each chapter with all the exercises and activity solutions as text files.
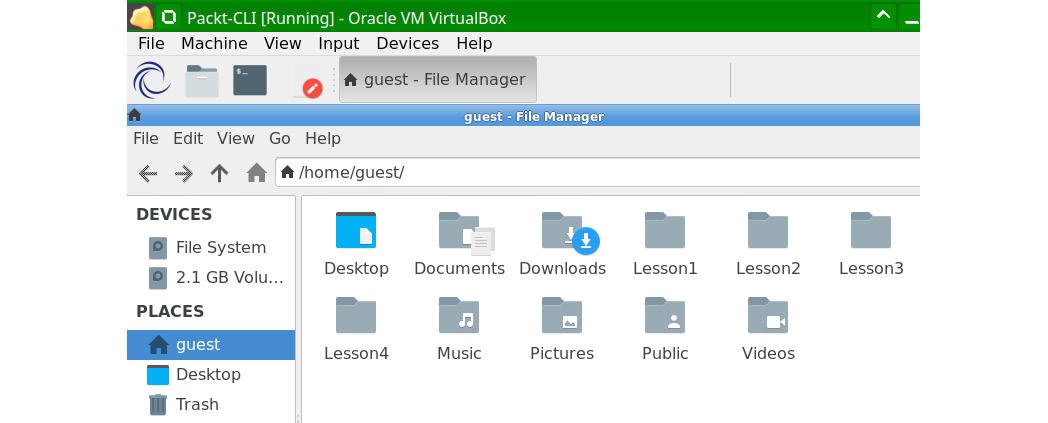
Figure 0.8: A screenshot showing the Thunar file manager
- The third launcher is the command-line terminal application. This is what you will need to use throughout the book. Notice that it starts in the home directory of the logged-in user, guest.
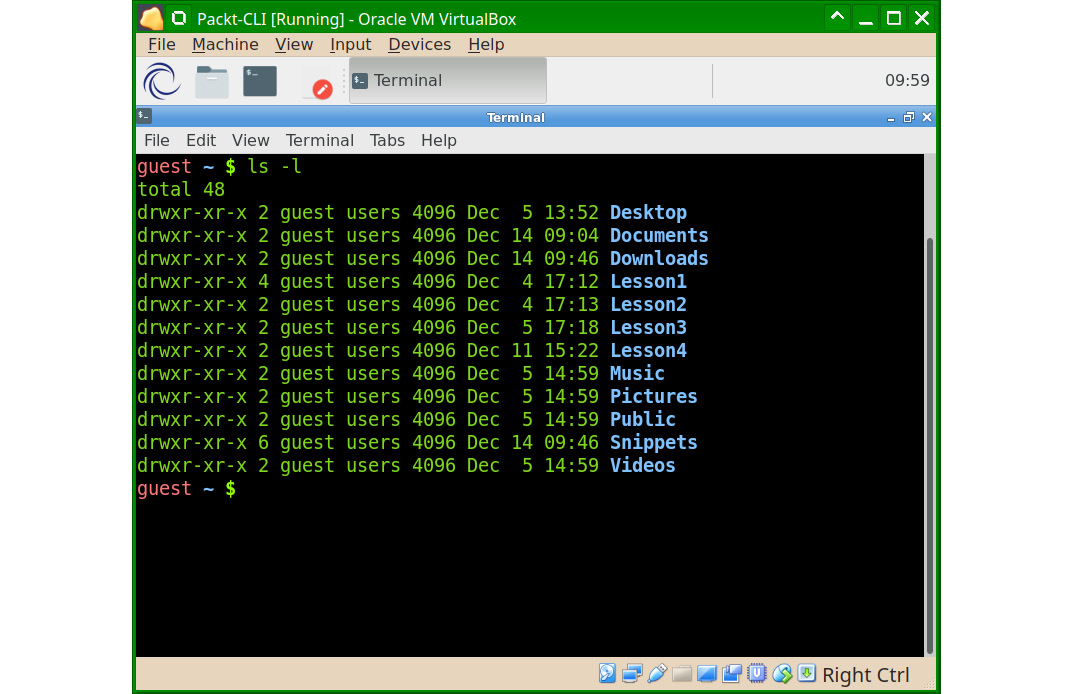
Figure 0.9: A screenshot showing the command-line terminal
- The final launcher is a text editor called Mousepad, which will be useful for viewing the snippets and writing scripts during the book:
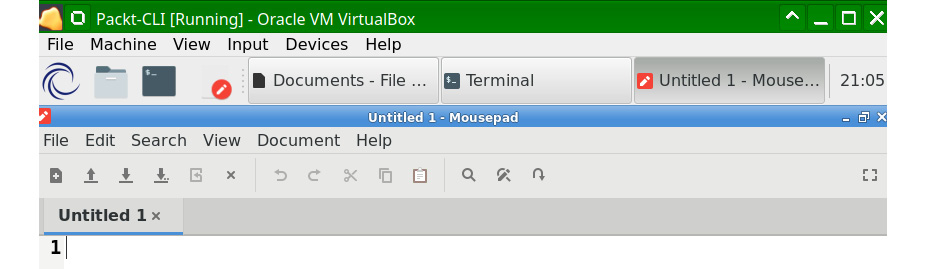
Figure 0.10: A screenshot of the text editor
Guidelines and Tips for using the VM
- The desktop environment in the guest OS is called XFCE and is very similar to Windows XP. The top toolbar shows the running tasks. The windows behave just like any other desktop environment.
- Within the console, you can select text with the mouse and paste it onto the command line with the middle mouse button (this is distinct from the clipboard). To copy selected text in the console to the clipboard, press Ctrl+Shift+C and to paste from the clipboard into the command line press Ctrl+Shift+V (or right-click and choose Paste). This will be useful when you try out the snippets. You can copy from the editor and paste into the command line, although it is recommended that you type them out. Be careful not to paste multiple or incomplete commands into the console, as it could lead to errors.
- To shut down the guest OS, click Log Out from the Root menu to get the following dialog:
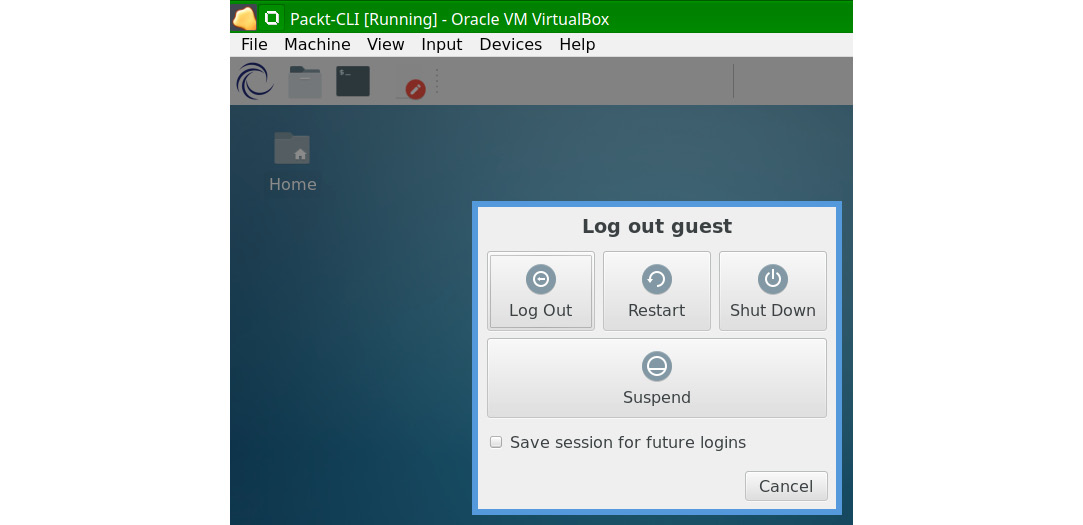
Figure 0.11: A screenshot showing the dialogue box that appears on shut down
- To close the VM (preserving its state) and resume later, close the VM window and choose Save the machine state. Next time the VM is started, it resumes from where it was. Usually, it would be preferable to use this option than choosing Shut down, as shown earlier.

Figure 0.12: A screenshot showing how to save your work before closing the VM
- The VM allows the guest and host OS to share the clipboard, so that text that you copy to the clipboard in the host, can be pasted into applications in the guest VM and vice versa. This is useful if you prefer to use your own editor rather than the one included in the VM.
- It is strongly recommended that you close the shell window after completion of each exercise or activity, and open a fresh instance for the next.
- During the book, it is possible that you, by mistake, will end up changing the sample data (or the guest OS itself) in such a way that you cannot complete the exercises. To avoid starting from scratch, you are advised to create a snapshot of the VM after each exercise or activity is performed. This can be done by clicking Snapshots in the VirtualBox window:
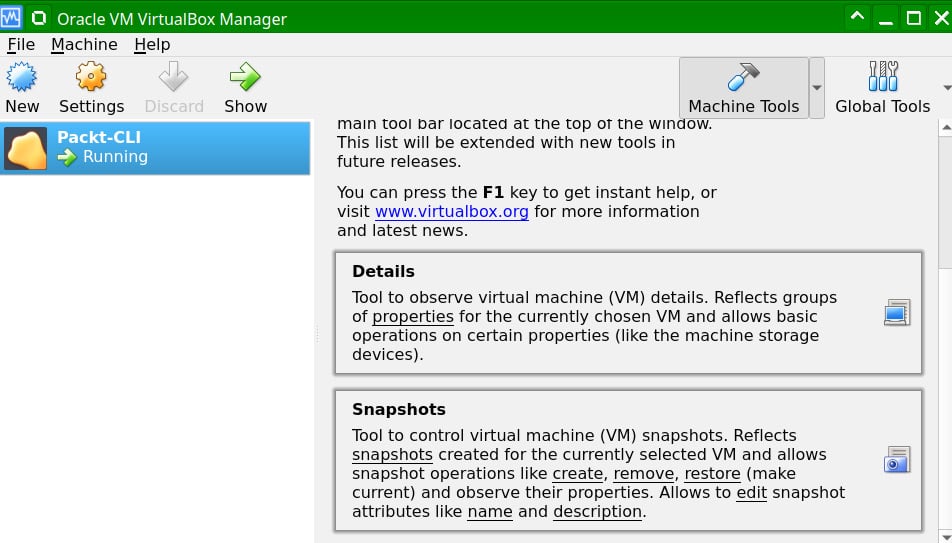
Figure 0.13: A screenshot showing the Snapshots window
- Click Take to save the current state of the VM as a snapshot:
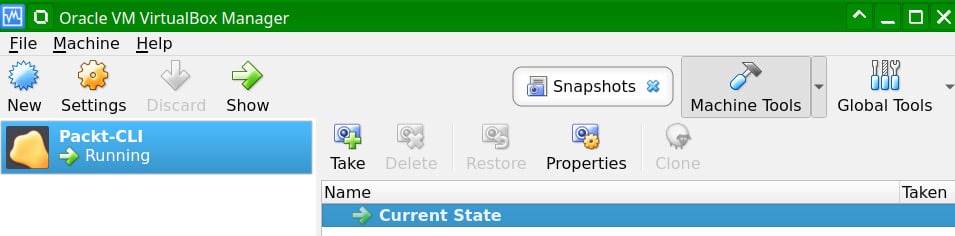
Figure 0.14: A screenshot showing how to take a snapshot
You can take any number of snapshots and restore them, taking the guest OS back to the exact state as when you saved it. Note that snapshots can only be restored when the guest has been shut down. Snapshots will take up some disk space. Deleting a snapshot does not affect the current state:
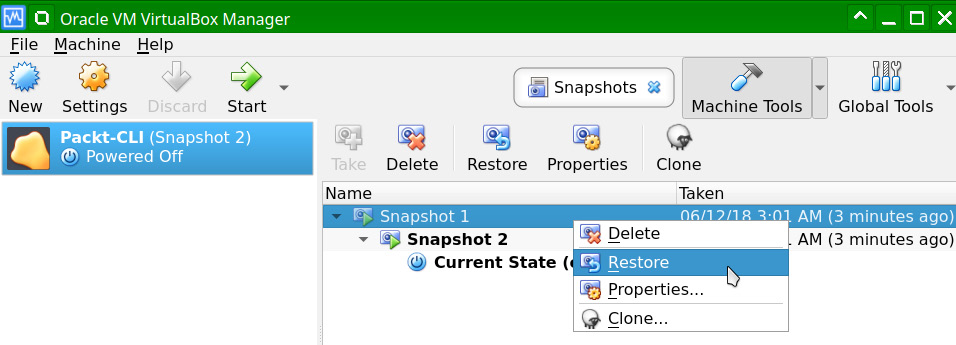
Figure 0.15: A screenshot showing how to restore the OS
- You are free to customize the color scheme, fonts, and preferences of the editor and console application to suit your own tastes but be sure to take a snapshot before changing things, to avoid being left with an unusable guest OS.
- If the VM somehow becomes completely unusable (which is quite unlikely), you can always delete it and repeat the setup process.
- If you get logged out by mistake, log in as
guestwith the passwordpackt.
Installing the Code Bundle
Copy the code bundle for the class to the C:/Code folder.
Conventions
Code words in text, folder names, filenames, file extensions, pathnames, user input, and example strings are shown as follows: "Navigate to the data folder inside the Lesson2 folder."
A block of code is set as follows: The text typed by the user is in bold and the output printed by the system is in regular font:
$ echo 'Hello World'
Hello World
New terms and important words are shown in bold. Words that you see on the screen, for example, in menus or dialog boxes, appear in the text like this: "Click Log Out from the Root menu."
Additional Resources
The code bundle for this book is also hosted on GitHub at https://github.com/TrainingByPackt/Command-Line-Fundamentals.
We also have other code bundles from our rich catalog of books and videos available at https://github.com/PacktPublishing/. Check them out!
You can also find links to the Official GNU Bash Manual and Linux man pages at https://www.gnu.org/software/bash/manual/html_node/index.html and https://linux.die.net/man/, respectively.