-
Book Overview & Buying
-
Table Of Contents

Advanced Network Simulations Simplified
By :
Advanced Network Simulations Simplified
By:
Overview of this book
Network simulation is a powerful technique that uses software programs to replicate the behaviors of real networks. Network simulators are programs that can predict the performance of computer networks or wireless communication networks. This book is your hands-on guide to ns-3, a script-based simulator that allows for learning, experimenting, and evaluating wired, wireless (802.11a/b/g/n/ac/ax), and 4G long-term evolution (LTE) networks quickly and at low cost.
You’ll begin by learning how to install and use ns-3, along with exploring its key features such as building blocks for creating a variety of wired or wireless network topologies, installing suitable protocols and applications, identifying and resolving networking issues, and systematically evaluating network performance. As you make progress, you’ll gain a clear understanding of simulation errors, exceptions, and abrupt events. You’ll also discover how to set up and evaluate Ethernet, Wi-Fi (802.11n/ac/ax) LANs, ad-hoc, and LTE networks. The concluding chapters discuss LTE advanced topics such as capacity planning, site surveys, radio resources, mobility management, and interference handling. By the end of this simulation book, you’ll be able to use ns-3 to implement, analyze, debug, and evaluate the performance of wired or wireless networks, as well as setting up custom test scenarios.
Table of Contents (15 chapters)
Preface

Part 1: Exploring Network Simulator-3 (ns-3) Thoroughly and Quickly
 Free Chapter
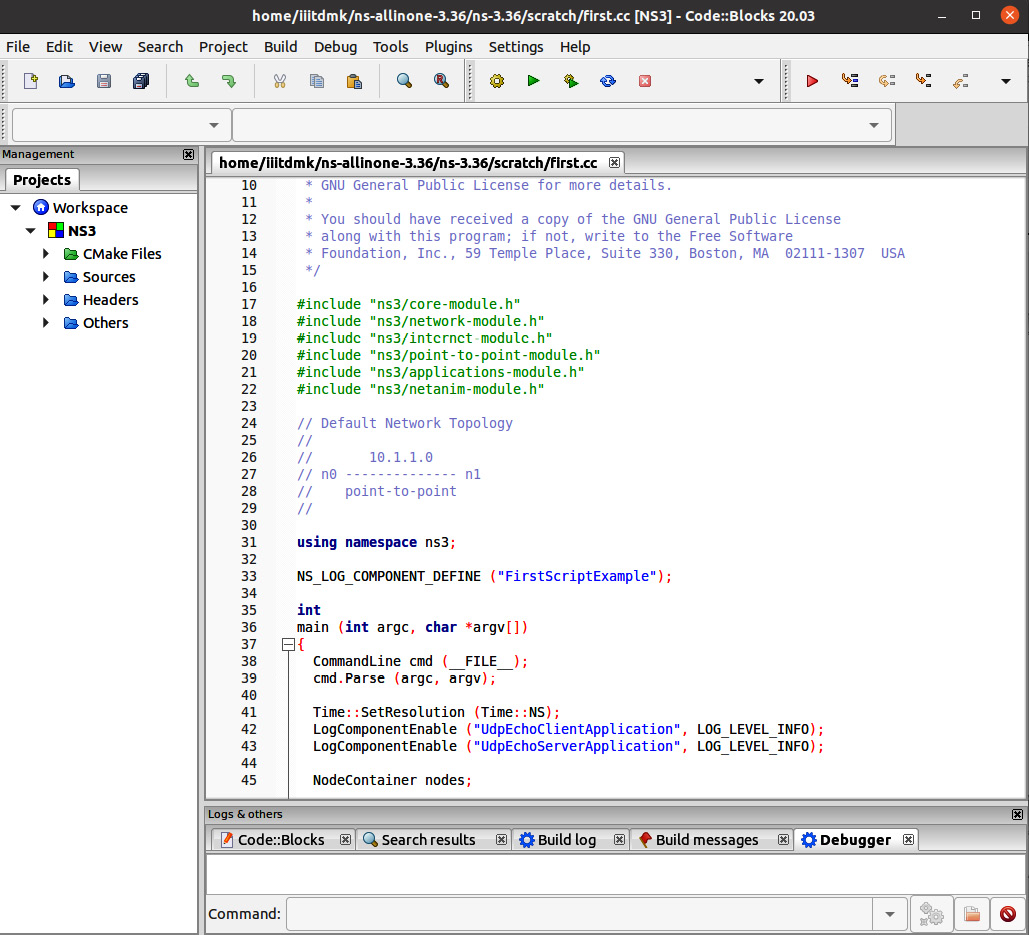
Chapter 1: Getting Started with Network Simulator-3 (ns-3)
Chapter 2: Monitoring, Debugging, Tracing, and Evaluating Network Topologies in ns-3
Chapter 3: ns-3 Key Building Blocks for Simulations
Part 2: Learn, Set Up, and Evaluate Wired and Wi-Fi (802.11a/b/g/n/ac/ax) Networks
Chapter 4: Setting Up and Evaluating CSMA/P2P LANs, Wi-Fi LANs, and the Internet
Chapter 5: Exploring Basic Wi-Fi Technologies and Setting Up and Evaluating Wireless Ad Hoc Networks
Chapter 6: Researching Advanced Wi-Fi Technologies – 802.11n, ac, and ax in ns-3
Part 3: Learn, Set Up, and Evaluate 4G Long-Term Evolution (LTE) Networks
Chapter 7: Getting Started with LTE Network Simulations Using ns-3
Chapter 8: Researching LTE Network Radio Resource Management and Mobility Management Using ns-3
Chapter 9: Researching LTE Advanced Networks: LTE HetNets and Interference Management Using ns-3
Index