
During the following section, we will take a SharePoint publishing scenario and use it to learn some basic concepts of UAG. The features described here will be used from now on throughout the book.
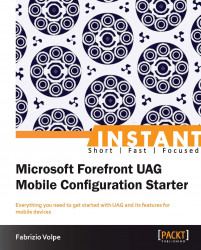
We said that the meaning of UAG is to publish resources, but it is obvious that at this point in the book we are still working with an empty framework. The only aspect we have partly addressed is security, because during the previous section we installed UAG and now know that TMG is active when it comes to protecting the host. What we now need is a channel to connect the external users to our internal resources, that is what we call a trunk in UAG. The configuration of a trunk is an operation that we execute from the UAG management console (as we can see in the following screenshot):
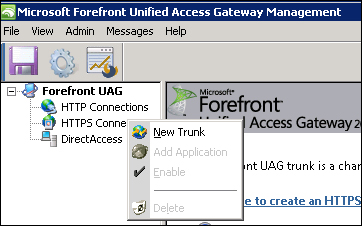
To enable external connections, UAG establishes a listener (an IP address paired with a port), that creates a website in IIS, that will have a name based on the trunk parameters, and a series of rules in TMG (in the following screenshot we can see the result of a UAG portal creation in IIS):
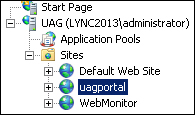
In the following screenshot, we can also see the rules created in TMG which are related to the trunk:
Note
All of the parameters and settings shown in the previous screenshot are automatically configured, and it is recommended not to interfere in the IIS or TMG parameters without a really good reason.
In UAG, two kinds of trunks are available, namely HTTP and HTTPS. The type of trunk we will select will have a deep impact on the security of our resources, because only when we use an HTTPS trunk are we encrypting the traffic with the end points (HTTP sends all the traffic in clear text).
An HTTPS trunk requires a valid and recognized SSL certificate with a working private key.
Note
The private key is mandatory for the encryption process, so if we have deleted the certificate request or in a similar scenario, we could try the solution in the TechNet article Install certificate after deleting the pending certificate request that is available at http://technet.microsoft.com/en-us/library/cc759048(v=ws.10).aspx.
We are free to select a certificate released from an internal certification authority or from a third-party authority. Certificates released from a public certification authority are usually trusted automatically (because the public C.A. certificate is already in the list of accepted C.A.), but if we decide to use an internal certification authority, we have to send the certificate of our internal C.A. to the mobile device. To give an example, we have sent our internal C.A. certificate to an Android device attaching it to a simple e-mail message, saved it on our SD, and we can see, as in the following screenshot, the first step, the Install from SD card screen:
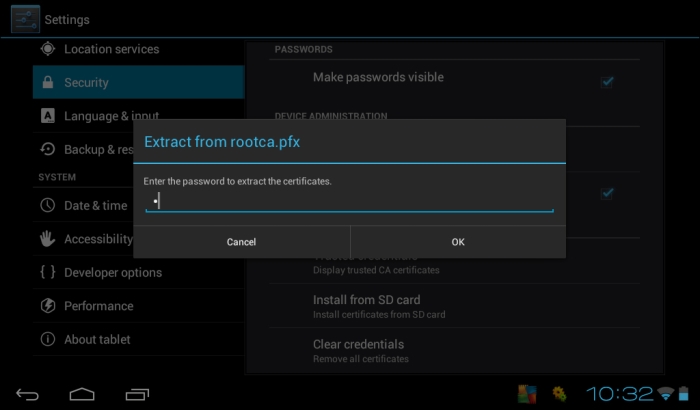
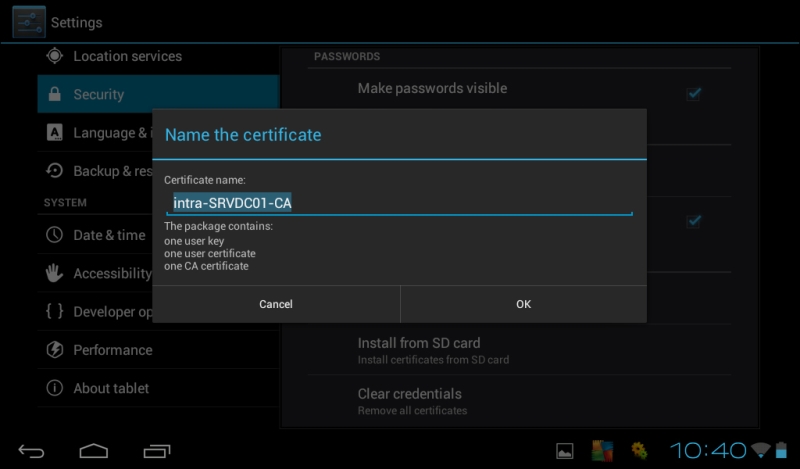
We are required to confirm the import operation as illustrated in the following screenshot:
If we want to verify the previous steps, we can open the Display trusted CA certificates screen.
One huge advantage of using HTTPS when we are configuring our trunks is that usually HTTPS encrypted traffic is able to pass through enterprise and personal firewalls while IPSEC or other encryption methods often are not allowed.
Now to make an application available, there is a last step to take — we have to publish it by adding it to a trunk (so we can think of the different trunks in our UAG deployment as folders in which we are able to organize our services).
Note
Publishing an application is an operation we have to perform (again) in the UAG management console.
Remote end points can access applications and resources published via a trunk in one of the following two ways:
Portals: We are able to create a web portal to act as a gateway for every single trunk. Applications will be published in the portal associated to their trunk.
Direct connection: We can publish a web application with a public FQDN, allowing end points to connect directly to the application.
Note
UAG supports an array of multiple servers and load-balancing on different nodes of the array. Each server in the array will make the same trunks available and each trunk will listen to a virtual IP address (VIP) providing scalability and high availability.
In UAG, we have two portals dedicated to mobile devices (in addition to the standard portal used for all the other clients). We have a Premium mobile portal for all the smartphones supporting AJAX and pages with numerous graphics files (mobile devices enabled to the Premium portal are the ones running, for example, Windows Phone 7, Windows Mobile, or the Apple iPhone). All the other mobile devices are redirected to the text-based Non-premium mobile portal.
UAG uses a mechanism called Host Address Translation (HAT) to publish internal servers with no FQDN resolvable on the external networks. For example, if we have an internal web server, http://webserver01.internal.intra, all the contents on that server will use the internal name, blocking the access to Internet clients. Using HAT, UAG takes the URL and replaces the server name with a URL pointing to itself (for example, http://webserver01.internal.intra/image1.gif is turned into http://uag.domain.com/uniquesig2bb49990fd8c6dd09bb3b0f63a3cfb8c/uniquesig0/image1.gif).
However, some applications (such as SharePoint) are so complex that the HAT mechanism is not able to correctly replace and modify all the links and scripts. To prevent the aforementioned issue, SharePoint has a feature called Alternate Access Mappings (AAM) that modifies the URLs before they are sent to UAG. So configuring AAM is a step fundamental to publishing SharePoint in UAG.
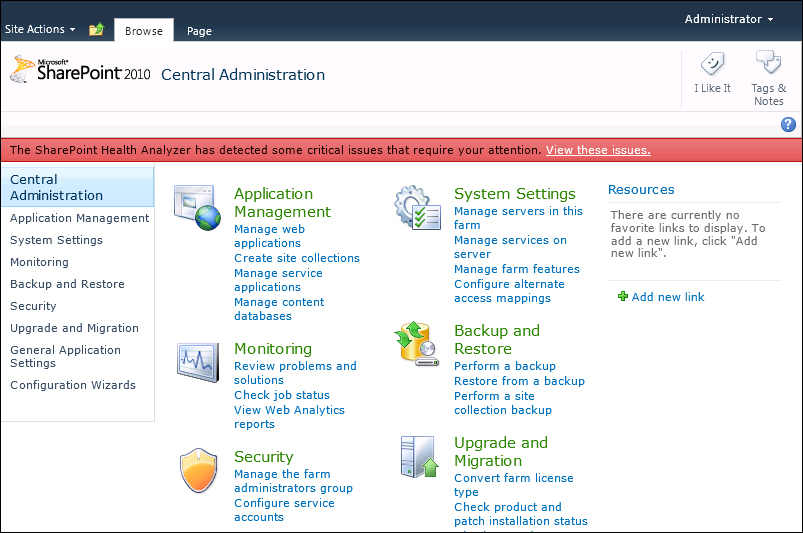
To modify the AAM setting with SharePoint 2010, we have to go to SharePoint 2010 Central Administration | Application Management as we can see in the following screenshot:
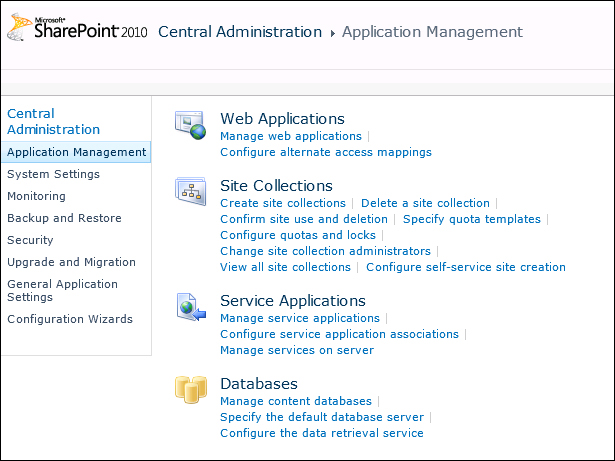
Then we select Configure alternate access mappings as shown in the following screenshot:
The last operation is to modify the AAM values:

Microsoft SharePoint Workspace Mobile 2010 enables smartphones and other mobile devices to edit Microsoft Office documents directly on the mobile device itself. To enable SharePoint Workspace Mobile, we have to first publish a Microsoft SharePoint Server 2010 application through Forefront Unified Access Gateway (UAG).
Note
We have talked about the need to have an SSL certificate to create an HTTPS trunk (that is the first step of our procedure). We can refer to one of the many articles on the topic, such as http://technet.microsoft.com/en-us/library/ff720335.aspx.
The most common configuration is the one based on SSL, as all the communication with the end points is secured with encryption.
To begin, let's select HTTPS Connections in the UAG management console and select Click here to create an HTTPS trunk, as shown in the following screenshot:

After the wizard starts, we can select the Next button and go to Step 1 - Select Trunk Type. We will create a portal trunk (exchange publishing not selected, at the moment).

In the following step, we will give a name to the trunk and add all the information about the server FQDN, IP addresses, and used ports.

The next screen is all about the authentication repository. We will use Active Directory, so we have to select the Add... button and select Add again in the Authentication and Authorization Servers screen.

If the UAG server is a member server of an Active Directory domain, we can select Use local Active Directory forest authentication or else we have to define the domain controllers.
Note
With Use local Active Directory forest authentication, any available domain controller in the forest will be used. It is recommended you use this option if the Forefront UAG server's domain joined a forest and we want to authenticate users from that forest.

The Search settings group is automatically populated the first time we click the ellipsis button, and we can leave them alone if they are set to our directory structure (by default the User container is selected).
Note
We are able to expand the search to subfolders and nested groups, but add these options only if they make sense in our directory environment.

The two options still empty are Server access, where we have to insert a user enabled to read the A.D. information, and Default domain name that is optional but it helps our users gain access in an easier way.

Step 4 of the wizard is about the selection of a valid SSL certificate.
The following screenshot is about Endpoint Security. We will keep the default selection (UAG access policies) with no modification, also in the screen that will follow, which is Endpoint Policies:

The final screen confirms the trunk creation and lists the parameters we have selected during the procedure, as shown in the following screenshot:

Back to the UAG management console, we're able to add SharePoint to the applications related to the HTTPS trunk we just defined. Selecting the Add button under the applications list, the Add Application Wizard will start.

After the first screen, we are enabled to select SharePoint 2010 from the list of web applications:

Step 2 requires a name for the application and in step 3 (Endpoint Policies) we can leave the default parameters and click on Next.
In step 4, we have to select the kind of SharePoint deployment we want to have:

The next screen will require information about the SharePoint web services:

In step 6 (Authentication), we were able to manage settings such as the single sign-on to multiple applications by credentials delegation (for trunks that use Integrated Windows Authentication).
Another really interesting option is Allow Rich Clients to Bypass Trunk Authentication: rich clients can authenticate directly with the SharePoint site's authentication server, and an end user can open documents published on SharePoint directly from the client application, without using the Forefront UAG portal.

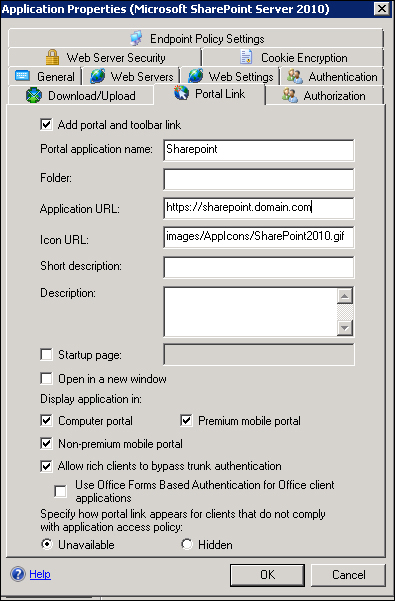
We can go on pressing Next till Step 7 - Portal Link. We have to remember the value of the Application URL set in this step because we will use it again in the SharePoint AAM configuration.

The Authorization step (step 8), allows the filtering of users and groups, so that SharePoint is available only to selected users.

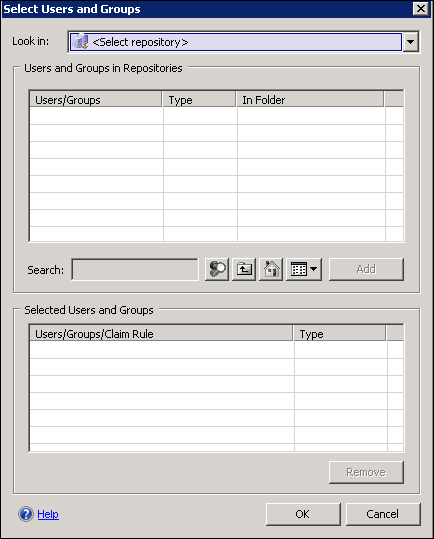
In the Authorization step, we are able to configure different repositories to authenticate users. This kind of flexibility allows us to design different scenarios for user authentication and access (in the following screenshot we can see the screen in which we are able to use the various repositories).
The steps we have carried out have published SharePoint for a standard client. What we need now is to enable mobile devices to access our application.
The first step is to press the Configure button in the Trunk Configuration zone of the portal:

We have to select the Endpoint Access Settings tab in the next screen that appears and click on Edit Endpoint Policies.

We have to edit Default Session Access Policy and Default Web Application Access policy (using the Edit Policy button for each one), as shown in the following screenshot:

In the Select platform-specific policies list, select the Other drop-down list and click on Always.

We can now close the Manage Policies and Expressions screen and select OK to return to the UAG management console.
Note
Selecting Always in our access policies for other devices will invariably grant access with no check or with no control to any client not running Windows, Mac OS, or Linux. That is a configuration we have to accept for mobile devices. We will talk more about end point policies in the next section.
We have to make the SharePoint application available to mobile devices. We have to select the SharePoint application and select the Edit... button:

In the Application Properties dialog box, click on the Portal Link tab and check the following options: Allow rich clients to bypass trunk authentication, Premium Mobile Portal, and Non-premium mobile Portal.
Note
As we said before, the Rich clients option will be very useful to enable the Office Hub integration with mobile devices such as a Windows phone.
The last step to publish SharePoint with UAG is to edit the AAM in SharePoint so that the server is able to answer to the connections arriving from UAG.
On the Alternate Access Mappings page, in the Alternate Access Mapping Collection list, click on Change Alternate Access Mapping Collection, and then on the Select an Alternate Access Mapping Collection dialog box, select the SharePoint application that we want to publish.
On the Alternate Access Mappings page, click on Edit Public URLs.
In the following screenshot, we have added the URL we used to configure the trunk in UAG:

Now opening the UAG portal from a mobile device (a Windows phone, for instance), we are able to launch SharePoint:

We will be redirected to the mobile version of our SharePoint application. Please note that our user does not need to remember the URL of the SharePoint server, because the starting point is inside the UAG portal.

SharePoint Workspace Mobile is part of Office Mobile (so on a Windows phone we do not have to download or install anything) and it allows users to open, edit, and synchronize Office documents with SharePoint servers. If our organization uses UAG, we are able to take advantage of the mobile features from any place with a working Internet connection. We have to check an additional configuration of UAG, to be sure that it will work with Office Mobile, so click on the Configure button in the Configure Trunk Settings zone.
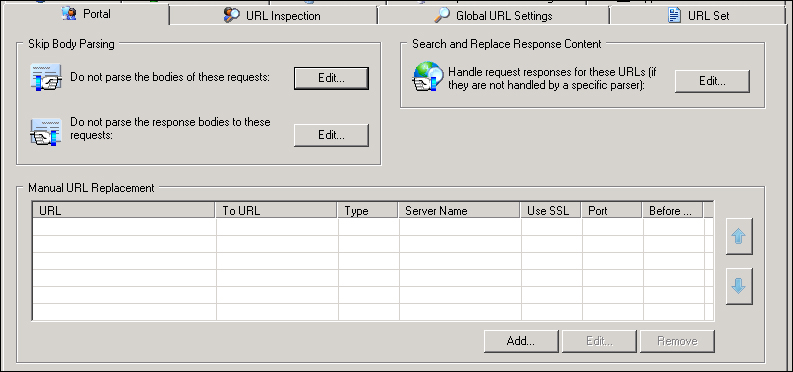
From the Portal tab, we have to click on the Edit... button for Do not parse the response bodies to these requests. In the Server list we should find the SharePoint host that we configured in previous steps with the following URLs in the list:
.*/_vti_bin/webs\.asmx
.*/_vti_bin/lists\.asmx

The steps to configure the connection to our SharePoint server from a Windows Phone Version 7.5 are given as follows:
In the Start menu, flick left to the app list, and navigate to Settings | Applications | Office.
Tap the UAG server.
On the UAG server screen, in the UAG address box, type the URL of UAG, beginning with
https://.In the User name box, type the domain account information and password.
Tap Done.

Now we have to configure our SharePoint site using the following steps:
On Start, flick left to the app list, and then tap on Office.
Flick to Locations, and then tap on SharePoint.
Next to https://, type the URL for a SharePoint site.
We are now ready to work with the SharePoint contents.
