
Nessus is a highly functional vulnerability scanner that can be installed on the Kali Linux platform. This recipe will discuss the process to install, enable, and activate the Nessus service.
Prior to attempting to install the Nessus vulnerability scanner in Kali Linux, you will need to obtain a plugin feed activation code. This activation code is necessary to acquire the audit plugins used by Nessus to evaluate networked systems. If you are going to be using Nessus at home or exclusively within your lab, you can acquire a Home Feed Key for free. Alternatively, if you are going to be using Nessus to audit production systems, you will need to acquire a Professional Feed Key. In either case, you can acquire this activation code at http://www.tenable.com/products/nessus/nessus-plugins/obtain-an-activation-code.
Once you have acquired your plugin feed activation code, you will need to download the Nessus installation package available at http://www.tenable.com/products/nessus/select-your-operating-system. The following screenshot displays a list of various platforms that Nessus can run on and their corresponding installation packages:
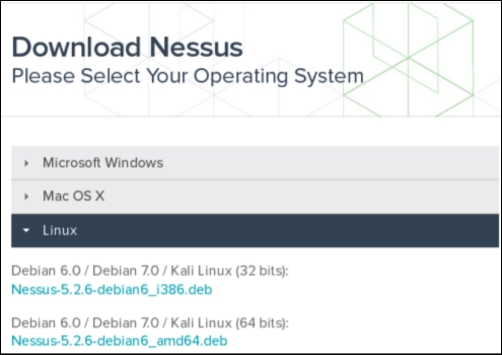
Select the appropriate installation package for the architecture of the operating system that you have installed. Once you have selected it, read and agree to the subscription agreement provided by Tenable. Your system will then download the installation package. Click on Save File and then browse to the location you would like to save it to:
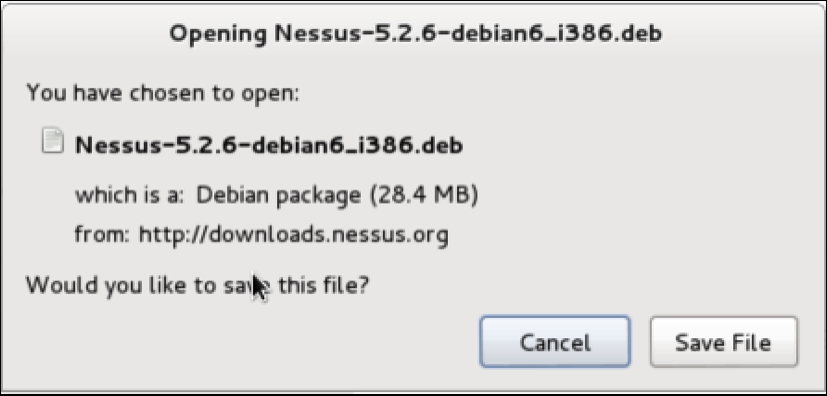
In the example provided, I have saved the installation package to the root directory. Once downloaded, you can complete the installation from the command line. This can be done over SSH or via a terminal on the graphic desktop in the following manner:
root@kali:~# ls
Desktop  Nessus-5.2.6-debian6_i386.deb
root@kali:~# dpkg -i Nessus-5.2.6-debian6_i386.deb
Selecting previously unselected package nessus.
(Reading database ... 231224 files and directories currently installed.)
Unpacking nessus (from Nessus-5.2.6-debian6_i386.deb) ...
Setting up nessus (5.2.6) ...
nessusd (Nessus) 5.2.6 [build N25116] for Linux
Copyright (C) 1998 - 2014 Tenable Network Security, Inc

Processing the Nessus plugins...
[##################################################]

All plugins loaded

 - You can start nessusd by typing /etc/init.d/nessusd start
 - Then go to https://kali:8834/ to configure your scanner

root@kali:~# /etc/init.d/nessusd start
$Starting Nessus : .
Use the ls command to verify that the installation package is in the current directory. You should see it listed in the response. You can then use the Debian Package Manager (dpkg) tool to install the service. The -i argument tells the package manager to install the specified package. Once the install is complete, the service can be started with the command, /etc/init.d/nessusd start. Nessus runs completely from a web interface and can easily be accessed from other machines. If you want to manage Nessus from your Kali system, you can access it via your web browser at https://127.0.0.1:8834/. Alternatively, you can access it from a remote system (such as your host operating system) via a web browser using the IP address of the Kali Linux virtual machine. In the example provided, the appropriate URL to access the Nessus service from the host operating system is https://172.16.36.244:8834:
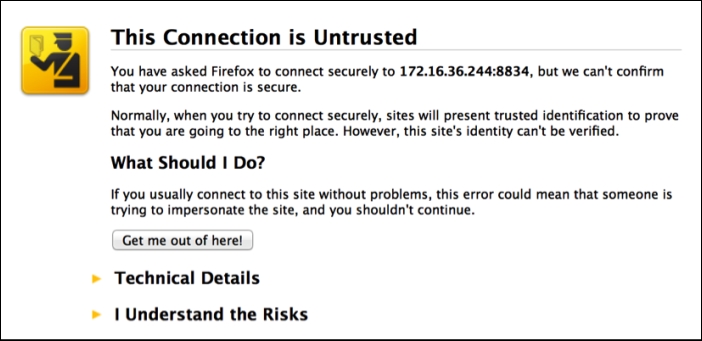
By default, a self-signed SSL certificate is used by the Nessus service, so you will receive an untrusted connection warning. For security lab usage, you can disregard this warning and proceed. This can be done by expanding the I Understand the Risks option as shown in the following screenshot:
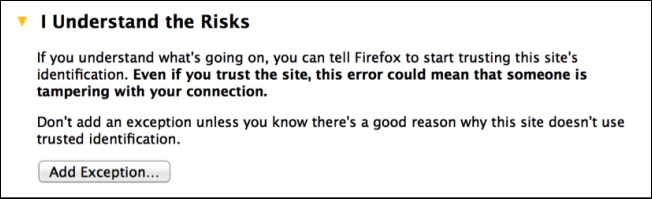
When you expand this option, you can click on the Add Exception button. This will prevent you from having to deal with this warning every time you try to access the service. After adding the service as an exception, you will receive a welcome screen. From here, click on the Get Started button. This will take you to the following screen:
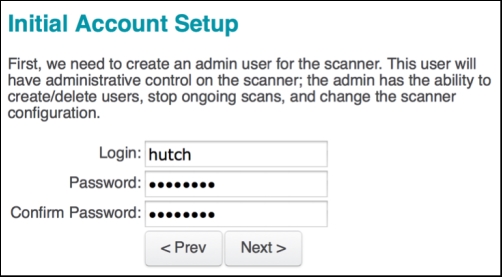
The first configurations that have to be set are the administrator's user account and associated password. These credentials will be used to log in and use the Nessus service. After entering the new username and password, click on Next to continue; you will see the following screen:
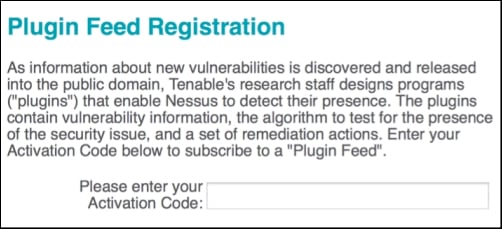
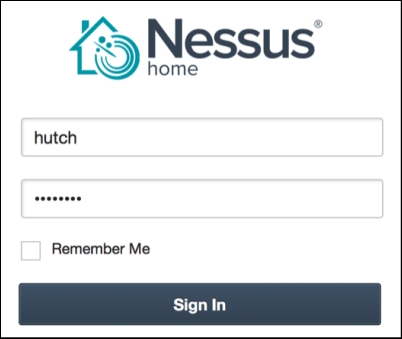
You will then need to enter your plugin feed activation code. If you do not have an activation code, refer back to the Getting ready section of this recipe. Finally, after you have entered your activation code, you will be returned to the login page and asked to enter your username and password. Here, you need to enter the same credentials that you created during the installation process. The following is the default screen that Nessus will load each time you access the URL in future:
Once installed properly, the Nessus vulnerability scanner should be accessible from the host system and all of the virtual machines that have a graphic web browser installed. This is due to the fact that the Nessus service is hosted on TCP port 8834 and both the host and all other virtual systems have network interfaces sitting in the same private IP space.