Book Image

Cloud Native Python

By : Manish Sethi
Book Image

Cloud Native Python

By: Manish Sethi

Overview of this book

Businesses today are evolving so rapidly that having their own infrastructure to support their expansion is not feasible. As a result, they have been resorting to the elasticity of the cloud to provide a platform to build and deploy their highly scalable applications. This book will be the one stop for you to learn all about building cloud-native architectures in Python. It will begin by introducing you to cloud-native architecture and will help break it down for you. Then you’ll learn how to build microservices in Python using REST APIs in an event driven approach and you will build the web layer. Next, you’ll learn about Interacting data services and building Web views with React, after which we will take a detailed look at application security and performance. Then, you’ll also learn how to Dockerize your services. And finally, you’ll learn how to deploy the application on the AWS and Azure platforms. We will end the book by discussing some concepts and techniques around troubleshooting problems that might occur with your applications after you’ve deployed them. This book will teach you how to craft applications that are built as small standard units, using all the proven best practices and avoiding the usual traps. It's a practical book: we're going to build everything using Python 3 and its amazing tooling ecosystem. The book will take you on a journey, the destination of which, is the creation of a complete Python application based on microservices over the cloud platform
Table of Contents (14 chapters)
6
Creating UIs to Scale with Flux

Setting up the Python environment

As we will demonstrate throughout this book, having the right environment (local or for your automated builds) is crucial to the success of any development project. If a workstation has the right tools, and is set up properly, developing on that workstation can feel like a breath of fresh air. Conversely, a poorly set up environment can suffocate any developer trying to use it.

The following are the prerequisite accounts that we require in the later part of the book:

  • A GitHub account needs to be created for source code management. Use the article on the following link to do so:

https://medium.com/appliedcode/setup-github-account-9a5ec918bcc1

Now, let's set up some of the tools that we will need during our development project.

Installing Git

Git (https://git-scm.com) is a free and open source distributed, version control system designed to handle everything, ranging from small to very large projects, with speed and efficiency.

Installing Git on Debian-based distribution Linux (such as Ubuntu)

There are a couple of ways by which you can install Git on a Debian system:

  1. Using the Advanced Package Tool (APT) package management tools:

You can use the APT package management tools to update your local package index. Then, you can download and install the latest Git using the following commands as the root user:

      $ apt-get update -y
      $ apt-get install git -y  

The preceding commands will download and install Git on your system.

  1. Using the source code, you can do the following:
    1. Download the source from the GitHub repository, and compile the software from the source.

Before you begin, let's first install the dependencies of Git; execute the following commands as the root user to do so:

      $ apt-get update -y 
      $ apt-get install build-essential libssl-dev
libcurl4-gnutls-dev libexpat1-dev gettext unzip -y

2. After we have installed the necessary dependencies, let's go to the Git project repository (https://github.com/git/git) to download the source code, as follows:

      $ wget https://github.com/git/git/archive/v1.9.1.zip -Ogit.zip  

3. Now, unzip the downloaded ZIP file using the following commands:

      $ unzip git.zip
      $ cd git-*  

4. Now you have to make the package and install it as a sudo user. For this, use the commands given next:

      $ make prefix=/usr/local all
      $ make prefix=/usr/local install

The preceding commands will install Git on your system at /usr/local.

Seting up Git on a Debian-based distribution

Now that we have installed Git on our system, we need to set some configuration so that the commit messages that will be generated for you contain your correct information.

Basically, we need to provide the name and email in the config. Let's add these values using the following commands:

$ git config --global user.name "Manish Sethi"
$ git config --global user.email [email protected]  

Installing Git on Windows

Let's install Git on Windows; you can download the latest version of Git from the official website (https://git-scm.com/download/win). Follow the steps listed next to install Git on a Windows system:

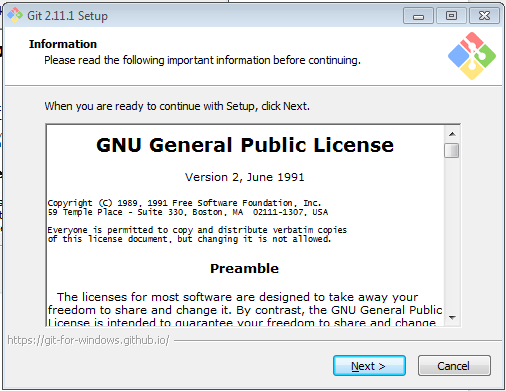
  1. Once the .exe file is downloaded, double-click on it to run it. First of all, you will be provided with a GNU license, as seen in this screenshot:

Click on Next:

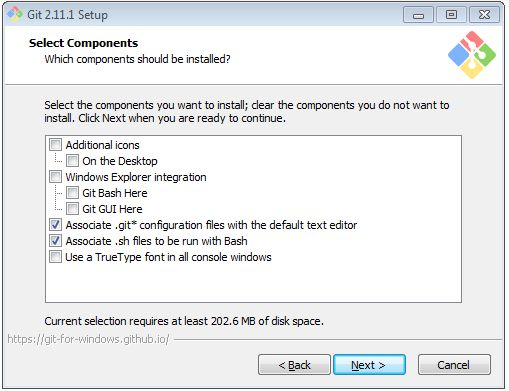
In the section shown in the preceding screenshot, you will customize your setup based on tools that are needed, or you can keep it default, which is okay from the book's perspective.

  1. Additionally, you can install Git Bash along with Git; click on Next:
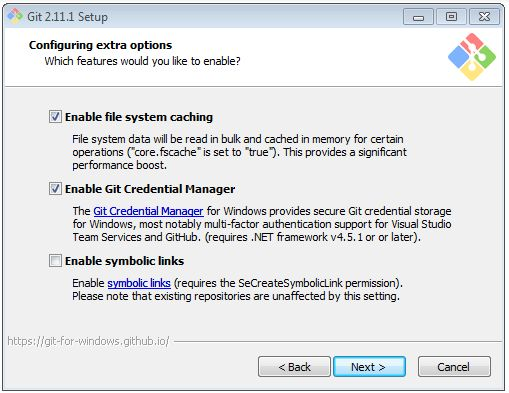
  1. In the section seen in the next screenshot, you can enable other features that come along with Git packages. Then, click on Next:

  1. You can skip the rest of the steps by clicking on Next, and go for the installation part.

Once you complete the installation, you will be able to see a screen like this:

Great!! We have successfully installed Git on Windows!!

Using Chocolatey

This is my preferred way to install Git for Windows on Windows 10. It installs the same package as before, but in one line. If you have not heard of Chocolatey, stop everything, and go learn a bit more. It can install the software with a single command; you don't have to use click-through installers anymore!

Chocolatey is very powerful, and I use it in combination with Boxstarter to set up my dev machines. If you are in charge of setting up machines for developers on Windows, it is definitely worth a look.

Let's see how you would install Git using Chocolatey. I assume you have Chocolatey installed (https://chocolatey.org/install) already (it's a one-liner in Command Prompt). Then, simply open the Administrator Command window, and type this command:

$ choco install git -params '"/GitAndUnixToolsOnPath"'  

This will install Git and the BASH tools, and add them to your path.

Installing Git on Mac

Before we begin with the Git installation, we need to install command-line tools for OS X.

Installing the command-line tools for OS X

In order to install any developer, you will need to install Xcode (https://developer.apple.com/xcode/), which is a nearly 4 GB developer suite. Apple offers this for free from the Mac App Store. In order to install Git and the GitHub setup, you will need certain command-line tools, which are part of the Xcode development tools.

If you have enough space, download and install Xcode, which is basically a complete package of development tools.

You will need to create an Apple developer account at developer.apple.com in order to download command-line tools. Once you have set up your account, you can select the command-line tools or Xcode based on the version, as follows:

  • If you are on OS X 10.7.x, download the 10.7 command-line tools. If you are on OS X 10.8.x, download the 10.8 command-line tools.
  • Once it is downloaded, open the DMG file, and follow the instructions to install it.

Installing Git for OS X

Installing Git on Mac is pretty much similar to how you install it on Windows. Instead of using the .exe file, we have the dmg file, which you can download from the Git website (https://git-scm.com/download/mac) for installation as follows:

  1. Double-click on the dmg file that got downloaded. It will open a finder with the following files:
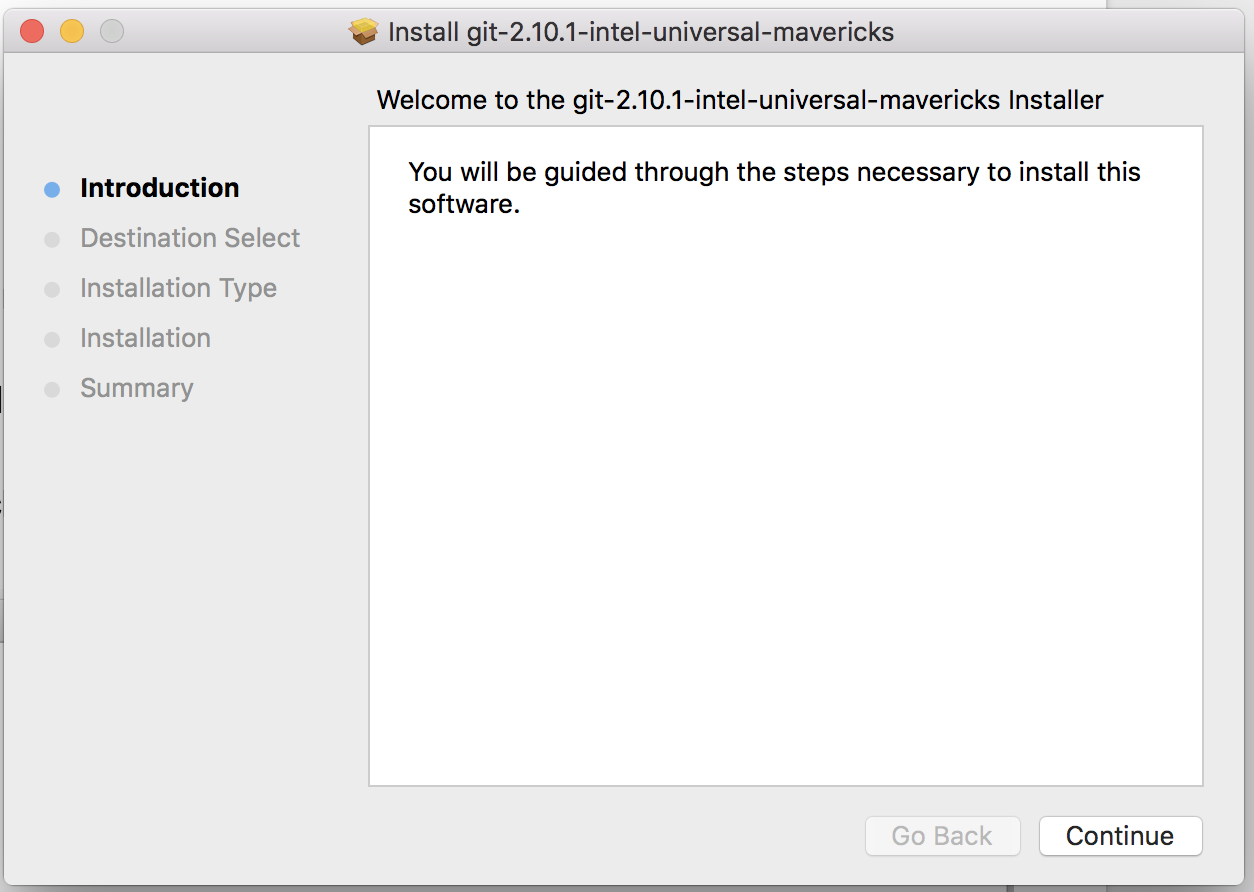
  1. Double-click on the package (that is, git-2.10.1-intel-universal-mavericks.dmg) file; it will open the installation wizard to install, as seen in the following screenshot:
  1. Click on Install to begin the installation:
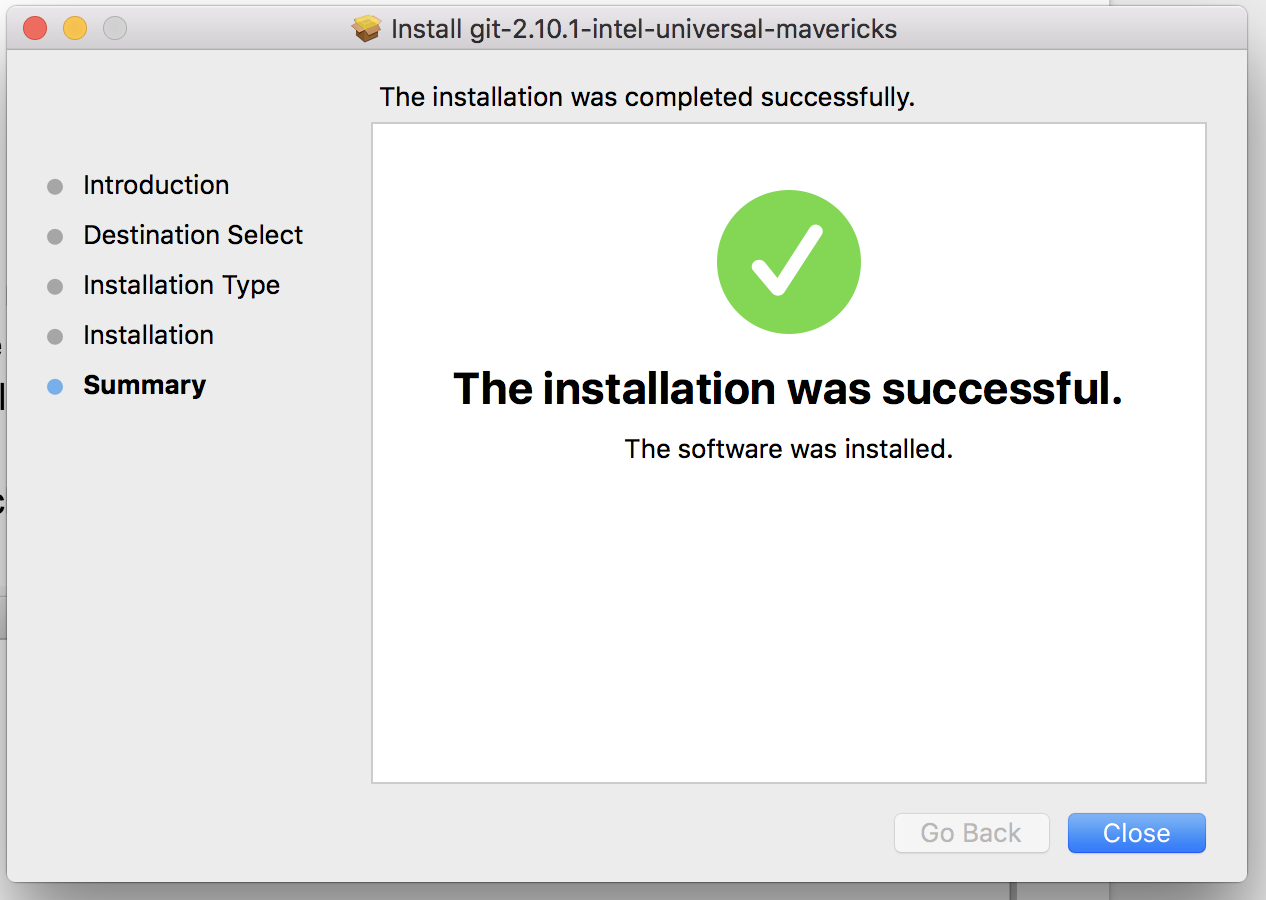
  1. Once the installation is complete, you will see something like this:
If you are using OS X 10.8 and haven't already modified your security settings to allow the installation of third-party applications, you'll need to make that adjustment before OS X lets you install these tools.

Installing and configuring Python

Now, let's install Python, which we will use to build our microservices. We will be using the Python 3.x version throughout the book.

Installing Python on a Debian-based distribution (such as Ubuntu)

There are different ways to install Python on a Debian-based distribution.

Using the APT package management tools

You can use the APT package management tools to update your local package index. Then, you can download and install the latest Python using the following commands as a root user:

$ apt-get update -y
$ apt-get install python3 -y  

The following packages will automatically be downloaded and installed, as these are the prerequisites for Python 3 installation:

libpython3-dev libpython3.4 libpython3.4-dev python3-chardet

python3-colorama python3-dev python3-distlib python3-html5lib

python3-requests python3-six python3-urllib3 python3-wheel python3.4-de

Once the prerequisites are installed, it will download and install Python on your system.

Using source code

You can download the source code from the GitHub repository and compile the software from the source, as follows:

  1. Before you begin, let's first install the dependencies of Git; execute the following commands as the root user to do so:
      $ apt-get update -y 
      $ apt-get install build-essential checkinstall libreadline-gplv2-
dev libncursesw5-dev libssl-dev libsqlite3-dev tk-dev libgdbm-
dev libc6-dev libbz2-dev -y
  1. Now, let's download Python (https://www.python.org) using the following command from Python's official website. You can also download the latest version in place, as specified:
      $ cd /usr/local
      $ wget https://www.python.org/ftp/python/3.4.6/Python-3.4.6.tgz  
  1. Now, let's extract the downloaded package with this command:
      $ tar xzf Python-3.4.6.tgz  
  1. Now we have to compile the source code. Use the following set of commands to do so:
      $ cd python-3.4.6
      $ sudo ./configure
      $ sudo make altinstall  
  1. The preceding commands will install Python on your system at /usr/local. Use the following command to check the Python version:
      $ python3 -V                                                                                                                                                                             
        Python 3.4.6

Installing Python on Windows

Now, let's see how we can install Python on Windows 7 or later systems. Installation of Python on Windows is pretty simple and quick; we will be using Python 3 and above, which you can download from Python's download page (https://www.python.org/downloads/windows/). Now perform the following steps:

  1. Download the Windows x86-64 executable installer based on your system configuration, and open it to begin the installation, as shown in the following screenshot:
  1. Next, select the type of installation you want to go with. We will click on Install Now to go for the default installation, as seen in this screenshot:
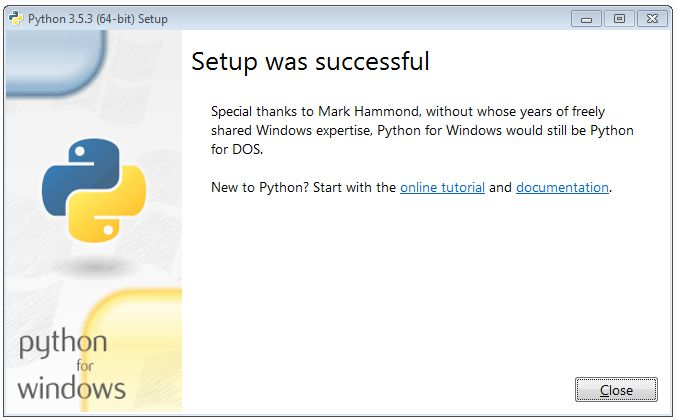
  1. Once the installation is complete, you will see the following screen:

Great! We have successfully installed Python on Windows.

Installing Python on Mac

Before we begin with the Python installation, we need to install the command-line tools for OS X. If you have already installed the command-line tools at the time of Git installation, you can ignore this step.

Installing the command-line tools for OS X

In order to install any developer, you need to install Xcode (https://developer.apple.com/xcode/); you will need to set up an account on connect.apple.com to download the respective Xcode version tools.

However, there is another way you can install command-line tools using a utility, which comes along with an Xcode called xcode-select, which is shown here:

% xcode-select --install  

The preceding command should trigger an installation wizard for the command-line tools. Follow the installation wizard, and you will be able to install it successfully.

Installing Python for OS X

Installing Python on Mac is quite similar to how you install Git on Windows. You can download the Python package from the official website (https://www.python.org/downloads/). Proceed with the following steps:

  1. Once the Python package is downloaded, double-click on it to begin the installation; it will show the following pop-up window:
  1. The next step will be about the release note and the respective Python version information:
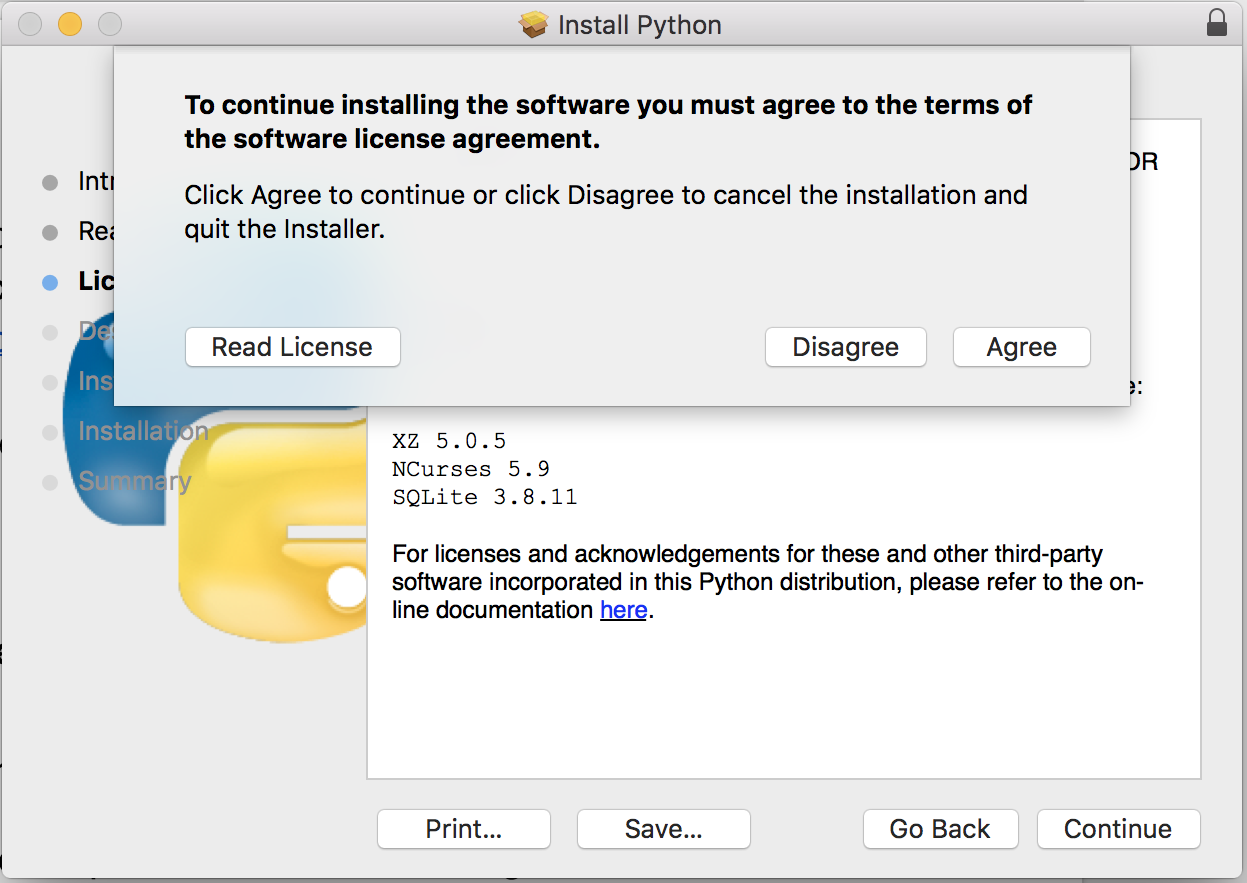
  1. Next, you will need to Agree with the license, which is mandatory for installation:
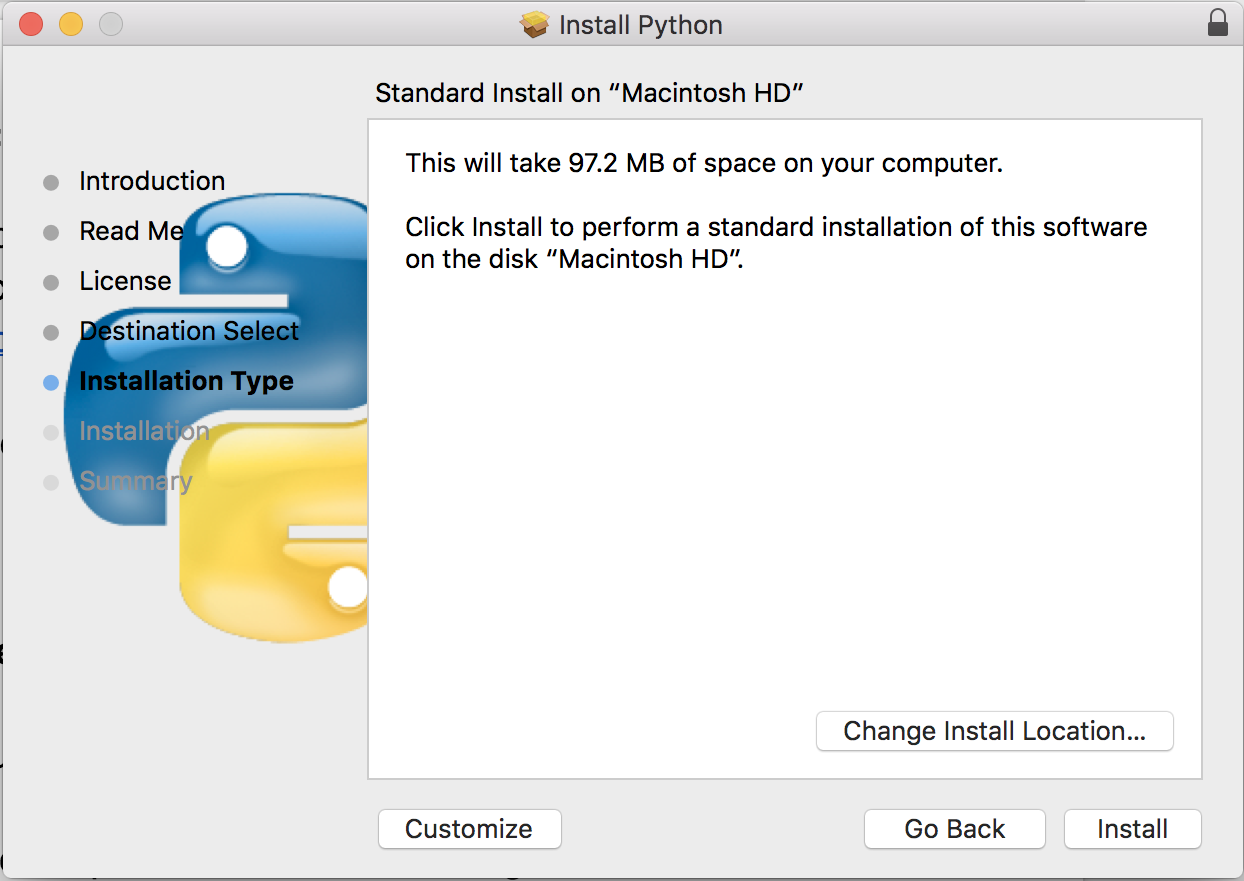
  1. Next, it will show you the installation-related information, such as the disk occupied and the path. Click on Install to begin:
  1. Once the installation is complete, you will see the following screen:
  2. Use the following command to see whether the Python version is installed:
      % python3 -V  
Python 3.5.3

Great!! Python is successfully installed.

Getting familiar with the GitHub and Git commands

In this section, we will go through a list of Git commands, which we will be using frequently throughout the book:

  • git init: This command initializes your local repository once when you are setting it up for the first time
  • git remote add origin <server>: This command links your local <indexentry content="Git command:git remote add origin " dbid="164250" state="mod">directory to the remote server repository so that all the changes pushed are saved in the remote repository
  • git status: This command lists the files/directories that are yet to be added, or are modified and need to be committed
  • git add * or git add <filename>: This command adds files/directories so that <indexentry content="Git command:git add * or git add " dbid="164250" state="mod">they can be tracked, and makes them ready to be committed
  • git commit -m "Commit message": This command helps you commit your track changes in the local machine and generate the commit ID by which the updated code can be identified
  • git commit -am "Commit message": The only difference between the previous command and this command is that this opens a default editor to add the commit message based on an operating system such as Ubuntu (Vim) or Windows (Notepad++) after adding all the files to stage
  • git push origin master: This command pushes the last committed code from the local directory to the remote repository

Test everything to make sure our environment works.

Here we go. We have installed both Git and Python in the last section, which are needed to begin with building microservices. In this section, we will focus on testing the installed packages and try to get familiar with them.

The first thing we can do is to exercise the Git command, which fetches an external Python code from a repository (usually GitHub) over HTTPs, and copies it into our current workspace in the appropriate directory:

$ git clone https://github.com/PacktPublishing/Cloud-Native-
Python.git

The preceding command will create a directory named Cloud-Native-Python on your local machine; switch to the Cloud-Native-Python/chapter1 path from the current location.

We will need to install the requirements of the apps that are needed to run it. In this case, we just need the Flask module to be available:

$ cd hello.py
$ pip install requirements.txt

Here, Flask works as the web server; we will understand more about it in detail in the next chapter.

Once it is installed successfully, you can run the app using the following command:

$ python hello.py
* Running on http://0.0.0.0:5000/ (Press CTRL+C to quit)  

I think we are good to see the output, which is as follows:

$ curl http://0.0.0.0:5000/
Hello World!  

If you see this output, then our Python development environment is correctly set up.

Now it's time to write some Python code!