-
Book Overview & Buying
-
Table Of Contents

Developing Robust Date and Time Oriented Applications in Oracle Cloud
By :
Developing Robust Date and Time Oriented Applications in Oracle Cloud
By:
Overview of this book
Proper date and time management is critical for the development and reliability of Oracle Databases and cloud environments, which are among the most rapidly expanding technologies today. This knowledge can be applied to cloud technology, on premises, application development, and integration to emphasize regional settings, UTC coordination, or different time zones. This practical book focuses on code snippets and discusses the existing functionalities and limitations, along with covering data migration to the cloud by emphasizing the importance of proper date and time management.
This book helps you understand the historical background and evolution of ANSI standards. You’ll get to grips with data types, constructor principles, and existing functionalities, and focus on the limitations of regional parameters and time zones, which help in expanding business to other parts of the world. You’ll also explore SQL injection threats, temporal database architecture, using Flashback Technology to reconstruct valid database images from the past, time zone management, and UTC synchronization across regions.
By the end of this book, you’ll be able to create and manage temporal systems, prevent SQL injection attacks, use existing functionalities and define your own robust solutions for date management, and apply time zone and region rules.
Table of Contents (26 chapters)
Preface

Part 1: Discovering Oracle Cloud
 Free Chapter
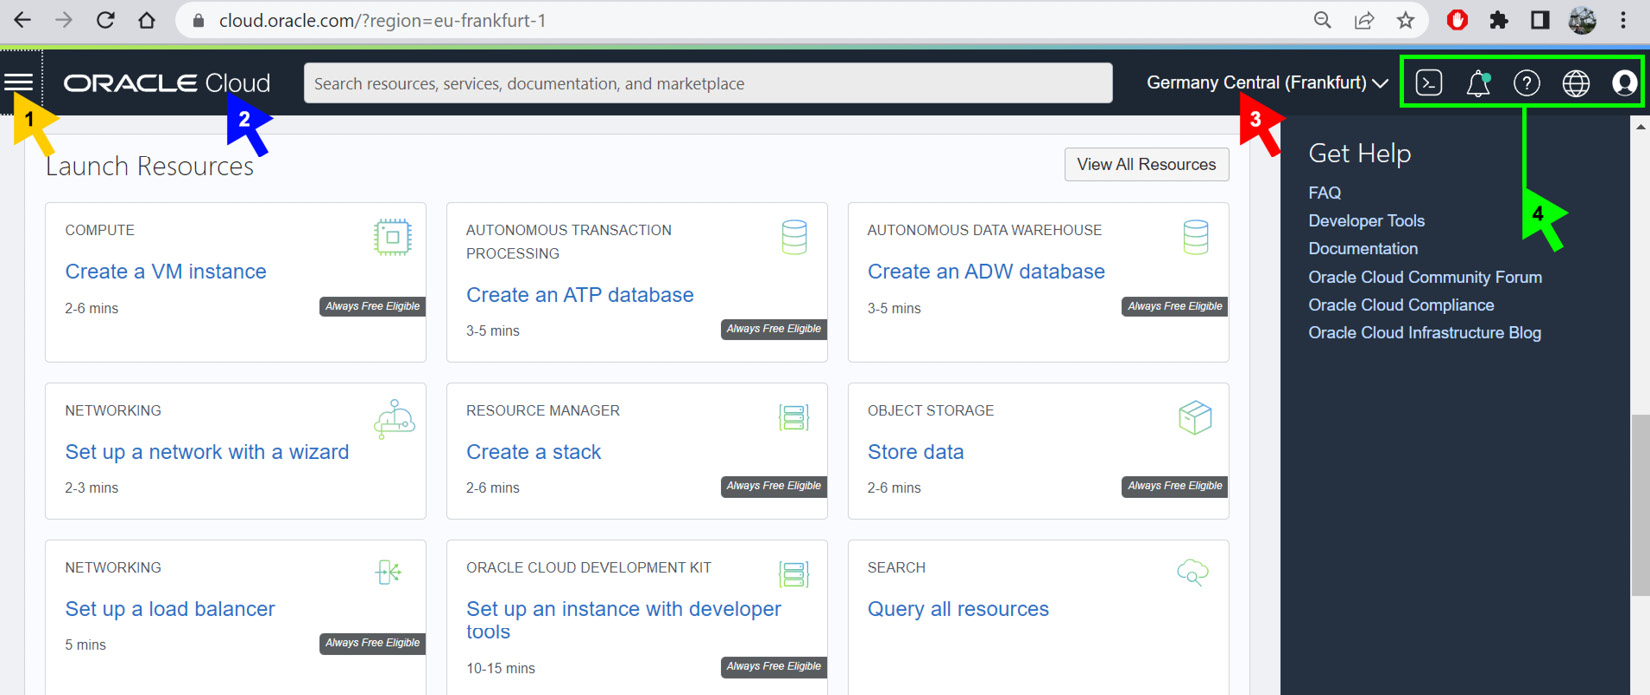
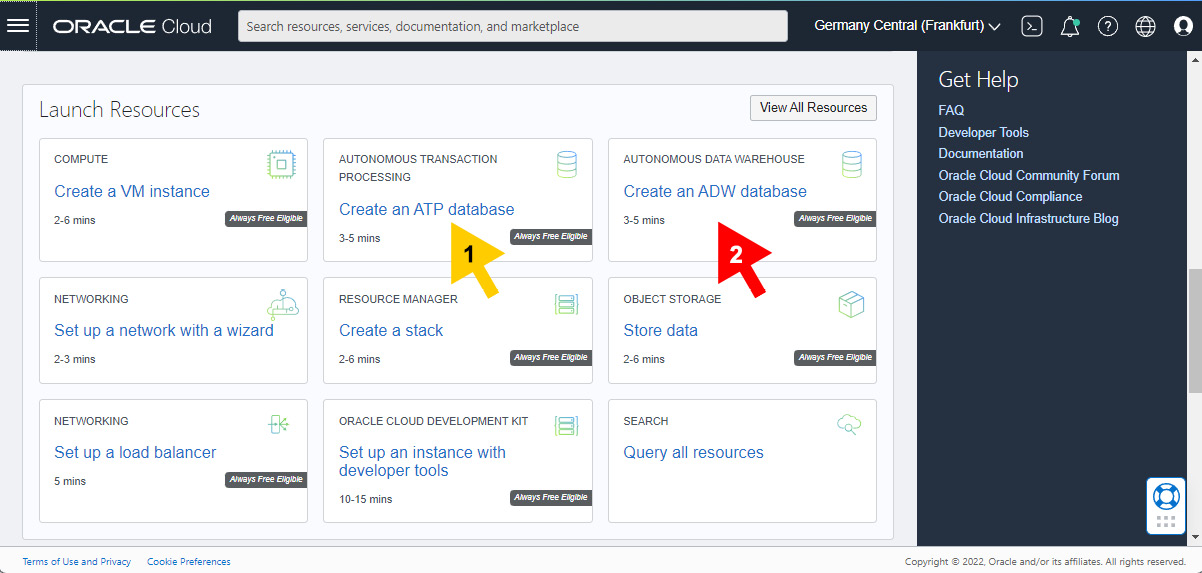
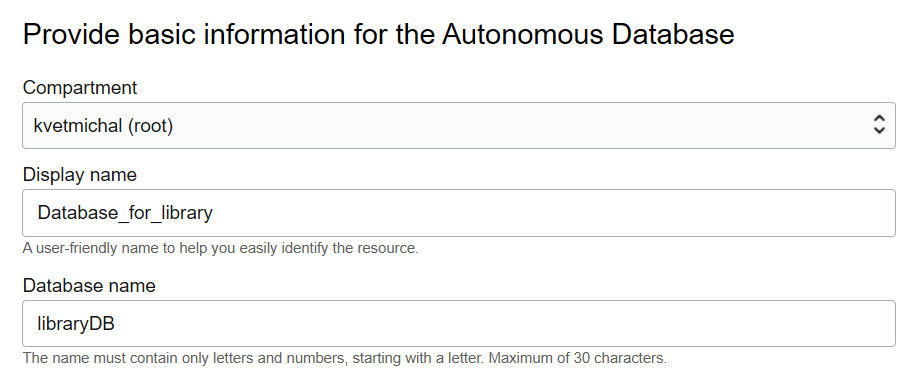
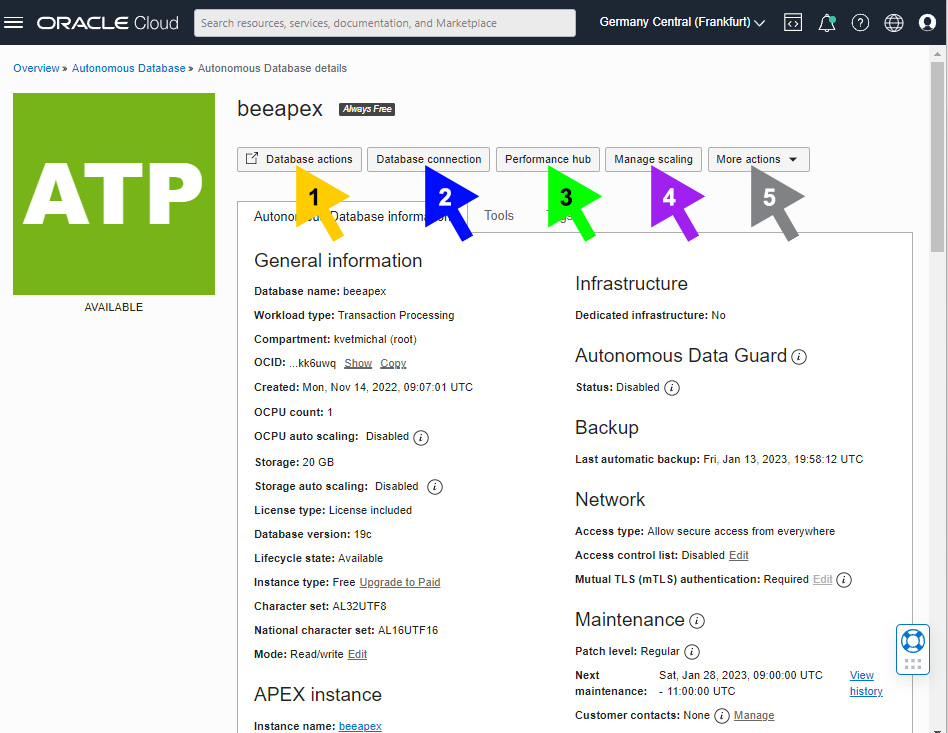
Chapter 1: Oracle Cloud Fundamentals
Chapter 2: Data Loading and Migration Perspectives
Part 2: Understanding the Roots of Date and Time
Chapter 3: Date and Time Standardization Principles
Chapter 4: Concepts of Temporality
Part 3: Modeling, Storing, and Managing Date and Time
Chapter 5: Modeling and Storage Principles
Chapter 6: Conversion Functions and Element Extraction
Chapter 7: Date and Time Management Functions
Chapter 8: Delving into National Language Support Parameters
Part 4: Modeling Validity Intervals
Chapter 9: Duration Modeling and Calculations
Chapter 10: Interval Representation and Type Relationships
Chapter 11: Temporal Database Concepts
Chapter 12: Building Month Calendars Using SQL and PL/SQL
Part 5: Building Robust and Secure Temporal Solutions
Chapter 13: Flashback Management for Reconstructing the Database Image
Chapter 14: Building Reliable Solutions to Avoid SQL Injection
Part 6: Expanding a Business Worldwide Using Oracle Cloud
Chapter 15: Timestamp Enhancements
Chapter 16: Oracle Cloud Time Zone Reflection
Assessments
Index