-
Book Overview & Buying
-
Table Of Contents

Getting Started with SpriteKit
By :
Getting Started with SpriteKit
By:
Overview of this book
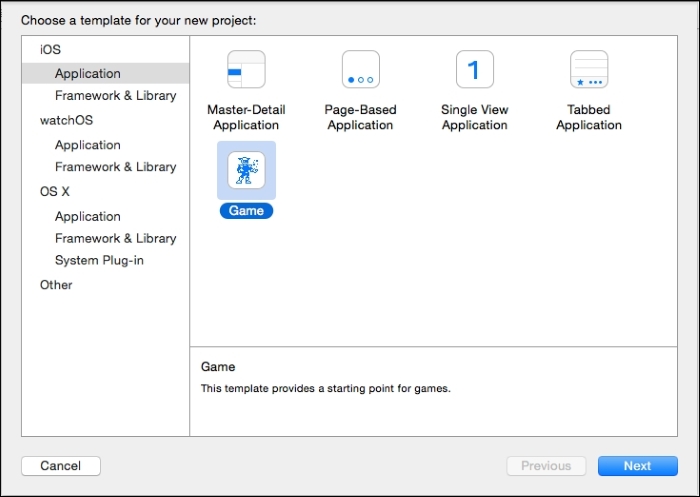
SpriteKit is Apple’s game engine to develop native iOS games. Strongly boosted by the Apple Inc., Cupertino, it has increased in popularity since its first release. This book shows you the solutions provided by SpriteKit to help you create any 2D game you can imagine and apply them to create animations that will highlight your existing apps.
This book will give you the knowledge you need to apply SpriteKit to your existing apps or create your own games from scratch.
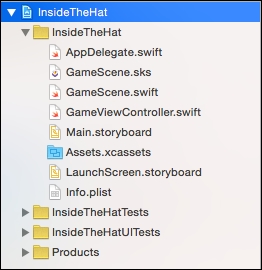
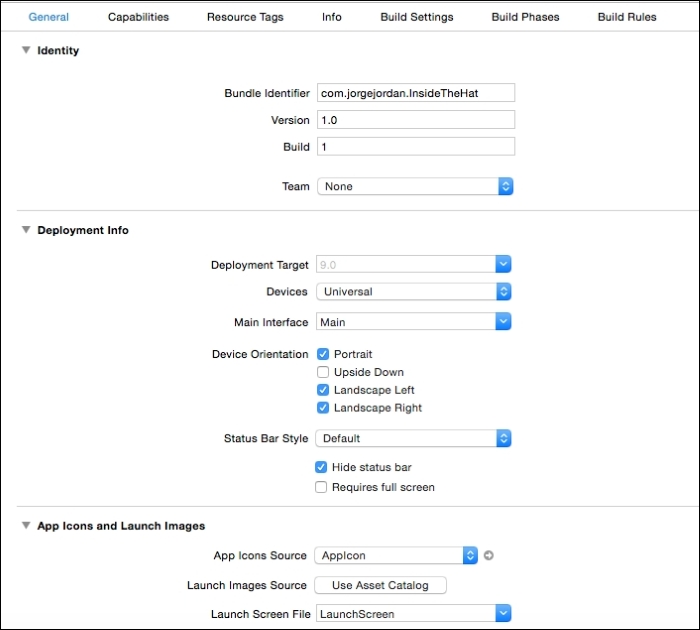
Throughout the book, you will develop a complete game. The beautiful designs implemented in the game in this book will easily lead you to learn the basis of 2D game development, including creating and moving sprites, and adding them to a game scene. You will also discover how to apply advanced techniques such as collision detection, action execution, playing music, or running animations to give a more professional aspect to the game. You will finish your first game by learning how to add a main menu and a tutorial, as well as saving and loading data from and to the player’s device.
Finally, you will find out how to apply some mobile games techniques such as accelerometer use or touch detection.
Table of Contents (8 chapters)
Preface

 Free Chapter
1. The First Step toward SpriteKit
2. What Makes a Game a Game?
3. Taking Games One Step Further
4. From Basic to Professional Games
5. Utilizing the Hardware and Graphics Processor
6. Auxiliary Techniques
Index