
Covers catch the reader's eye and convey information about the comic. Sure, they will tell you the title, the publisher, and perhaps the people who worked on the comic. They can also convey the subject matter and tone of the comic. Some elements of a cover will appear on each one that's made, so let's create a template to save time in our art process and apply it to our cover pages.
This recipe shows you how to create a cover, save it as a material, and then apply it as a template to a new file:
Open a blank page that has the default size (inner) margins set up.
Add a text or logo design for the comic title at the top of the page, resizing, rotating, or transforming as needed.
Add the name of the comic's author and/or artist, colorist, and so on as needed.
If a Paper layer is included in the current file, select it. Then delete the paper layer. The following screenshot is an example of what a cover template might include, such as comic title and logo, subtitle, author, and artist information:

Go to Edit | Register Layer as Template Material.
In the Material property window, enter Material name (for example,
Living Glory Bound Cover Template).Check the Material image thumbnail to ensure that all the elements that you wish to include in the template are shown.
Click on the arrow to the left of Material under Location to save material to open the material categories.
Navigate to Manga material | Framing template and click to select it as the location to save the cover template in.
Enter some search tags to find the cover template easily. Refer to this screenshot for suggestions:

Click on OK.
Go to File | New and create a new story file with multiple pages and a cover page.
Under the Cover page options, click on the Template checkbox.
Locate the cover template that you just created and select it. In the following screenshot, our saved cover template is visible:

Click on OK.
Then click on OK in the New dialog window to create the new story file, with the template for the front cover.
Before we can use a cover template, we have to create the cover. By laying out the title and any other elements that will be on each cover, we'll save time later on during the creation of our comic by not having to set the cover elements each time we create a new chapter or book.
By erasing the paper layer, we ensure that our template will show up in all new covers without a white background all around it. This will allow us to use other paper colors and draw directly behind the template to create our cover art.
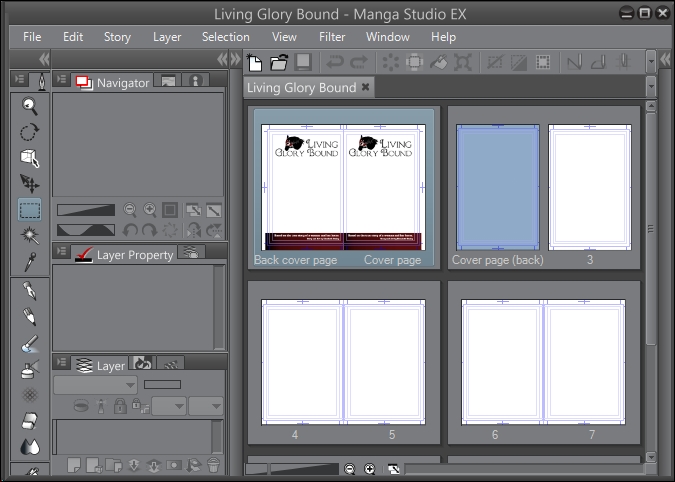
Currently, if we want to put a different image on the front and back cover, we have to go to the back cover, delete the layer containing the template, and then add the back cover images. As of Manga Studio EX 5.0.5, there is no way to use different templates on the front and back covers. As shown in this screenshot, the two-page spread cover has the same template on both the front and the back: