Book Image

Raspberry Pi Robotic Projects

By : Dr. Richard Grimmett
Book Image

Raspberry Pi Robotic Projects

By: Dr. Richard Grimmett

Overview of this book

<p>Robotics development is accelerating, and an amazing array of new hardware and software capabilities are available to anyone with an interest in the area. Robots will soon be a part of our everyday life, and it will soon be as important to know how they work as it is to know how a computer works. Raspberry Pi is a credit-card sized, fully capable PC that can be used for many of the things that your desktop PC does, such as spreadsheets, word processing, and games.</p> <p>This book starts with the essentials of turning on the basic hardware. It provides the capability to interpret your commands and have your robot initiate actions. By the time you are through, you’ll have robots that can speak, listen, and move in a number of amazing ways.</p> <p>This book is a step-by-step projects guide to unlocking some complex and interesting capabilities of Raspberry Pi. Teaching you to use Raspberry Pi from scratch, this book will discuss a wide range of capabilities that can be achieved with it. These capabilities include voice recognition, human-like speech simulation, computer vision, motor control, GPS location, and wireless control. You will then learn how to combine these capabilities to create your own robotics projects.</p> <p>By the time you have completed this book, you will be able to use Raspberry Pi to create some complex and fascinating robotics projects with a vast array of capabilities.</p>
Table of Contents (18 chapters)
Raspberry Pi Robotic Projects
Credits
About the Author
About the Reviewers
www.PacktPub.com
Preface
Index

Connecting the USB camera to Raspberry Pi and viewing the images


The first step in enabling computer vision is connecting the USB camera to the USB port. I am using a Logitech C110 camera in my example. To access the USB webcam, I like to use a Linux program called guvcview. Install this by entering sudo apt-get install guvcview.

Connect your USB camera and make sure your LAN cable is plugged in. Then, apply power to Raspberry Pi. After the system is booted, you can check to see if Raspberry Pi has found your USB camera. Go to the /dev directory and type ls. You should see something as shown in the following screenshot:

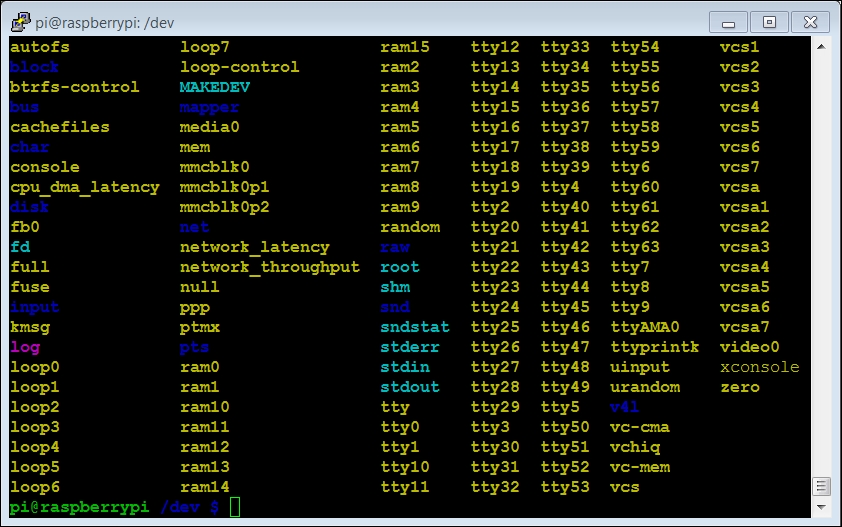
Look for video0, as this is the entry for your webcam. If you see it, the system knows your camera is there.

Now, let's use guvcview to see the output of the camera. Since it will need to output some graphics, you either need to use a monitor connected to the board, as well as a keyboard and mouse, or you can use vncserver as described in Chapter 1, Getting Started with Raspberry...