Install and open androidVNC on your device. You will be presented with a first activity user interface asking for the details of the connection. Here, you should provide Nickname for the connection, Password you enter when you run the x11vnc –storepasswd command, and the IP Address of the Pi that you found out using the ifconfig command. Initiate the connection by pressing the Connect button, and you should now be able to see the Pi desktop on your Android device.
In androidVNC, you should be able to move the mouse pointer by clicking on the screen and under the options menu in the androidVNC app, you will find out how to send text and keys to the Pi with the help of Enter and Backspace.
Note
You may even find it convenient to connect to the Pi from another computer. I recommend using RealVNC for this purpose, which is available on Windows, Linux, and Mac OS.
In order to use a Wi-Fi dongle on the Pi, first of all, open the wpa_supplicant configuration file using the nano editor with the following command:
sudo nano /etc/wpa_supplicant/wpa_supplicant.conf
Add the following to the end of this file:
network={
    ssid="THE ID OF THE NETWORK YOU WANT TO CONNECT"
    psk="PASSWORD OF YOUR WIFI"
}
Note
I assume that you have set up your wireless home network to use WPA-PSK as the authentication mechanism. If you have another mechanism, you should refer to the wpa_supplicant documentation. LXDE provides even better ways to connect to Wi-Fi networks through a GUI. It can be found on the upper-right corner of the desktop environment on the Pi.
Now, we have connected to the Pi from our device, which we need to connect to the same network as the Pi. However, most of us would like to connect to the Pi from around the world as well. To do this, first of all, we need to now the IP address of the home network assigned to us by our network provider. By going to http://whatismyipaddress.com URL, we can figure out what our home network's IP address is. The next step is to log in to our router and open up requests to the Pi from around the world. For this purpose, we will use a functionality found on most modern routers called port forwarding.
Note
Be aware of the risks contained in port forwarding. You are opening up access to your Pi from all around the world, even to malicious users. I strongly recommend that you change the default password of the user pi before performing this step. You can change passwords using the passwd command.
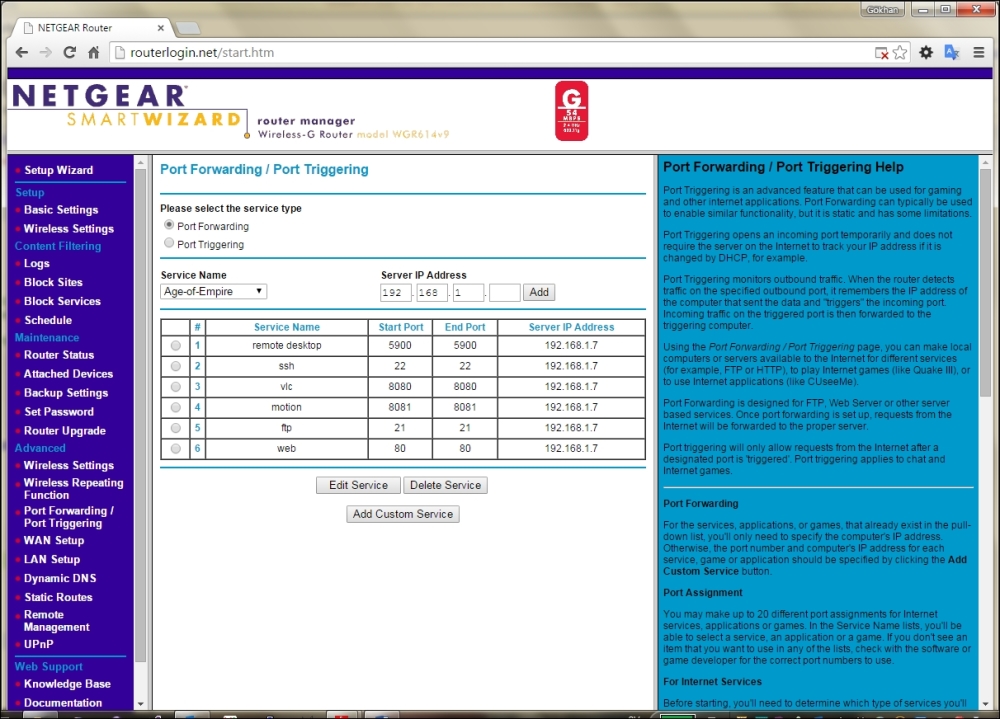
By logging onto the router's management portal and navigating to the Port Forwarding tab, we can open up requests to the Pi's internal network IP address, which we have figured out previously, and the default port of the VNC server, which is 5900. Now, we can provide our external IP address to androidVNC from anywhere around the world instead of an internal IP address that works only if we are on the same network as the Pi.

Port Forwarding settings on Netgear router administration page


