Book Image

iOS 12 Programming for Beginners - Third Edition

By : Craig Clayton
Book Image

iOS 12 Programming for Beginners - Third Edition

By: Craig Clayton

Overview of this book

Want to build iOS 12 applications from scratch with the latest Swift 4.2 language and Xcode 10 by your side? Forget sifting through tutorials and blog posts; this book is a direct route to iOS development, taking you through the basics and showing you how to put principles into practice. Take advantage of this developer-friendly guide and start building applications that may just take the App Store by storm! If you’re already an experienced programmer, you can jump right in and learn the latest iOS 12 features. For beginners, this book starts by introducing you to iOS development as you learn Xcode and Swift. You'll also study advanced iOS design topics, such as gestures and animations, to give your app the edge. You’ll explore the latest Swift 4.2 and iOS 12 developments by incorporating new features, such as the latest in notifications, custom-UI notifications, maps, and the recent additions in Sirikit. The book will guide you in using TestFlight to quickly get to grips with everything you need to get your project on the App Store. By the end of this book, you'll be ready to start building your own cool iOS applications confidently.
Table of Contents (27 chapters)
Free Chapter
1
Getting Familiar with Xcode

Creating a data model

The data model is where you create your app's model objects and their properties. For our project, we only need to create one model object, called Review. Let's create a managed object model now:

  1. In the Navigator panel, right-click on the Misc folder and create a new group, called Core Data.
  2. Next, right-click this new Core Data folder and click New File.
  3. Inside the Choose a template for your new file screen, select iOS at the top and then scroll down to the Core Data section. From there, select Data Model. Then, hit Next:
  1. Name the file LetsEatModel and click Create.
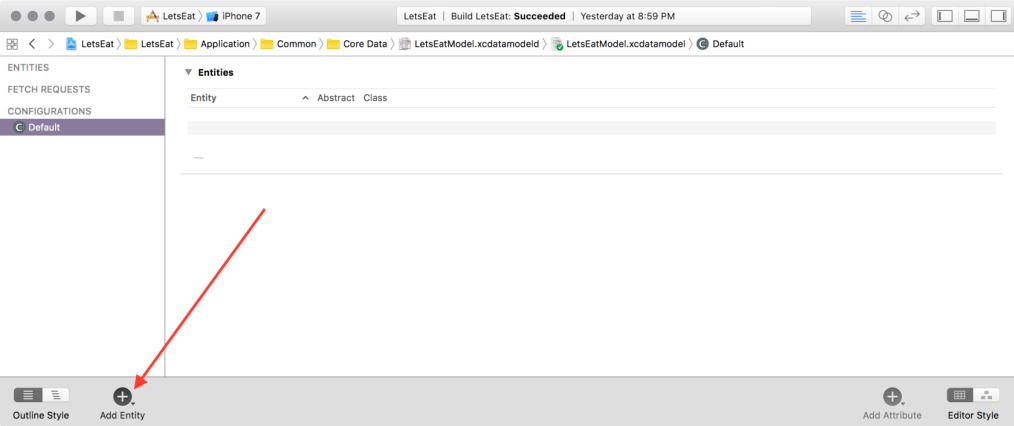
  2. Click Add Entity in the screen that appears:

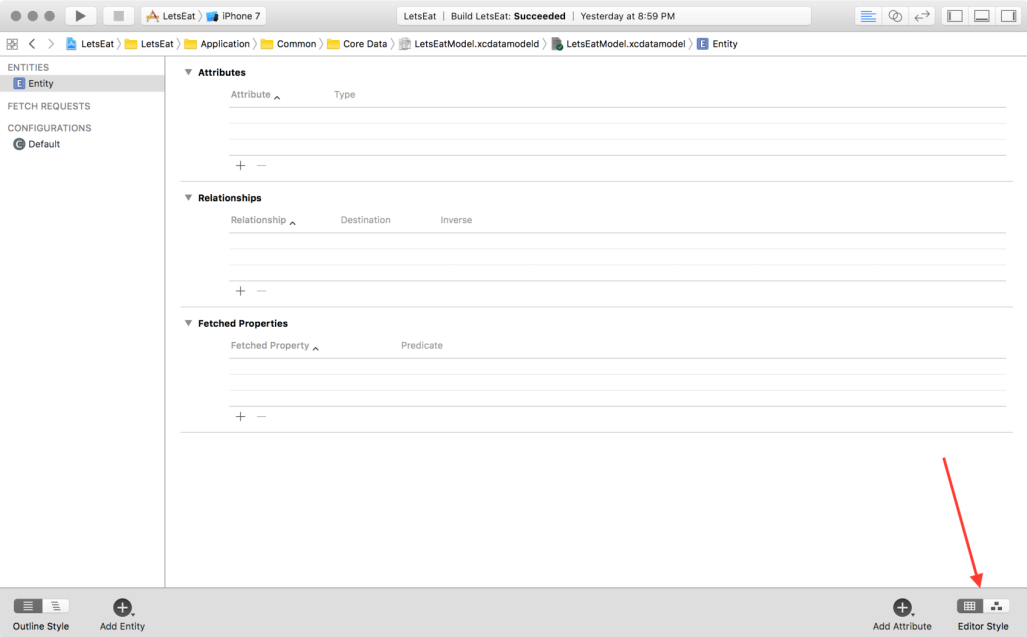
Then, in the bottom-right corner of the new screen, change the Editor Style to Graph Style:

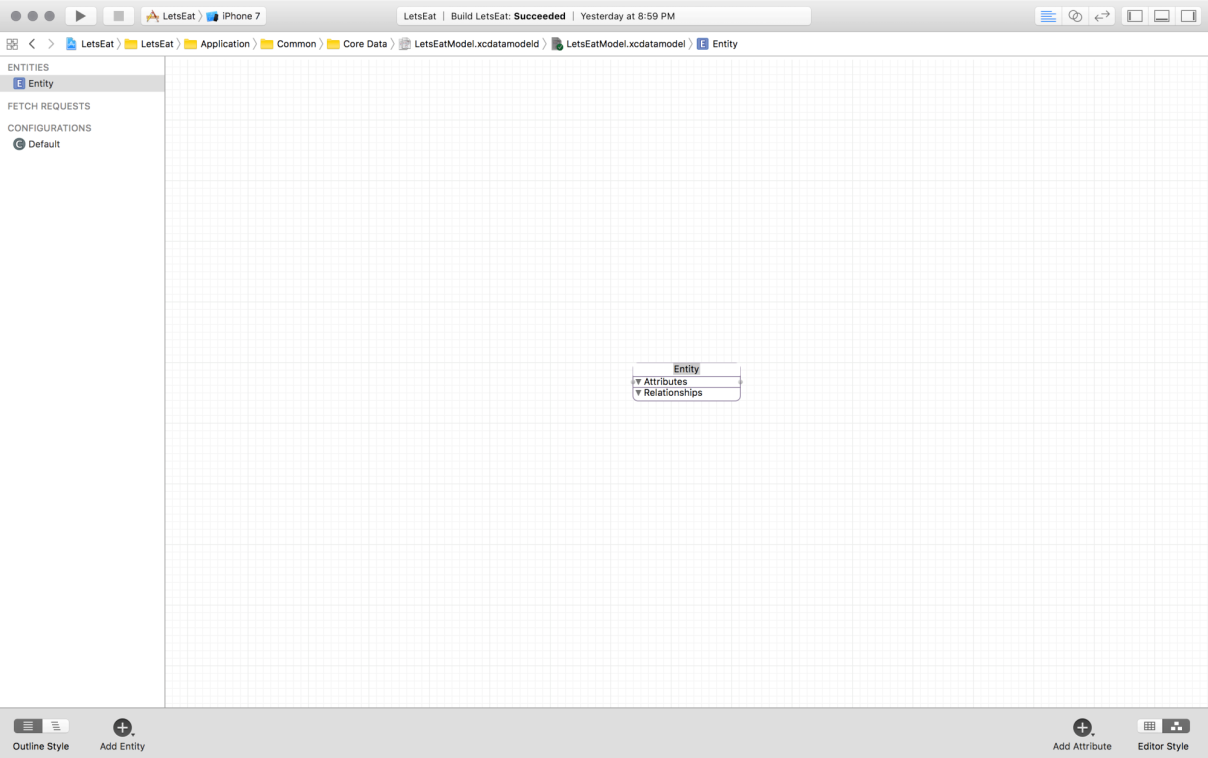
In the Graph Style, double-click on Entity in the box in the middle of the graph to change your entity's name:

  1. Update the text to say...