
In four easy steps, you can install Netcat and get it set up on your system, whether it is Windows, Linux, Unix, or Mac OS X. For brevity, we will be focusing on Windows and Debian distributions of Linux. Mac OS X has Netcat installed by default, albeit without the DGAPING_SECURITY_HOLE option enabled (which is explained later). For information on recompiling Netcat for Mac OS X (BSD) with the DGAPING_SECURITY_HOLE option, please refer to the build instructions in the man pages.
The requirements for Netcat are reflective of the good old days of computing, when Bill Gates was famously (and also incorrectly) attributed to the 640 K memory ceiling on personal computing needs (see http://www.wired.com/politics/law/news/1997/01/1484). While Netcat is not quite that lightweight, let's examine the requirements.
One of the most attractive features of using Netcat in your environment is the incredibly small footprint that the utility occupies on both the client and the listener. If you are not completely comfortable in a Command-line Interface (CLI) environment, fear not. Most of the heavy lifting for installing Netcat is done in the steps leading up to the installation.
Before diving in with both feet, there is some minor historical context that must be imparted to you. As mentioned before, Netcat is an oldie, but goodie. One of the byproducts of its longevity is how the utility has been maintained over the years. There have essentially been three major paths that the utility has evolved through. The first is the original Unix Netcat that was released by Hobbit. This version will contain the Version 1.10 (or 1.11 in some instances). The second major version is the GNU Netcat version that is hosted on SourceForge's web-based source code repository. The GNU version's goal is to have full compatibility with all of the functions of Unix Netcat Version 1.10. Finally, this book would be remiss to not include references to the Nmap project's version of Netcat, simply called Ncat. According to the Nmap Project website, Ncat was written for the Nmap Project as a much-improved reimplementation of the venerable Netcat (Nmap Project).
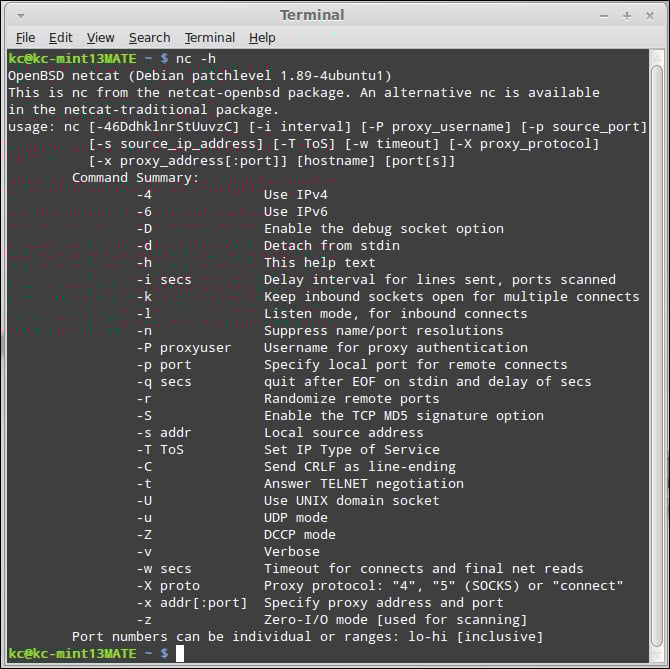
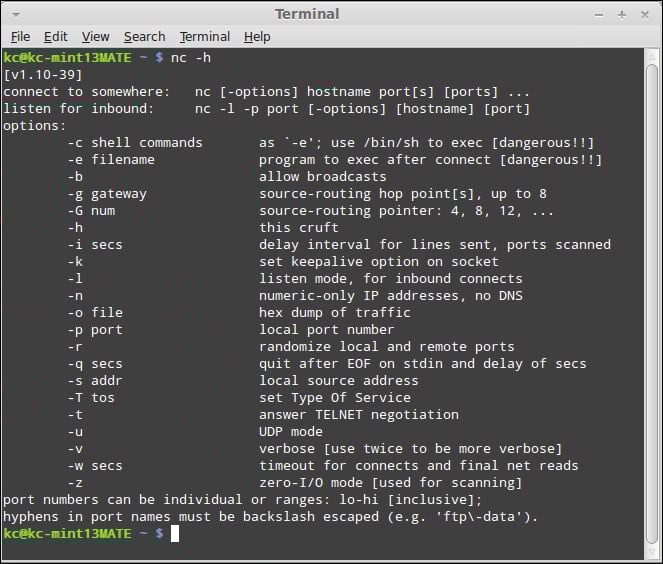
The last thing you need to be aware of regarding the original Unix Netcat is that some flavors of Linux and Unix may have recompiled the original Unix Netcat without the ability to execute programs upon connection to the listener. The DGAPING_SECURITY_HOLE option allows an operator to execute programs using the –e switch to do a number of powerful tasks, including launching a shell. As a result, those precompiled, preinstalled versions are considered "safer" than the other versions that allow the –e switch. If you were to search for "Netcat DGAPING_SECURITY_HOLE" in your favorite search engine, you will undoubtedly see the equivalent of a hamster slap fight over the risks and benefits of the DGAPING_SECURITY_HOLE option. To determine whether your instance of Netcat was compiled with the DGAPING_SECURITY_HOLE option, simply type nc –h in the command line. The following screenshot demonstrates the output of a Netcat instance without the DGAPING_SECURITY_HOLE (notice the absence of the –e switch):
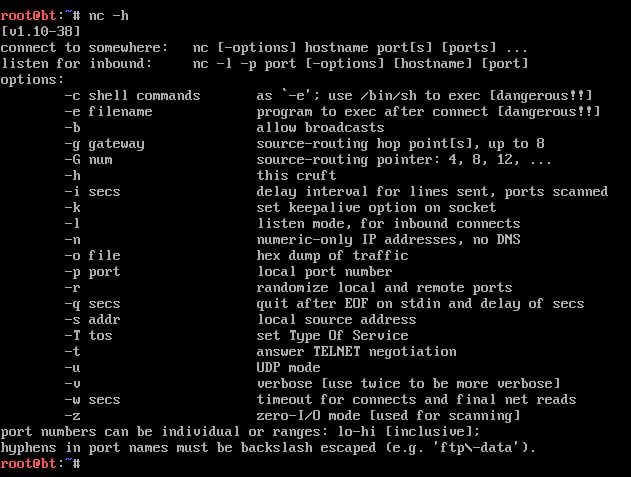
Conversely, the following screenshot demonstrates the Netcat utility with the DGAPING_SECURITY_HOLE option enabled:
Netcat is a relatively easy program to obtain, configure, and install. In fact, most distributions of Unix and Linux have a precompiled version of Netcat already installed and configured. We will briefly discuss the primary reason why you may want to recompile your instance of Netcat in a bit, but for now, let's focus on the requirements to get you up and running quickly.
Fortunately, the distributions I am providing links to in this section all have the DGAPING_SECURITY_HOLE option enabled. This includes the Unix Netcat, GNU Netcat, and, of course, Ncat for both Windows and Unix.
Before you obtain and install Netcat, you will need to check that you have all of the required elements, listed as follows:
Disk space: 300 KB free (minimum). You read that correctly. On Windows, the
ncfolder, including all of the source and help files, occupies 280 KB on disk. For Windows installations, once you are done extracting the files, the only required file isnc.exe, which weighs in at 60 KB.Memory: 2 MB (minimum), 8 MB (recommended).
Windows distributions are relatively straightforward, once you find the archive to download from.
Finding the Windows binaries has proven somewhat difficult and unreliable, as the most common distribution point, formerly located at http://www.vulnwatch.org/netcat/nc111nt.zip appears to have gone offline and the binary is not available. Fret not, in doing a search for nc111nt.zip on my favorite search engine, I was able to locate two mirror sites that appear to be both reliable and committed to hosting the binary. Please check out one of the following sites:
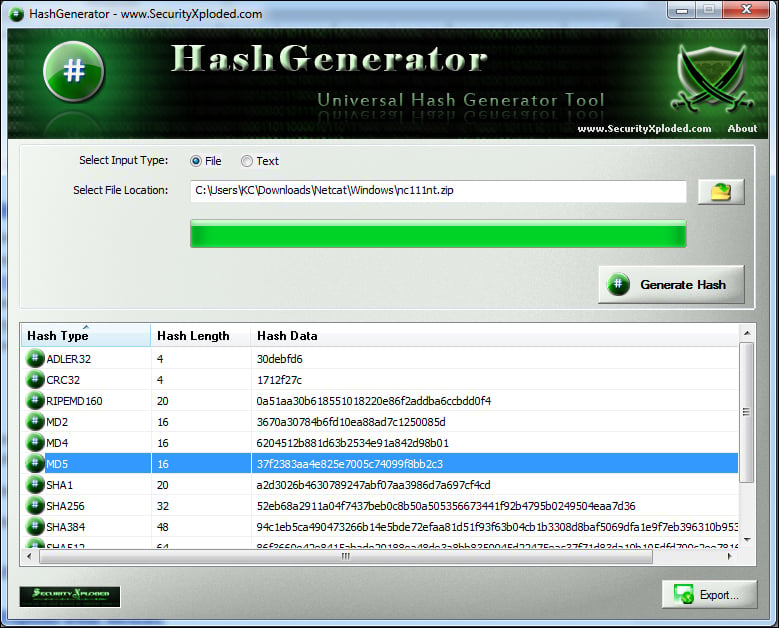
For the purpose of our exercises, we will be using the version from these sites, both of which calculated an MD5 hash value of 37f2383aa4e825e7005c74099f8bb2c3, as shown in the following screenshot (special thanks to the Security Xploded team for creating an awesome hash generator tool):
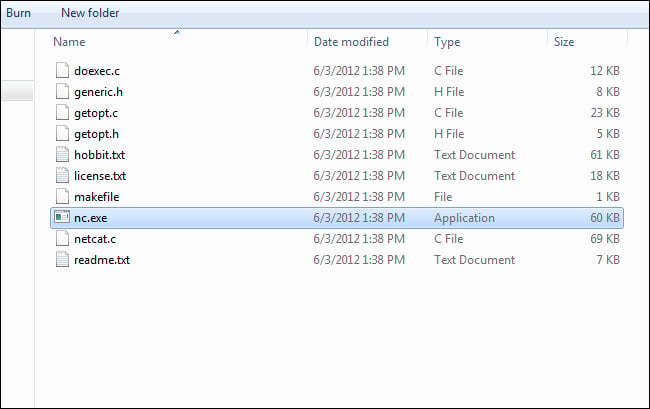
For Windows binaries, simply double-click on the nc111nt.zip file you downloaded in Step 2 – downloading Netcat from the Internet. The only file that is required to run is nc.exe, located in the extracted folder as shown in the following screenshot:
Once this is completed, you can verify the success of compilation and installation by typing the nc –h command in the command prompt.
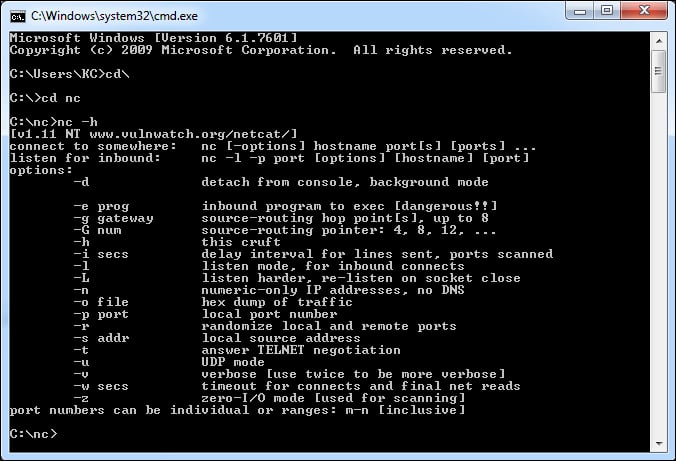
If your screen looks similar to what is shown in the preceding screenshot, then you have successfully implemented Netcat on the Windows platform. From this point, you can continue to explore other distribution installation instructions, or skip ahead to the next section where we will actually start working with the tool.
For Linux/Unix installations, you may find it easier or slightly more difficult to get up and running with Netcat. Today, many distributions of Linux (as well as Mac OS X, based on BSD) have a version of Netcat preinstalled. However, the installed version may not suit your exact needs; therefore, let's examine a couple of different approaches to getting the right version on your Linux/Unix machine.
In my experience, most distributions of Linux have the Unix version of Netcat available within the package management applications on your particular distribution. However, there may be a time when you will want to grab the source from a trusted location. The following locations host the binaries:
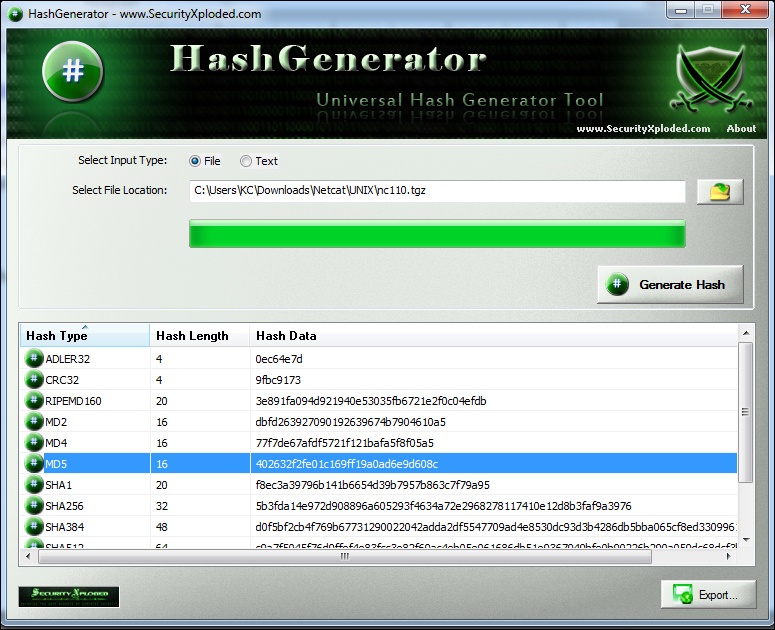
The MD5 hash produced by this file is 402632f2fe01c169ff19a0ad6e9d608c, as shown in the following screenshot:
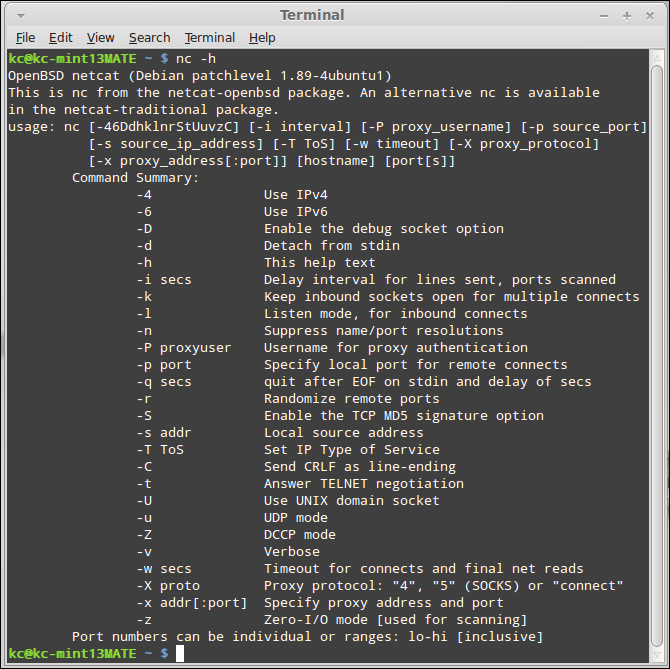
As mentioned earlier, most distributions of Linux have Netcat installed by default. In this example, I am using Linux Mint 13, with the MATE desktop. In my case, the version of Netcat that I am running by default is an OpenBSD version that has the DGAPING_SECURITY_HOLE option disabled. Since we will be exploring this option in future exercises, I will need to install the proper version. In later examples, I will show you how to compile and install Netcat from a source; however, in this example, I will use Linux Mint's Package Manager to install the correct version. The following screenshot shows the default Netcat installation; notice the text that explains that there is another version available in the Netcat-traditional package (line 3):
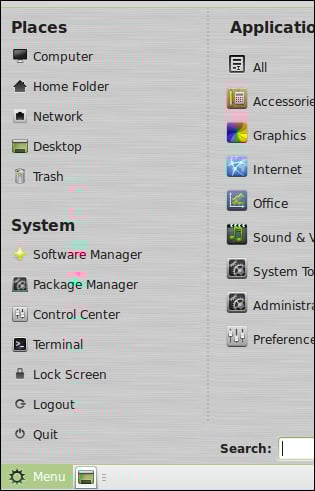
Before we install the correct Netcat binaries, we will go ahead and remove the old version. To do this, you can either issue the apt-get command from the command line, or simply launch your package manager and have the script do it for you. We will take the GUI route, probably much to the chagrin of Linux purists. For those of you wanting to remove the package from the command line, simply type the command sudo apt-get remove --purge netcat-openBSD, type your sudo password, and select Y to confirm. However, assuming zero experience in Linux, from the MATE desktop, we will first select the Package Manager application as shown in the following screenshot:
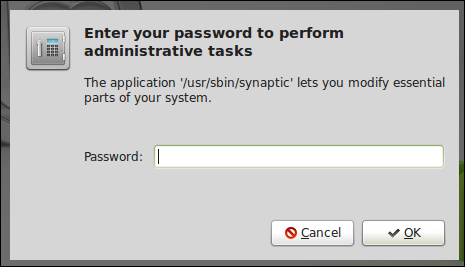
Because Synaptic is modifying your system, you will likely be required to enter your sudo credentials as shown in the following screenshot:
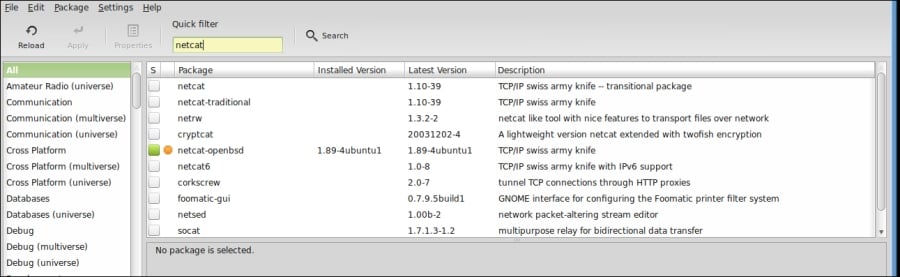
A listing of software packages will appear. By entering netcat in the search bar, you will see both the netcat-openbsd package and the netcat-traditional package. The green box in the following screenshot shows that netcat-openbsd is being installed currently:
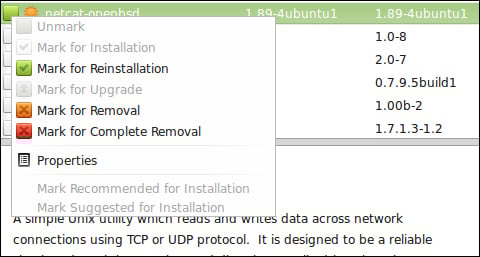
We will mark the netcat-openbsd package for complete removal using the right mouse button, as demonstrated in the following screenshot:
The square will turn from green to red to indicate this, as shown in the following screenshot:

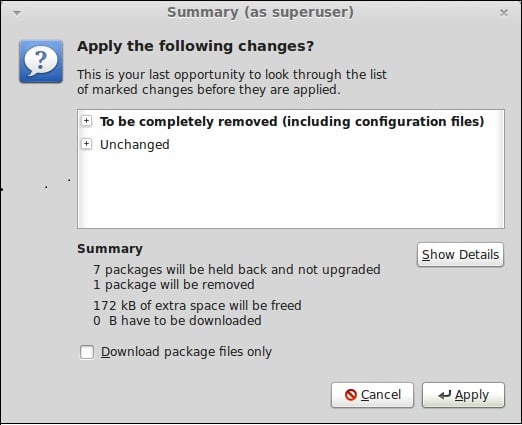
Click on the Apply button. Synaptic will tell you what the results of the actions will be, and you will be presented with the image in the following screenshot:
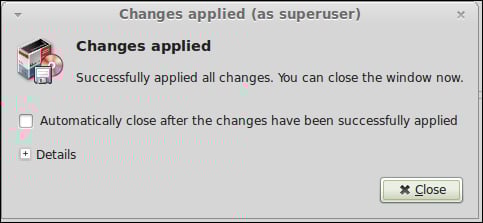
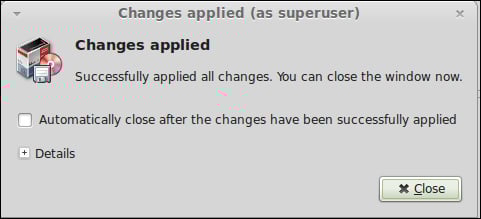
After we apply to commit the complete removal of the netcat-openbsd package, the package manager will execute the requested actions and, when completed, shows you the feedback as displayed in the following screenshot:
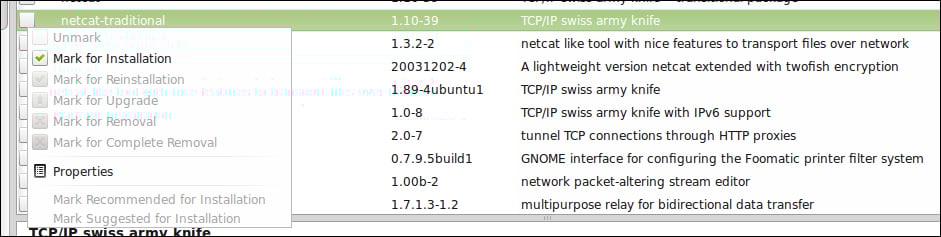
Now we will simply install the netcat-traditional package using the same technique. If you want to install from the command line, simply type sudo apt-get install netcat-traditional, and hit Enter. The following screenshot demonstrates marking the netcat-traditional package for installation with the right mouse button:
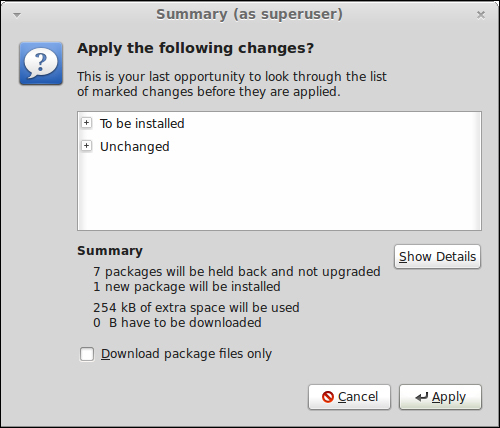
In the next screenshot, I demonstrate what you should see when you apply the installation.
Finally, the following screenshot shows the result of the operation:
Once this is completed, you can verify the success of compilation and installation by typing the nc –h command in the command prompt. If your screen looks similar to the following screenshot, you have successfully installed the utility. Feel free to stick around while we install the GNU Netcat utility, or skip ahead to the next section.
Keep in mind that the Hobbit/Unix version of Netcat is not centrally supported or maintained. Therefore, you may want to learn and begin keeping up with the currently supported and maintained versions from the GNU Netcat project.
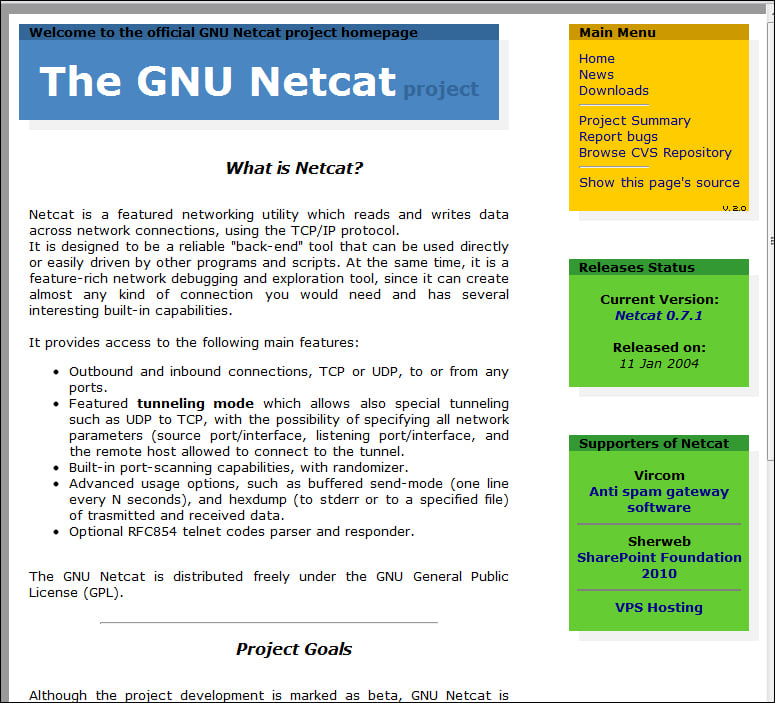
Finding the GNU Netcat is very simple, as its source is being maintained on the SourceForge web-based source code repository. To download GNU Netcat, navigate to http://netcat.sourceforge.net as shown in the next screenshot, and select the download link as displayed in the upper-right corner of The GNU Netcat project page:
When selecting the download link, you will be presented with a page that looks similar to the following screenshot, allowing you to select both the RPM and compressed archive files:
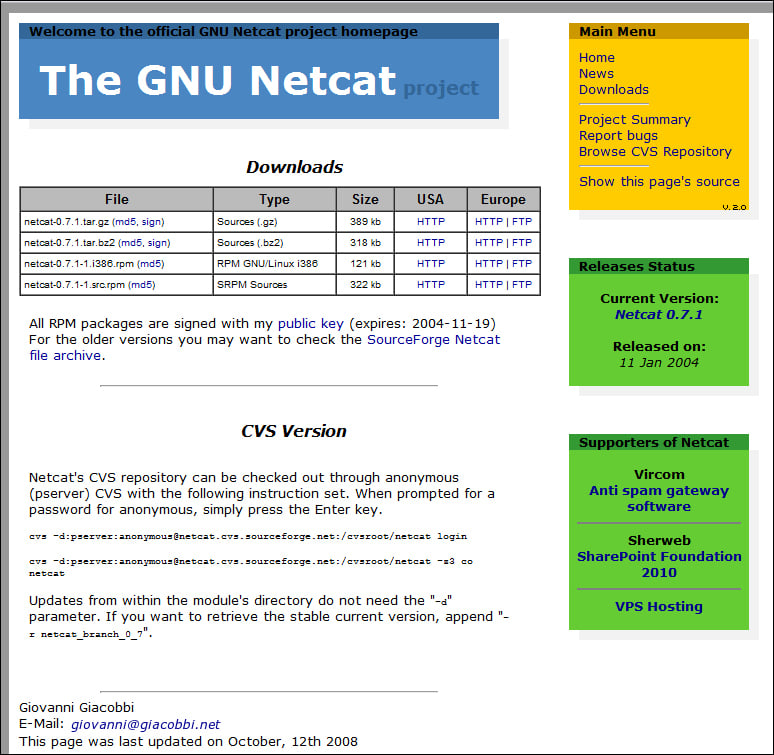
Simply select the desired distribution and you are off to the races. Unlike the Unix Netcat implementation, the GNU Netcat distributions provide the MD5 hashes for you directly on the site, so please verify your download before installing to make sure there are no errors and no tinkering has been done to the files.
Now, for the sake of consistency, we downloaded the package using our trusted web browser. However, just to change things up a bit, we will use a different means for compiling and installing GNU Netcat using our trusted Command Line Interface (CLI). If you have never compiled and installed a package from a source, don't worry. We will be getting dirt under our fingernails, but it will be a good experience. So let's do it!
From your Linux machine, either use the wget command or simply browse to the GNU Netcat download URL. In the command line, type the following command:
wget http://sourceforge.net/projects/netcat/files/netcat/0.7.1/netcat-0.7.1.tar.gz
Once the archive is downloaded, navigate to the directory, and type in the following commands, as shown in the next screenshot:
tar –xzf netcat-0.7.1.tar.gz
cd Netcat-0.7.1
./configure
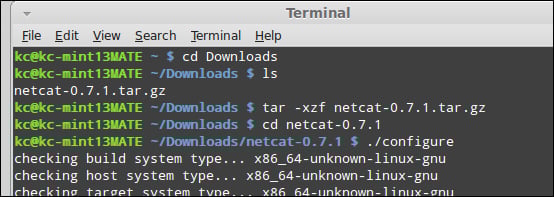
After the system does its thing (several lines of text will fly by), you will return to the shell prompt. As shown in the next screenshot, type the following command:
make

Finally, type the following command to install the compiled binaries, as shown in the next screenshot:
sudo make install


The Nmap Project integrates Ncat with their Nmap application, so installing Ncat is as simple as installing Nmap. For our purposes, the specific installation instructions for Nmap are outside of the scope of this book; however, you can find the download page for Nmap and Ncat at http://www.nmap.org/download.html.
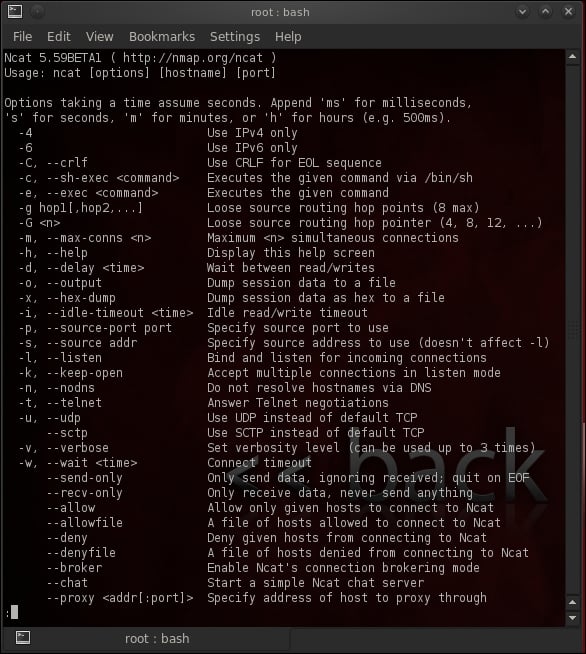
Just so you can see the similarities between the Unix and GNU Netcat utilities, the screenshot that follows shows the first page of options. In this screenshot, I am using my personal favorite, Linux distribution, BackTrack, which can be found at http://www.backtrack-linux.org. Important to note that while the other versions of Netcat are launched using the nc executable, the Nmap Project's utility is launched from the command ncat.
By this point, you should have at least one working installation of Netcat and are free to play around and discover more about it. If we did not cover your specific operating system or Linux distribution, please refer to your distribution's man pages. However, we will continue under the assumption that when we flip over to the next section, we will be looking at roughly the same things. So, are we ready to actually get underneath the hood?