-
Book Overview & Buying
-
Table Of Contents

Mastering RStudio: Develop, Communicate, and Collaborate with R
By :
Mastering RStudio: Develop, Communicate, and Collaborate with R
By:
Overview of this book
RStudio helps you to manage small to large projects by giving you a multi-functional integrated development environment, combined with the power and flexibility of the R programming language, which is becoming the bridge language of data science for developers and analyst worldwide. Mastering the use of RStudio will help you to solve real-world data problems.
This book begins by guiding you through the installation of RStudio and explaining the user interface step by step. From there, the next logical step is to use this knowledge to improve your data analysis workflow. We will do this by building up our toolbox to create interactive reports and graphs or even web applications with Shiny. To collaborate with others, we will explore how to use Git and GitHub and how to build your own packages to ensure top quality results. Finally, we put it all together in an interactive dashboard written with R.
Table of Contents (12 chapters)
Preface

 Free Chapter
1. The RStudio IDE – an Overview
2. Communicating Your Work with R Markdown
3. R Lesson I – Graphics System
4. Shiny – a Web-app Framework for R
5. Interactive Documents with R Markdown
6. Creating Professional Dashboards with R and Shiny
7. Package Development in RStudio
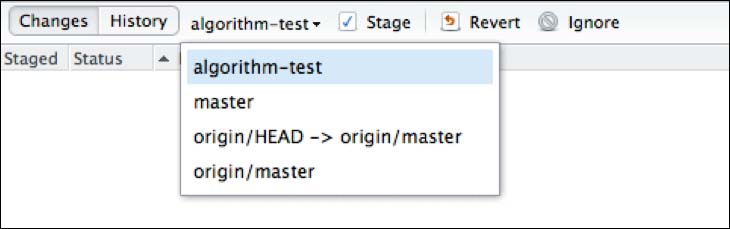
8. Collaborating with Git and GitHub
9. R for your Organization – Managing the RStudio Server
10. Extending RStudio and Your Knowledge of R
Index