Sign In Start Free Trial
Account

Add to playlist

Create a Playlist

Modal Close icon
You need to login to use this feature.
  • Book Overview & Buying Learning Julia
  • Table Of Contents Toc
Learning Julia

Learning Julia

By : Anshul Joshi, Lakhanpal
3 (2)
close
close
Learning Julia

Learning Julia

3 (2)
By: Anshul Joshi, Lakhanpal

Overview of this book

Julia is a highly appropriate language for scientific computing, but it comes with all the required capabilities of a general-purpose language. It allows us to achieve C/Fortran-like performance while maintaining the concise syntax of a scripting language such as Python. It is perfect for building high-performance and concurrent applications. From the basics of its syntax to learning built-in object types, this book covers it all. This book shows you how to write effective functions, reduce code redundancies, and improve code reuse. It will be helpful for new programmers who are starting out with Julia to explore its wide and ever-growing package ecosystem and also for experienced developers/statisticians/data scientists who want to add Julia to their skill-set. The book presents the fundamentals of programming in Julia and in-depth informative examples, using a step-by-step approach. You will be taken through concepts and examples such as doing simple mathematical operations, creating loops, metaprogramming, functions, collections, multiple dispatch, and so on. By the end of the book, you will be able to apply your skills in Julia to create and explore applications of any domain.
Table of Contents (11 chapters)
close
close
8
Data Visualization and Graphics

Using REPL

Read-Eval-Print-Loop (REPL) is an interactive shell or the language shell that provides the functionality to test out pieces of code. Julia provides an interactive shell with a JIT compiler (used by Julia) at the backend. We can give input in a line, it is compiled and evaluated, and the result is given in the next line:

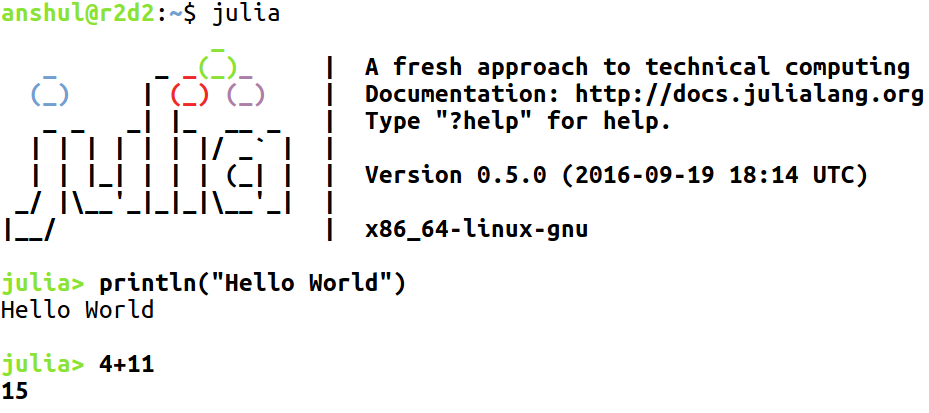
Julia's shell can be started easily, just by writing Julia in the Terminal. This brings up the logo and information about the version. This julia> is a Julia prompt and we can write expressions, statements, and functions, just as we could write them in a code file. The benefit of having the REPL is that we can test out our code for possible errors. Also, it is a good environment for beginners. We can type in the expressions and press Enter key to evaluate them. A Julia library, or custom-written Julia program, can be included in REPL using include

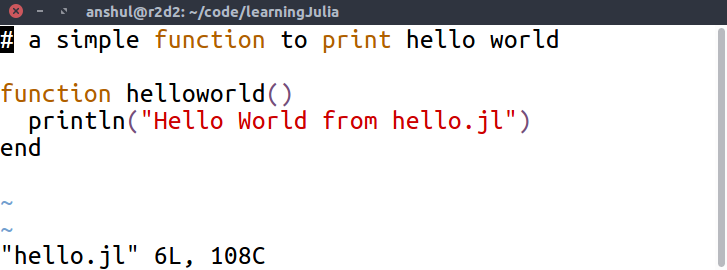
For example, let's create a file with the name hello.jl and write a function with the name helloworld(), which just prints the line Hello World from hello.jl:

Now, use this function inside the REPL by writing an include statement for the specified file:

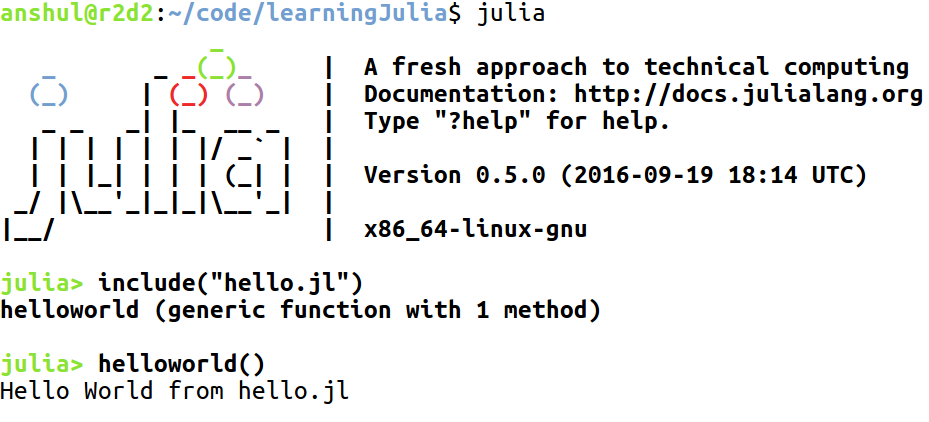
When we include the file inside the REPL, we see that it gave the information about the function present inside the file. We used the function and it printed the desired line. Julia also stores all the commands written in the REPL in the .julia_history folder. This file is located at  C:\Users\%username% on Windows, or ~/.julia_history on Linux or macOS. Similar to Linux Terminal, we can reverse-search using Ctrl + R keys in Julia's shell. This helps us to find the previous commands or to debug the errors if necessary.

Using help in Julia

There is another nice feature provided in the REPL of Julia, which is help. One can use this by typing a question mark (?) and the prompt will change to:

help?>

It is used to give information about the functions, types, macros, and operators used in Julia:

In the preceding screenshot, we used help?> to give information about the include and "+" key (please read the information provided for "+" key).

Julia also provides the functionality to use regular shell commands from REPL. This can be used by writing ";" key inside the REPL, which will change the prompt to:

shell>

In the preceding screenshot, we used the ls command (dir in Windows) to list the files in the current directory and did a ping to 8.8.8.8.  This is helpful, as we don't have to leave the REPL for tasks that we need to do on the Terminal. Tab-completion works fine in shell> mode too, as it does in julia> mode. There are some interactive functions and macros available, which increase the productivity from the REPL:

  • whos(): This gives information about the global symbols currently present:

We can see it also gives the size of the module.

  • @which: It gives the information about the method that would be called for the particular function and arguments:
     julia> @which sin(10)
sin(x::Real) at math.jl:204
  •  versioninfo(): Although when we start the Julia REPL, it gives some information about the version, if we want more detailed information, then versioninfo() is used:
     julia> versioninfo()
Julia Version 0.5.0 Commit 3c9d753 (2016-09-19 18:14 UTC) Platform Info: System: Linux (x86_64-linux-gnu) CPU: Intel(R) Core(TM) i7-6700HQ CPU @ 2.60GHz WORD_SIZE: 64 BLAS: libopenblas (NO_LAPACKE DYNAMIC_ARCH NO_AFFINITY
Haswell) LAPACK: liblapack.so.3 LIBM: libopenlibm LLVM: libLLVM-3.7.1 (ORCJIT, broadwell)
  • edit("any_file_in_home_directory"):  This is used to edit a file in the home directory.

Let's edit the same file that we used in the earlier examples:

julia> edit("hello.jl")
 

This brings up a default editor based on the OS being used, like Vim.

  • @edit rand(): If required, we can also edit the definition of the built-in functions. This will bring up a similar window as the preceding one, which is for the default editor.
  • less("any_file_in_same_directory"): This is similar to the shell utility for showing the file.
  • clipboard("some_text"): This is used to copy some_text to the system clipboard.
  • clipboard(): This is used to paste the contents of the keyboard to the REPL. Useful when copying some commands from elsewhere to the REPL.
  • dump(): This displays information about a Julia object on the screen.
  • names(): This gets an array of the names exported by a module.
  • fieldnames(): This is used to get the array of the data fields belonging to a particular symbol.
  • workspace(): This brings out a clean workspace (all user defined variables are erased) and cleans up the top-level module (Main).

Plots in REPL

There is also the possibility to create plots in REPL. These are simple plots, but look quite nice and are very light on memory. To do this, we need to add a package. We will study package management later, but for now, we can directly add a package and start using it.

julia> Pkg.add("UnicodePlots")

This has been provided by a developer called Christof Stocker. Remember how to enter the symbol "π"? If yes, then please go through the previous sections. Let's use this to create a simple plot:

We can create many similar plots such as scatterplots, line plots, histograms, and so on using UnicodePlots.

Visually different images
CONTINUE READING
83
Tech Concepts
36
Programming languages
73
Tech Tools
Icon Unlimited access to the largest independent learning library in tech of over 8,000 expert-authored tech books and videos.
Icon Innovative learning tools, including AI book assistants, code context explainers, and text-to-speech.
Icon 50+ new titles added per month and exclusive early access to books as they are being written.
Learning Julia
notes
bookmark Notes and Bookmarks search Search in title playlist Add to playlist download Download options font-size Font size

Change the font size

margin-width Margin width

Change margin width

day-mode Day/Sepia/Night Modes

Change background colour

Close icon Search
Country selected

Close icon Your notes and bookmarks

Confirmation

Modal Close icon
claim successful

Buy this book with your credits?

Modal Close icon
Are you sure you want to buy this book with one of your credits?
Close
YES, BUY

Submit Your Feedback

Modal Close icon
Modal Close icon
Modal Close icon