Sign In Start Free Trial
Account

Add to playlist

Create a Playlist

Modal Close icon
You need to login to use this feature.
  • Book Overview & Buying Learn Spring for Android Application Development
  • Table Of Contents Toc
Learn Spring for Android Application Development

Learn Spring for Android Application Development

By : Sunnat, Igor Kucherenko
close
close
Learn Spring for Android Application Development

Learn Spring for Android Application Development

By: Sunnat, Igor Kucherenko

Overview of this book

As the new official language for Android, Kotlin is attracting new as well as existing Android developers. As most developers are still working with Java and want to switch to Kotlin, they find a combination of these two appealing. This book addresses this interest by bringing together Spring, a widely used Java SE framework for building enterprise-grade applications, and Kotlin. Learn Spring for Android Application Development will guide you in leveraging some of the powerful modules of the Spring Framework to build lightweight and robust Android apps using Kotlin. You will work with various modules, such as Spring AOP, Dependency Injection, and Inversion of Control, to develop applications with better dependency management. You’ll also explore other modules of the Spring Framework, such as Spring MVC, Spring Boot, and Spring Security. Each chapter has practice exercises at the end for you to assess your learning. By the end of the book, you will be fully equipped to develop Android applications with Spring technologies.
Table of Contents (13 chapters)
close
close

Setting up the environment

An environment setup is one of the prime parts before developing an application. To the developers who are currently working with Spring, feel free to skip this part. This section is for new developers, who need to set up the foundation and the instruments to begin developing.

Here are the steps of how to set up the environment in the accompanying segments.

Spring

Spring is the most powerful Java application framework; it is currently the most popular in the enterprise world. It helps to create high-performing applications that have easily-testable and reusable code. This is open source and was written by Rod Johnson, first released under the Apache 2.0 license in June 2003.

To create and run Spring applications, you need some tools and language supports. You also need a server to test and run your project in your operating system. We will show you how to set up the environment for Spring.

The following software and tools are needed with the current version:

  • Java (version 1.8)
  • Kotlin (version 1.3)
  • Apache Tomcat (version 9.0.11)
  • IntelliJ Ultimate (version 2018.2.2) or Eclipse Photon
  • Spring Framework Libraries (version 5.0.8.RELEASE)

Java

Java is available in two editions:

  • Standard Edition (J2SE)
  • Enterprise Edition (J2EE)

Here, we will opt for Standard Edition. Java is free to download and use for all operating systems.

You can download Java 10.0.2 from http://www.oracle.com/technetwork/java/javase/downloads/index.html.
Download for your operating system.

After installation, please check whether Java is installed. To check, open your Terminal and type java --version. If Java is installed successfully, you will see the following Java version:

Check java version

Alternatively, you will see an error. If this occurs, try to install it again to resolve it.

Kotlin

Developed by JetBrains, Kotlin is an open source and statically-typed programming language. It runs on the Java Virtual Machine (JVM) and can be compiled to JavaScript source code or use the LLVM compiler infrastructure. Kotlin is easy to learn, especially for Java developers.

To use Kotlin, you don't need to download or set it up separately like Java. It comes with the IDEs. Kotlin is a built-in feature of Android Studio, IntelliJ Ultimate, or IntelliJ Community. To use Kotlin in Eclipse, you need to follow these steps:

  1. Go to help -> Eclipse Marketplace from the Eclipse toolbar.
  2. In the search box, write Kotlin, there you will find the Kotlin plugin.
  3. Install it and you can write code in Kotlin:

Eclipse Marketplace
We highly recommend using IntelliJ IDE to implement the latest version of Kotlin. The Eclipse plugin does not have the latest version of Kotlin.

Apache Tomcat

We require a steady, free, and open source web server that we can use to create and run Spring-Framework-based ventures. We will utilize Apache Tomcat, which is easy to understand for all developers of Java. You can also use Jetty or Undertow to develop in Spring.

Tomcat is an open source web server. This allows the utilization of Java Servlets and JavaServer Pages (JSP) for the Java server. The core segment of Tomcat is Catalina.

Apache Tomcat is a web server and not an application server.

You can download Tomcat 9.0.11 from https://tomcat.apache.org/download-90.cgi.

If you use Tomcat version 9, you have to use Java version 8 or later. According to the Apache Tomcat source, this version builds on Tomcat 8.0.x and 8.5.x, and implements the Servlet 4.0, JSP 2.3, EL 3.0, WebSocket 1.1, and JASPIC 1.1 specifications (the versions required by the Java EE 8 platform).

Let's see how to configure and verify the Tomcat server.

Configuring Tomcat

You can configure the Tomcat server in two ways—either using the Terminal or from the IDE. To set up the server, you have to download the Tomcat server's content from https://tomcat.apache.org/download-90.cgi.

Configuring Tomcat by these following steps:

  1. Download a binary distribution of the core module from the link.
  2. Extract the file. This creates a folder named apache-tomcat-9.0.11 (version number can be changed).

  1. To access it with ease, rename the folder Tomcat and move it to /usr/local (for Linux) or /Library (for macOS):
Project files
  • For Linux, use these steps:
// If you have an older version of Tomcat, then remove it before using the newer one
sudo rm -rf /usr/local/Tomcat // To remove exist TomCat

sudo mv ~/Download/Tomcat /usr/local // To move TomCat from the download directory to your desire direction
  • For macOS, use these steps:
// If you have an older version of Tomcat, then remove it before using the newer one
sudo rm -rf /Library/Tomcat // To remove exist TomCat

sudo mv Downloads/Tomcat /Library/ // To move TomCat from the download directory to your desire direction

To check the current directory, type the following:

  • For Linux: cd /usr/local/Tomcat/
  • For macOS: cd /Library/Tomcat/
  1. Type ls to see a list of this directory:
check tomcat files in terminal
  1. Change the ownership of the /usr/local/Tomcat or /Library/Tomcat folder hierarchy:
  • For Linux: sudo chown -R <your_username> /usr/local/Tomcat/
  • For macOS: sudo chown -R <your_username> /Library/Tomcat/
  1. Make all scripts executable:
  • For Linux: sudo chmod +x /usr/local/Tomcat/bin/*.sh
  • For macOS: sudo chmod +x /Library/Tomcat/bin/*.sh
  1. To check the contents of Tomcat, use the following command:
  • For Linux: ls -al /usr/local/Tomcat/bin/*.sh
  • For macOS: ls -al /Library/Tomcat/bin/*.sh
  1. You can see that every file is listed with -rwxr-xr-x@, where -x means executable. Executable demonstrates to us the authorization status to get to the files:
Check the tomcat executable files in terminal
  1. To start and stop, type the following:
  • For macOS:
/Library/Tomcat/bin/startup.sh
/Library/Tomcat/bin/shutdown.sh
  • For Linux:
/usr/local/Tomcat/bin/startup.sh
/usr/local/Tomcat/bin/shutdown.sh
  1. To turn on and off the Tomcat server, use this command:

Verifying Tomcat

  1. After starting the server, go to your browser and enter http://localhost:8080, which will show you the default page:
Default tomcat local hosting

This is how we can configure Tomcat from the Terminal.

Integrated development environment

When it comes to writing Java programs, you can use any text editor. However, we encourage you to use an integrated development environment (IDE) because they provide numerous features. IntelliJ IDEA, Eclipse, and NetBeans are the best of them. IntelliJ is a paid IDE, but you can use Eclipse or NetBeans, which are free.

We can use IDE to do the following:

  • Manage Tomcat
  • Develop apps and web apps where there is no need to remember the full name of the methods and signatures
  • Highlight compile errors

In this book, we will work with Eclipse and IntelliJ IDEA.
You can download the Ultimate version, which has a 30-day free trial, from https://www.jetbrains.com/idea/download/.

To download the Eclipse, visit http://www.eclipse.org/downloads/packages/.

For Spring, you should download Eclipse IDE for the Java EE Developers version.

For both, once you start IDE, it will ask for a workspace. You can create a folder of your choice and give the path of that folder.

IntelliJ IDEA

IntelliJ IDEA is a Java coordinated development environment for developing computer software. It is developed by JetBrains and is accessible as an Apache 2 Licensed people group release and in a restrictive business version. Both can be utilized for business development.

The latest version of Kotlin comes built-in with IntelliJ IDEA ultimate and IntelliJ IDEA community.

Eclipse

Eclipse is an incorporated development environment utilized in computer programming and is the most generally-utilized Java IDE. It contains a base workspace and an extensible module framework for tweaking the environment. Eclipse is composed generally in Java and its essential utility is for developing Java applications, yet it might likewise be utilized to develop applications in other programming dialects by means of modules, including Ada, ABAP, C, C++, C#, Clojure, COBOL, D, Erlang, Fortran, Groovy, Haskell, JavaScript, Julia, Lasso, Lua, NATURAL, Perl, PHP, Prolog, Python, R, Ruby (including the Ruby on Rails framework), Rust, Scala, and Scheme.

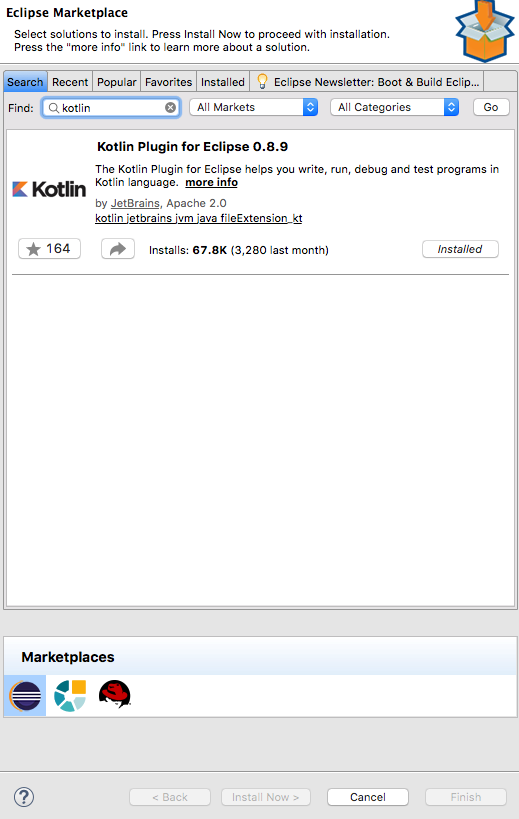
To use Kotlin in Eclipse, you will need to install the Kotlin plugin.

Eclipse doesn't have the latest version of Kotlin.

After creating a project, you’ll need to integrate the Tomcat server manually. However, if you use Spring Boot, you don't need to do anything because this comes with the Tomcat server.

Follow these steps to create a web project and implement the Tomcat server into your project:

  1. Visit new > New Dynamic Web Project.
  2. Provide a Project Name.
  3. To integrate Tomcat, click New Runtime:

new project create
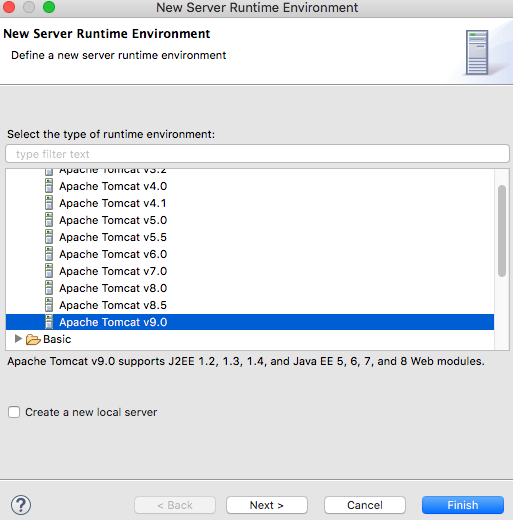
  1. Download version 9+, select Apache Tomcat v9.0, and click Finish:
tomcat version selection
  1. Select the latest Dynamic web module version.
  2. Click Finish.

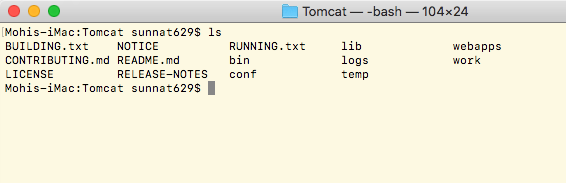
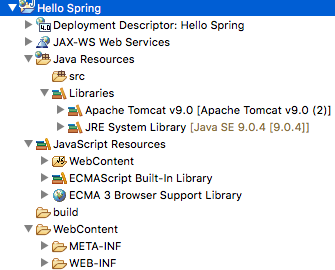
You will find these files after creating the project:

Project files
  1. Go to the Server tab, which is in the bottom-left window:
project IDE interface
  1. Select Tomcat v9.0 Server at localhost.
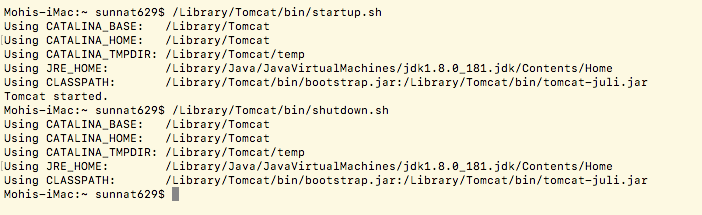
  2. Hit the start button.
  3. Once the server is started, verify it by visiting http://localhost:8080 in a browser.
  4. If everything is OK, you can start and stop the Tomcat server from here.
Visually different images
CONTINUE READING
83
Tech Concepts
36
Programming languages
73
Tech Tools
Icon Unlimited access to the largest independent learning library in tech of over 8,000 expert-authored tech books and videos.
Icon Innovative learning tools, including AI book assistants, code context explainers, and text-to-speech.
Icon 50+ new titles added per month and exclusive early access to books as they are being written.
Learn Spring for Android Application Development
notes
bookmark Notes and Bookmarks search Search in title playlist Add to playlist download Download options font-size Font size

Change the font size

margin-width Margin width

Change margin width

day-mode Day/Sepia/Night Modes

Change background colour

Close icon Search
Country selected

Close icon Your notes and bookmarks

Confirmation

Modal Close icon
claim successful

Buy this book with your credits?

Modal Close icon
Are you sure you want to buy this book with one of your credits?
Close
YES, BUY

Submit Your Feedback

Modal Close icon
Modal Close icon
Modal Close icon