-
Book Overview & Buying
-
Table Of Contents

iOS Forensics Cookbook
By :
iOS Forensics Cookbook
By:
Overview of this book
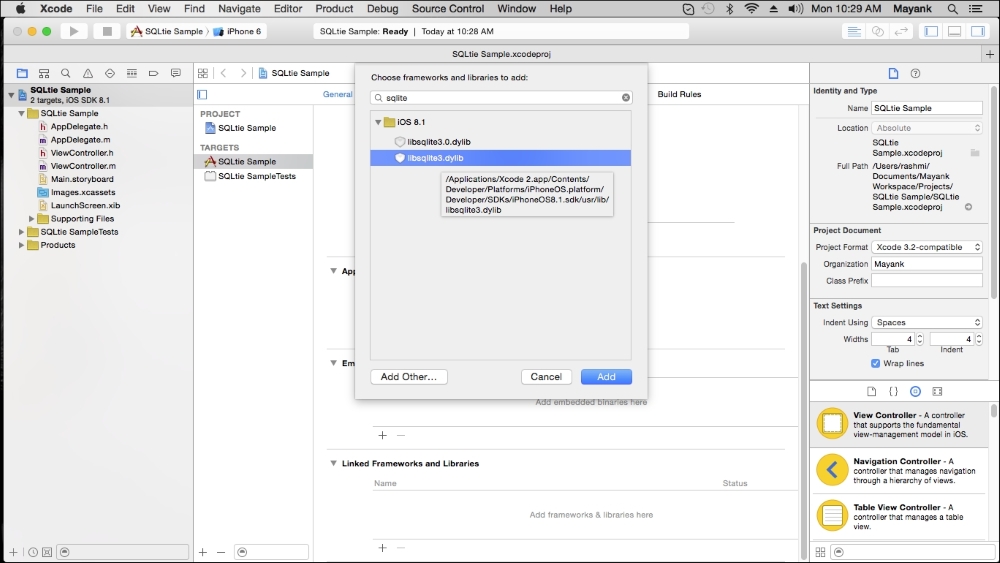
Mobile device forensics is a branch of digital forensics that involves the recovery of evidence or data in a digital format from a device without affecting its integrity. With the growing popularity of iOS-based Apple devices, iOS forensics has developed immense importance.
To cater to the need, this book deals with tasks such as the encryption and decryption of files, various ways to integrate techniques withsocial media, and ways to grab the user events and actions on the iOS app. Using practical examples, we’ll start with the analysis keychain and raw disk decryption, social media integration, and getting accustomed to analytics tools. You’ll also learn how to distribute the iOS apps without releasing them to Apple’s App Store. Moving on, the book covers test flights and hockey app integration, the crash reporting system, recovery tools, and their features. By the end of the book, using the aforementioned techniques, you will be able to successfully analyze iOS-based devices forensically.
Table of Contents (9 chapters)
Preface

 Free Chapter
1. Saving and Extracting Data
2. Social Media Integration
3. Integrating Data Analytics
4. App Distribution and Crash Reporting
5. Demystifying Crash Reports
6. Forensics Recovery
7. Forensics Tools
Index