
In this chapter, we will cover:
Every programming language needs to name a piece of information so that it can be referenced later. This is the fundamental way in which code remains readable after it is written. Swift provides a number of core types that help you represent your information in a very comprehensible way.
Swift provides two types of information: a constant and a variable:
All constants are defined using the let keyword followed by a name, and all variables are defined using the var keyword. Both constants and variables in Swift must contain a value before they are used. This means that, when you define a new one, you will most likely give it an initial value. You do so by using the assignment operator (=) followed by a value.
The only difference between the two is that a constant can never be changed, whereas a variable can be. In the preceding example, the code defines a constant called pi that stores the information 3.14 and a variable called name that stores the information "Sarah". It makes sense to make pi a constant because pi will always be 3.14. However, we need to change the value of name in the future so we defined it as a variable.
One of the hardest parts of managing a program is the state of all the variables. As a programmer, it is often impossible to calculate all the different possible values a variable might have, even in relatively small programs. Since variables can often be changed by distant, seemingly unrelated code, more states will cause more bugs that are harder to track down. It is always best to default to using constants until you run into a practical scenario in which you need to modify the value of the information.
It is often helpful to give a name to more complex information. We often have to deal with a collection of related information or a series of similar information like lists. Swift provides three main collection types called tuples, arrays, and dictionaries.
A tuple is a fixed sized collection of two or more pieces of information. For example, a card in a deck of playing cards has three properties: color, suit, and value. We could use three separate variables to fully describe a card, but it would be better to express it in one:
Another way to access specific values in a tuple is to capture each of them in a separate variable:
An array is essentially a list of information of variable length. For example, we could create a list of people we want to invite to a party, as follows:
You can then add values to an array by adding another array to it, like this:
Note that += is the shorthand for the following:
The index is specified using square brackets ([]) immediately after the name of the array. Indexes start at 0 and go up from there like tuples. So, in the preceding example, index 2 returned the third element in the array, Marcos. There is additional information you can retrieve about an array, like the number of elements that you can see as we move forward.
A dictionary is a collection of keys and values. Keys are used to store and look up specific values in the container. This container type is named after a word dictionary in which you can look up the definition of a word. In that real life example, the word would be the key and the definition would be the value. As an example, we can define a dictionary of television shows organized by their genre:
As a bonus, this can also be used to change the value for an existing key.
You might have noticed that all of my variable and constant names begin with a lower case letter and each subsequent word starts with a capital letter. This is called camel case and it is the widely accepted way of writing variable and constant names. Following this convention makes it easier for other programmers to understand your code.
Now that we know about Swift's basic containers, let's explore what they are in a little more detail.
Swift is a strongly typed language, which means that every constant and variable is defined with a specific type. Only values of matching types can be assigned to them. So far, we have taken advantage of a feature of Swift called Type Inference. This means that the code does not have to explicitly declare a type if it can be inferred from the value being assigned to it during the declaration.
Without Type Inference, the name variable declaration from before would be written as follows:
A string is defined by a series of characters. This is perfect for storing text, as in our name example. The reason that we don't need to specify the type is that Sarah is a
string literal. Text surrounded by quotation marks is a string literal and can be inferred to be of the type String. That means that name must be of the type String if you make its initial value Sarah.
The code is much cleaner and easier to understand if we leave the types out as the original examples showed. Just keep in mind that these types are always implied to be there, even if they are not written explicitly. If we tried to assign a number to the name variable, we would get an error, as shown:


As was expected, the variable was indeed inferred to be of the type String.
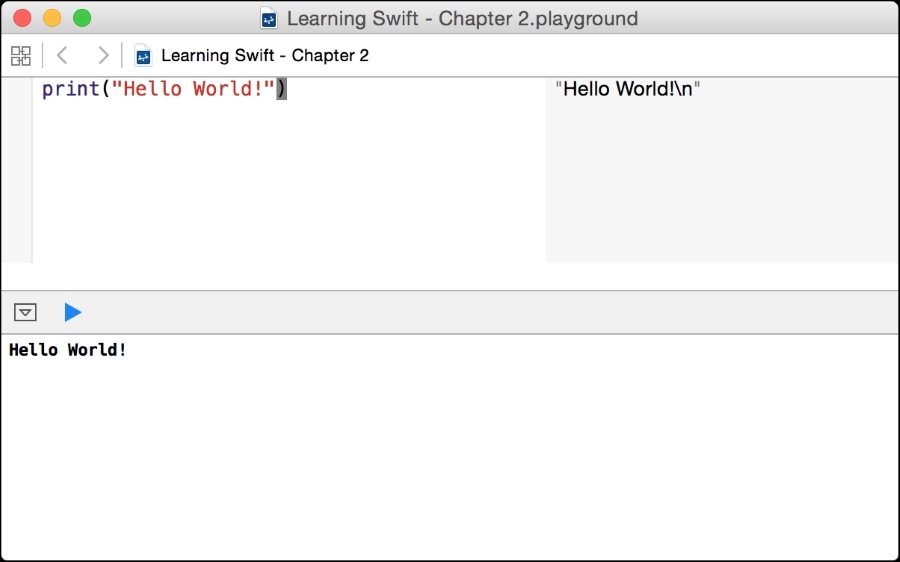
It is very useful to write output to a log so that you can trace the behavior of code. As a codebase grows in complexity, it gets hard to follow the order in which things happen and exactly what the data looks like as it flows through the code. Playgrounds help a lot with this but it is not always enough.
You can even use a feature of Swift called string interpolation to insert variables into a string, like this:
At any point in a string literal, even when not printing, you can insert the results of the code by surrounding the code with \( and ). Normally this would be the name of a variable but it could be any code that returns a value.
Printing to the console is even more useful when we start using more complex code.
A program wouldn't be very useful if it were a single fixed list of commands that always did the same thing. With a single code path, a calculator app would only be able to perform one operation. There are a number of things we can do to make an app more powerful and collect the data to make decisions as to what to do next.
The most basic way to control the flow of a program is to specify code that should only be executed if a certain condition is met. In Swift, we do that with an if statement. Let's look at an example:
Semantically, the preceding code reads; if the number of invitees is greater then 20, print 'Too many people invited". This example only executes one line of code if the condition is true, but you can put as much code as you like inside the curly brackets ({}).
As an exercise, I recommend adding an additional scenario to the preceding code in which, if there were exactly zero invitees, it would print "One is the loneliest number". You can test out your code by adjusting how many invitees you add to the invitees declaration. Remember that the order of the conditions is very important.
A switch is a more expressive way of writing a series of if statements. A direct translation of the example from the conditionals section would look like this:
A switch consists of a value and a list of conditions for that value with the code to execute if the condition is true. The value to be tested is written immediately after the switch command and all of the conditions are contained in curly brackets ({}). Each condition is called a
case. Using that terminology, the semantics of the preceding code is "Considering the number of invitees, in the case that it is greater than 20, print "Too many people invited", otherwise, in the case that it is less than or equal to three, print "Too many people invited", otherwise, by default print "Just right".
The most common way to handle that is by using a default case as designated by the default keyword. Sometimes, you don't actually want to do anything in the default case, or possibly even in a specific case. For that, you can use the break keyword, as shown here:
Note that the default case must always be the last one.
Switches don't only work with numbers. They are great for performing any type of test:
This code shows some other interesting features of switches. The first case is actually made up of two separate conditions. Each case can have any number of conditions separated by commas (,). This is useful when you have multiple cases that you want to use the same code for.
There are many different types of loops but all of them execute the same code repeatedly until a condition is no longer true. The most basic type of loop is called a while loop:
A while loop consists of a condition to test and code to be run until that condition fails. In the preceding example, we have looped through every element in the invitees array. We used the variable index to track which invitee we were currently on. To move to the next index, we used a new operator += which added one to the existing value. This is the same as writing index = index + 1.
In this case, we get access to both the key and the value of the dictionary. This should look familiar because (genre, show) is actually a tuple used for each iteration through the loop. It may be confusing to determine whether or not you have a single value from a for-in loop like arrays or a tuple like dictionaries. At this point, it would be best for you to remember just these two common cases. The underlying reasons will become clear when we start talking about
sequences in Chapter 6, Make Swift Work For You – Protocols and Generics.
Now, the loop will only be run for each of the invitees that start with the letter A.
This code runs the loop using the variable index from the value 0 up to but not including invitees.count. There are actually two types of ranges. This one is called a half open range because it does not include the last value. The other type of range, which we saw with switches, is called a
closed range:
The break keyword is used to immediately exit a loop:
As soon as a break is encountered, the execution jumps to after the loop. In this case, it jumps to the final line.
switch is a more expressive way of writing a series of if statements. A direct translation of the example from the conditionals section would look like this:
A switch consists of a value and a list of conditions for that value with the code to execute if the condition is true. The value to be tested is written immediately after the switch command and all of the conditions are contained in curly brackets ({}). Each condition is called a
case. Using that terminology, the semantics of the preceding code is "Considering the number of invitees, in the case that it is greater than 20, print "Too many people invited", otherwise, in the case that it is less than or equal to three, print "Too many people invited", otherwise, by default print "Just right".
The most common way to handle that is by using a default case as designated by the default keyword. Sometimes, you don't actually want to do anything in the default case, or possibly even in a specific case. For that, you can use the break keyword, as shown here:
Note that the default case must always be the last one.
Switches don't only work with numbers. They are great for performing any type of test:
This code shows some other interesting features of switches. The first case is actually made up of two separate conditions. Each case can have any number of conditions separated by commas (,). This is useful when you have multiple cases that you want to use the same code for.
There are many different types of loops but all of them execute the same code repeatedly until a condition is no longer true. The most basic type of loop is called a while loop:
A while loop consists of a condition to test and code to be run until that condition fails. In the preceding example, we have looped through every element in the invitees array. We used the variable index to track which invitee we were currently on. To move to the next index, we used a new operator += which added one to the existing value. This is the same as writing index = index + 1.
In this case, we get access to both the key and the value of the dictionary. This should look familiar because (genre, show) is actually a tuple used for each iteration through the loop. It may be confusing to determine whether or not you have a single value from a for-in loop like arrays or a tuple like dictionaries. At this point, it would be best for you to remember just these two common cases. The underlying reasons will become clear when we start talking about
sequences in Chapter 6, Make Swift Work For You – Protocols and Generics.
Now, the loop will only be run for each of the invitees that start with the letter A.
This code runs the loop using the variable index from the value 0 up to but not including invitees.count. There are actually two types of ranges. This one is called a half open range because it does not include the last value. The other type of range, which we saw with switches, is called a
closed range:
The break keyword is used to immediately exit a loop:
As soon as a break is encountered, the execution jumps to after the loop. In this case, it jumps to the final line.
are many different types of loops but all of them execute the same code repeatedly until a condition is no longer true. The most basic type of loop is called a while loop:
A while loop consists of a condition to test and code to be run until that condition fails. In the preceding example, we have looped through every element in the invitees array. We used the variable index to track which invitee we were currently on. To move to the next index, we used a new operator += which added one to the existing value. This is the same as writing index = index + 1.
In this case, we get access to both the key and the value of the dictionary. This should look familiar because (genre, show) is actually a tuple used for each iteration through the loop. It may be confusing to determine whether or not you have a single value from a for-in loop like arrays or a tuple like dictionaries. At this point, it would be best for you to remember just these two common cases. The underlying reasons will become clear when we start talking about
sequences in Chapter 6, Make Swift Work For You – Protocols and Generics.
Now, the loop will only be run for each of the invitees that start with the letter A.
This code runs the loop using the variable index from the value 0 up to but not including invitees.count. There are actually two types of ranges. This one is called a half open range because it does not include the last value. The other type of range, which we saw with switches, is called a
closed range:
The break keyword is used to immediately exit a loop:
As soon as a break is encountered, the execution jumps to after the loop. In this case, it jumps to the final line.
All of the code we have explored so far is very linear down the file. Each line is processed one at a time and then the program moves onto the next. This is one of the great things about programming: everything the program does can be predicted by stepping through the program yourself mentally, one line at a time.
There are various different types of functions but each builds on the previous type.
The most basic type of function simply has a name with some static code to be executed later. Let's look at a simple example. The following code defines a function named sayHello:
A function can take zero or more parameters, which are input values. Let's modify our sayHello function to be able to say Hello to an arbitrary name using string interpolation:
As mentioned before, a function can take more than one parameter. A parameter list looks a lot like a tuple. Each parameter is given a name and a type separated by a colon (:), and these are then separated by commas (,). On top of that, functions can not only take in values but can also return values to the calling code.
The type of value to be returned from a function is defined after the end of all of the parameters separated by an arrow ->. Let's write a function that takes a list of invitees and one other person to add to the list. If there are spots available, the function adds the person to the list and returns the new version. If there are no spots available, it just returns the original list, as shown here:
In this function, we tested the number of names on the invitee list and, if it was greater than 20, we returned the same list as was passed in to the invitees parameter. Note that return is used in a function in a similar way to break in a loop. As soon as the program executes a line that returns, it exits the function and provides that value to the calling code. So, the final return line is only run if the if statement does not pass. It then adds the newinvitee parameter to the list and returns that to the calling code.
You would call this function like so:

You can use the arrow keys to move up and down the list to select the function you want to type and then press the Tab key to make Xcode finish typing the function for you. Not only that, but it highlights the first parameter so that you can immediately start typing what you want to pass in. When you are done defining the first parameter, you can press Tab again to move on to the next parameter. This greatly increases the speed with which you can write your code.
This is a great feature of Swift that allows you to have a function called with
named parameters. We can do this by giving the second parameter two names, separated by a space. The first name is the one to be used when calling the function, otherwise referred to as the
external name. The second name is the one to be used when referring to the constant being passed in from within the function, otherwise referred to as the
internal name. As an exercise, try to change the function so that it uses the same external and internal names and see what Xcode suggests. For more of a challenge, write a function that takes a list of invitees and an index for a specific invitee to write a message to ask them to just bring themselves. For example, it would print Sarah, just bring yourself for the index 0 in the preceding list.
Sometimes we write functions where there is a parameter that commonly has the same value. It would be great if we could provide a value for a parameter to be used if the caller did not override that value. Swift has a feature for this called default arguments. To define a default value for an argument, you simply add an equal sign after the argument, followed by the value. We can add a default argument to the sayHelloToName: function, as follows:
This means that we can now call this function with or without specifying a name:
When using default arguments, the order of the arguments becomes unimportant. We can add default arguments to our addInvitee:ifPossibleToList: function and then call it with any combination or order of arguments:
The last feature of functions that we are going to discuss is another type of conditional called a
guard statement. We have not discussed it until now because it doesn't make much sense unless it is used in a function or loop. A guard statement acts in a similar way to an if statement but the compiler forces you to provide an else condition that must exit from the function, loop, or switch case. Let's rework our addInvitee:ifPossibleToList: function to see what it looks like:
Semantically, the guard statement instructs us to ensure that the number of invitees is less than 20 or else return the original list. This is a reversal of the logic we used before, when we returned the original list if there were 20 or more invitees. This logic actually makes more sense because we are stipulating a prerequisite and providing a failure path. The other nice thing about using the guard statement is that we can't forget to return out of the else condition. If we do, the compiler will give us an error.
It is important to note that guard statements do not have a block of code that is executed if it passes. Only an else condition can be specified with the assumption that any code you want to run for the passing condition will simply come after the statement. This is safe only because the compiler forces the else condition to exit the function and, in turn, ensures that the code after the statement will not run.
basic type of function simply has a name with some static code to be executed later. Let's look at a simple example. The following code defines a function named sayHello:
A function can take zero or more parameters, which are input values. Let's modify our sayHello function to be able to say Hello to an arbitrary name using string interpolation:
As mentioned before, a function can take more than one parameter. A parameter list looks a lot like a tuple. Each parameter is given a name and a type separated by a colon (:), and these are then separated by commas (,). On top of that, functions can not only take in values but can also return values to the calling code.
The type of value to be returned from a function is defined after the end of all of the parameters separated by an arrow ->. Let's write a function that takes a list of invitees and one other person to add to the list. If there are spots available, the function adds the person to the list and returns the new version. If there are no spots available, it just returns the original list, as shown here:
In this function, we tested the number of names on the invitee list and, if it was greater than 20, we returned the same list as was passed in to the invitees parameter. Note that return is used in a function in a similar way to break in a loop. As soon as the program executes a line that returns, it exits the function and provides that value to the calling code. So, the final return line is only run if the if statement does not pass. It then adds the newinvitee parameter to the list and returns that to the calling code.
You would call this function like so:
You can use the arrow keys to move up and down the list to select the function you want to type and then press the Tab key to make Xcode finish typing the function for you. Not only that, but it highlights the first parameter so that you can immediately start typing what you want to pass in. When you are done defining the first parameter, you can press Tab again to move on to the next parameter. This greatly increases the speed with which you can write your code.
This is a great feature of Swift that allows you to have a function called with
named parameters. We can do this by giving the second parameter two names, separated by a space. The first name is the one to be used when calling the function, otherwise referred to as the
external name. The second name is the one to be used when referring to the constant being passed in from within the function, otherwise referred to as the
internal name. As an exercise, try to change the function so that it uses the same external and internal names and see what Xcode suggests. For more of a challenge, write a function that takes a list of invitees and an index for a specific invitee to write a message to ask them to just bring themselves. For example, it would print Sarah, just bring yourself for the index 0 in the preceding list.
Sometimes we write functions where there is a parameter that commonly has the same value. It would be great if we could provide a value for a parameter to be used if the caller did not override that value. Swift has a feature for this called default arguments. To define a default value for an argument, you simply add an equal sign after the argument, followed by the value. We can add a default argument to the sayHelloToName: function, as follows:
This means that we can now call this function with or without specifying a name:
When using default arguments, the order of the arguments becomes unimportant. We can add default arguments to our addInvitee:ifPossibleToList: function and then call it with any combination or order of arguments:
The last feature of functions that we are going to discuss is another type of conditional called a
guard statement. We have not discussed it until now because it doesn't make much sense unless it is used in a function or loop. A guard statement acts in a similar way to an if statement but the compiler forces you to provide an else condition that must exit from the function, loop, or switch case. Let's rework our addInvitee:ifPossibleToList: function to see what it looks like:
Semantically, the guard statement instructs us to ensure that the number of invitees is less than 20 or else return the original list. This is a reversal of the logic we used before, when we returned the original list if there were 20 or more invitees. This logic actually makes more sense because we are stipulating a prerequisite and providing a failure path. The other nice thing about using the guard statement is that we can't forget to return out of the else condition. If we do, the compiler will give us an error.
It is important to note that guard statements do not have a block of code that is executed if it passes. Only an else condition can be specified with the assumption that any code you want to run for the passing condition will simply come after the statement. This is safe only because the compiler forces the else condition to exit the function and, in turn, ensures that the code after the statement will not run.
can take zero or more parameters, which are input values. Let's modify our sayHello function to be able to say Hello to an arbitrary name using string interpolation:
As mentioned before, a function can take more than one parameter. A parameter list looks a lot like a tuple. Each parameter is given a name and a type separated by a colon (:), and these are then separated by commas (,). On top of that, functions can not only take in values but can also return values to the calling code.
The type of value to be returned from a function is defined after the end of all of the parameters separated by an arrow ->. Let's write a function that takes a list of invitees and one other person to add to the list. If there are spots available, the function adds the person to the list and returns the new version. If there are no spots available, it just returns the original list, as shown here:
In this function, we tested the number of names on the invitee list and, if it was greater than 20, we returned the same list as was passed in to the invitees parameter. Note that return is used in a function in a similar way to break in a loop. As soon as the program executes a line that returns, it exits the function and provides that value to the calling code. So, the final return line is only run if the if statement does not pass. It then adds the newinvitee parameter to the list and returns that to the calling code.
You would call this function like so:
You can use the arrow keys to move up and down the list to select the function you want to type and then press the Tab key to make Xcode finish typing the function for you. Not only that, but it highlights the first parameter so that you can immediately start typing what you want to pass in. When you are done defining the first parameter, you can press Tab again to move on to the next parameter. This greatly increases the speed with which you can write your code.
This is a great feature of Swift that allows you to have a function called with
named parameters. We can do this by giving the second parameter two names, separated by a space. The first name is the one to be used when calling the function, otherwise referred to as the
external name. The second name is the one to be used when referring to the constant being passed in from within the function, otherwise referred to as the
internal name. As an exercise, try to change the function so that it uses the same external and internal names and see what Xcode suggests. For more of a challenge, write a function that takes a list of invitees and an index for a specific invitee to write a message to ask them to just bring themselves. For example, it would print Sarah, just bring yourself for the index 0 in the preceding list.
Sometimes we write functions where there is a parameter that commonly has the same value. It would be great if we could provide a value for a parameter to be used if the caller did not override that value. Swift has a feature for this called default arguments. To define a default value for an argument, you simply add an equal sign after the argument, followed by the value. We can add a default argument to the sayHelloToName: function, as follows:
This means that we can now call this function with or without specifying a name:
When using default arguments, the order of the arguments becomes unimportant. We can add default arguments to our addInvitee:ifPossibleToList: function and then call it with any combination or order of arguments:
The last feature of functions that we are going to discuss is another type of conditional called a
guard statement. We have not discussed it until now because it doesn't make much sense unless it is used in a function or loop. A guard statement acts in a similar way to an if statement but the compiler forces you to provide an else condition that must exit from the function, loop, or switch case. Let's rework our addInvitee:ifPossibleToList: function to see what it looks like:
Semantically, the guard statement instructs us to ensure that the number of invitees is less than 20 or else return the original list. This is a reversal of the logic we used before, when we returned the original list if there were 20 or more invitees. This logic actually makes more sense because we are stipulating a prerequisite and providing a failure path. The other nice thing about using the guard statement is that we can't forget to return out of the else condition. If we do, the compiler will give us an error.
It is important to note that guard statements do not have a block of code that is executed if it passes. Only an else condition can be specified with the assumption that any code you want to run for the passing condition will simply come after the statement. This is safe only because the compiler forces the else condition to exit the function and, in turn, ensures that the code after the statement will not run.
we write functions where there is a parameter that commonly has the same value. It would be great if we could provide a value for a parameter to be used if the caller did not override that value. Swift has a feature for this called default arguments. To define a default value for an argument, you simply add an equal sign after the argument, followed by the value. We can add a default argument to the sayHelloToName: function, as follows:
This means that we can now call this function with or without specifying a name:
When using default arguments, the order of the arguments becomes unimportant. We can add default arguments to our addInvitee:ifPossibleToList: function and then call it with any combination or order of arguments:
The last feature of functions that we are going to discuss is another type of conditional called a
guard statement. We have not discussed it until now because it doesn't make much sense unless it is used in a function or loop. A guard statement acts in a similar way to an if statement but the compiler forces you to provide an else condition that must exit from the function, loop, or switch case. Let's rework our addInvitee:ifPossibleToList: function to see what it looks like:
Semantically, the guard statement instructs us to ensure that the number of invitees is less than 20 or else return the original list. This is a reversal of the logic we used before, when we returned the original list if there were 20 or more invitees. This logic actually makes more sense because we are stipulating a prerequisite and providing a failure path. The other nice thing about using the guard statement is that we can't forget to return out of the else condition. If we do, the compiler will give us an error.
It is important to note that guard statements do not have a block of code that is executed if it passes. Only an else condition can be specified with the assumption that any code you want to run for the passing condition will simply come after the statement. This is safe only because the compiler forces the else condition to exit the function and, in turn, ensures that the code after the statement will not run.
feature of functions that we are going to discuss is another type of conditional called a
guard statement. We have not discussed it until now because it doesn't make much sense unless it is used in a function or loop. A guard statement acts in a similar way to an if statement but the compiler forces you to provide an else condition that must exit from the function, loop, or switch case. Let's rework our addInvitee:ifPossibleToList: function to see what it looks like:
Semantically, the guard statement instructs us to ensure that the number of invitees is less than 20 or else return the original list. This is a reversal of the logic we used before, when we returned the original list if there were 20 or more invitees. This logic actually makes more sense because we are stipulating a prerequisite and providing a failure path. The other nice thing about using the guard statement is that we can't forget to return out of the else condition. If we do, the compiler will give us an error.
It is important to note that guard statements do not have a block of code that is executed if it passes. Only an else condition can be specified with the assumption that any code you want to run for the passing condition will simply come after the statement. This is safe only because the compiler forces the else condition to exit the function and, in turn, ensures that the code after the statement will not run.
At this point, we have learned a lot about the basic workings of Swift. Let's take a moment to bring many of these concepts together in a single program. We will also see some new variations on what we have learned.
Before we look at the code, I will mention the three small new features that I will use:
Lastly, rand returns a number anywhere from 0 to a very large number but, as you will see, we want to restrict the random number to between 0 and the number of invitees. To do this, we use the remainder operator (%). This operator gives you the remainder after dividing the first number by the second number. For example, 14 % 4 returns 2 because 4 goes into 14, 3 times with 2 left over. The great feature of this operator is that it forces a number of any size to always be between 0 and 1 less than the number you are dividing by. This is perfect for changing all of the possible random values.
The full code for generating a random number looks like this:
Lastly, the third feature we will use is a variation of the while loop called a repeat-while loop. The only difference with a repeat-while loop is that the condition is checked at the end of the loop instead of at the beginning. This is significant because, unlike with a while loop, a repeat-while loop will always be executed at least once, as shown:
This first section of code gives us a localized place in which to put all of our data. We can easily come back to the program and change the data if we want and we don't have to go searching through the rest of the program to update it:
Here, I have provided a number of functions that simplify more complex code later on in the program. Each one is given a meaningful name so that, when they are used, we do not have to go and look at their code to understand what they are doing:
Let's also look at an interesting limitation of this implementation. This program is going to run into a major problem if the number of invitees is less than the number of shows. The repeat-while loop will continue forever, never finding an invitee that was not invited. Your program doesn't have to handle every possible input but you should at least be aware of its limitations.