

Installers are one of the first pieces you need to get up and running with Docker on both your local machine as well as your server environments. Let's first take a look at what environments you can install Docker in:
Apple OS X (Mac)
Windows
Linux (various Linux flavors)
Cloud (AWS, DigitalOcean, Microsoft Azure, and so on)
With the various types of installers listed earlier, there are different ways Docker actually operates on the operating system. Docker natively runs on Linux; so if you are using Linux, then it's pretty straightforward how Docker runs right on your system. However, if you are using Windows or Mac OS X, then it operates a little differently, since it relies on using Linux. With these operating systems, they need Linux in some sort of way, thus enters the virtual machine needed to run the Linux part that Docker operates on, which is called boot2docker. The installers for both Windows and Mac OS X are bundled with the boot2docker package alongside the virtual machine software that, by default, is the Oracle VirtualBox.
Now, it is worthwhile to note that Docker recently moved away from offering boot2docker. But, I feel, it is important to understand the boot2docker terms and commands in case you run across anyone running the previous version of the Docker installer. This will help you understand what is going on and move forward to the new installer(s). Currently, they are offering up Docker Toolbox that, like the name implies, includes a lot of items that the installer will install for you. The installers for each OS contain different applications with regards to Docker such as:
|
Docker Toolbox piece |
Mac OS X |
Windows |
|---|---|---|
|
Docker Client |
X |
X |
|
Docker Machine |
X |
X |
|
Docker Compose |
X | |
|
Docker Kitematic |
X |
X |
|
VirtualBox |
X |
X |
First, let's take a look at the older style commands of boot2docker. Then, we will take a look at the new commands or application that you can use to achieve these outcomes.
Now, there are ways to run boot2docker on different VM software. But to start off, VirtualBox is the best and easiest way to operate boot2docker:
$ boot2docker
Usage: boot2docker [<options>] {help|init|up|ssh|save|down|poweroff|reset|restart|config|status|info|ip|shellinit|delete|download|upgrade|version} [<args>]
Now, after we have installed Docker on Linux, OS X, or Windows, how do we go about controlling this virtual machine in the events when we need to start it up, restart it, or even shut it down? This is where the boot2docker command-line parameters come into play.
As you can see in the earlier illustration, there are a lot of options you can use for your boot2docker instance. The options you will use mostly are up, down, poweroff, restart, status, ip, upgrade, and version. Some of these commands you will use mostly to troubleshoot items when you are trying to see why the Docker commands might hang, or when you run into any other issues with your boot2docker virtual machine. You can see what each command does by executing the following command:
$ boot2docker help
The most useful command that I have found while troubleshooting is the boot2docker status command:
$ boot2docker status
Another useful boot2docker command is:
$ boot2docker version
This command will help see what version of boot2docker you are currently running. This is helpful in knowing when to use the boot2docker upgrade command. The last command we will look at with respect to boot2docker is the boot2docker ip command. This command is very useful when you need to know what IP address is to be used to access the machines you have been running on a particular host:
$ boot2docker ip
192.168.59.103
As you can see, the earlier command gives us the IP address of the boot2docker client running on my OS X machine inside VirtualBox. By using this IP, I can now access the containers I might have been running using the IP address alongside any of the open ports I have exposed.
So, with boot2docker on its way out, there needs to be a new way to do what boot2docker does. This being said, enter Docker Machine. With Docker Machine, you can do the same things you did with boot2docker, but now in Machine. The following table shows the commands you used in boot2docker and what they are now in Machine:
|
Command |
boot2docker |
Docker Machine |
|---|---|---|
|
|
|
|
|
|
|
|
|
|
|
|
|
|
|
|
|
|
|
|
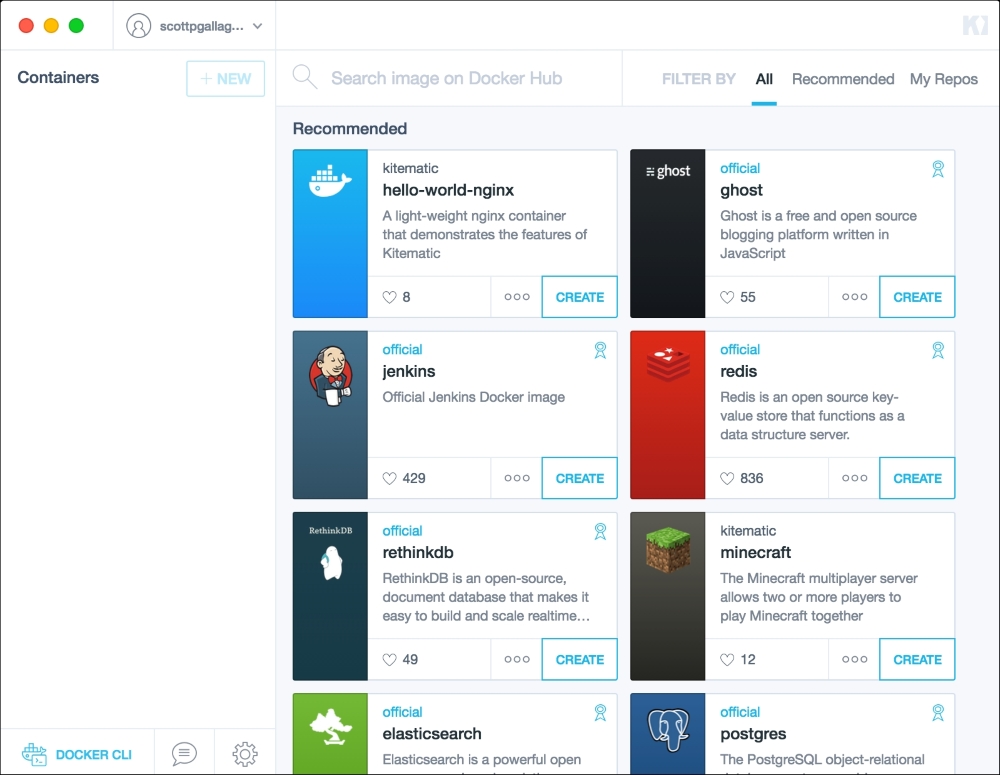
Now that we have covered all the basics of controlling your boot2docker VM, let's take a look at another way you can run Docker containers on your local machine. Let's take a look at Kitematic. Kitematic is a recent addition to the Docker portfolio. Up until now, everything we have done has been command line-based. With Kitematic, you can manage your Docker containers through a GUI. Kitematic can be used either on Windows or OS X, just not on Linux; besides who needs a GUI on Linux anyways! Kitematic, just like boot2docker, operates on a VM defaulting to VirtualBox. Pictures are worth a thousand words, so let's take a look at some screenshots of Kitematic:
The previous screenshot depicts what you will see when you launch Kitematic for the first time.
After you start running the containers, they will show up on the left-hand side column. You can manipulate and get information about them through the GUI. You can search for prebuilt images on the Docker Hub and click on the CREATE button once you have found the one you want to use or test.
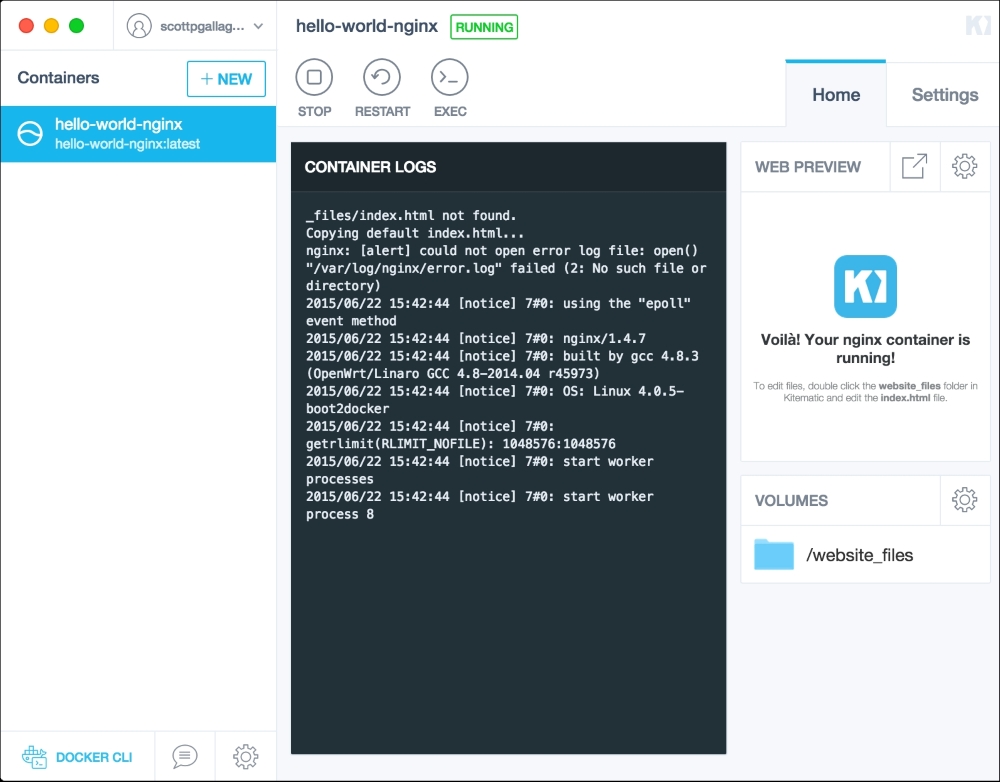
In the preceding screenshot, we have created and are running the hello-world-nginx image inside Kitematic. We can now use the STOP, RESTART, and EXEC commands against the container as well as view the settings of the running container.
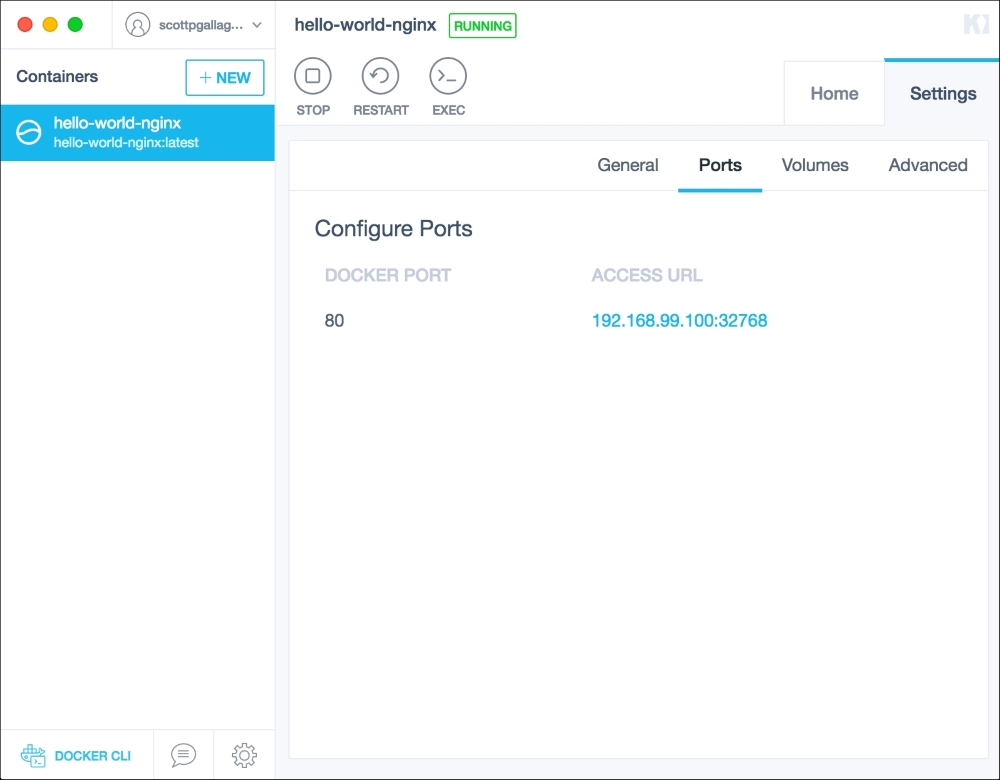
In the following screenshot, we can go to settings and view what ports are exposed from the container to the outside:
In the following screenshot, you can see that you can use your login credentials to log in to the Docker Hub and view the repositories you have created and pushed there:
