

Before moving further, you should be aware of the meanings of Drupal variables, which are mentioned in the following section:
A raw HTML file contains static content and using raw HTML in Drupal CMS is of no use since the powerful features of Drupal will be unexplored. To harness the powers of any CMS, the static content of HTML should be populated dynamically. Populating the content dynamically means that if the content is entered from the Admin panel, it should be reflected at the frontend.
As mentioned earlier, the
garlandtheme is taken as the base theme to explain things here.The user can also explore other default themes once he has exposure to the
garlandtheme.The user can rename the theme as per his choice. Whatever may be the name of the theme, the
garlandtheme's structure will be used and the content of the theme files will be changed as per the requirement.In the following section we will explain how to populate the Drupal theme with dynamic content, test to ensure if things are moving in the right direction, and enable the theme for testing.
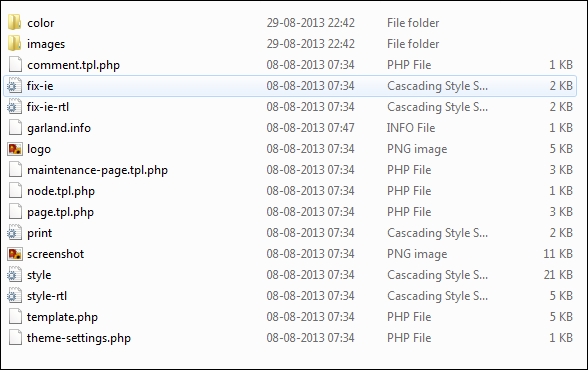
The screenshot of the Garland theme being used as the base theme to implement instructions mentioned in this book is given in this section. Everything that will be instructed should be implemented in the PHP files of the garland theme.
If any other file (for example, a CSS or JavaScript file) is required to be used at any point in time, it will be mentioned specifically.
Note
Please remember, we will use files having the .php extension to populate the Drupal theme with dynamic variables. Names of the files must be intact, while the content can be changed with your HTML.
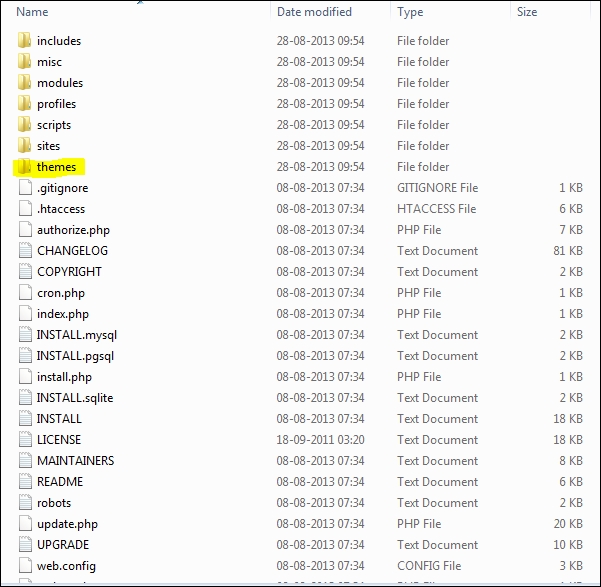
Everything we discussed until now about the garland theme is of no use if we don't know the location of the garland theme, isn't it ? How will you locate the garland theme? The following screenshot depicts the code structure of Drupal. Click on the themes folder highlighted in yellow:
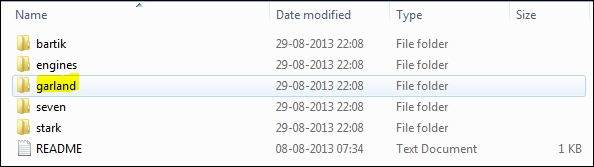
You will be able to see the garland folder, as shown in the following screenshot:
The following screenshot depicts the code structure of the garland theme:
Perform the following steps to populate raw HTML with Drupal variables:
Create a backup of all the files.
Open a PHP file.
Paste the HTML content onto the file.
Replace the static text with the concerned Drupal variable.
Suppose a raw HTML file is having static content as given in the following code, the static content in the
headandtitletags will be displayed using a Drupal variable as mentioned in the preceding section using thecode [$title]tag of Drupal.[<HTML> <head>Our Drupal website</head> <title>Title of the website</title> <body>Content of the website</body> </HTML> ]
After using the Drupal variable in our code, it should look as follows:
Code [
<HTML>
  <head><?php print $druapl_variable ?></head>
<title><?php print $druapl_variable ?></title>
<body><?php print $druapl_variable ?></body>
</HTML>
]
A list of theme variables can be found in the garland theme and other themes.
After populating the Drupal theme with dynamic variables, we need to test if things are working properly or not. Before that, we need to check if the garland theme is enabled or not. If it isn't enabled, we need to enable it
We need to perform the following steps to enable the garland theme (assuming Drupal 7 is installed on the user's machine):
Log in to the Drupal 7 Admin panel.
Enable the Garland theme if it is not enabled. Follow steps 3 and 4 to enable the Garland theme.
Click on Appearance (highlighted in yellow in the following screenshot) on the top menu bar to view a list of themes:

If the Garland theme is disabled, it will be displayed in the Disabled Themes section. Click on the Enable link to activate the Drupal theme as shown in the following screenshot:

Once enabled, Garland will appear in the Enabled Themes section with a message displayed as shown in the following screenshot:

Now we are in a state where we can test if things are working properly or not. We will add content from Drupal's Admin panel and it should be reflected at the frontend.
We need to perform the following steps to add content:
Navigate to Add content by clicking on the Content tab as shown in the following screenshot:

Click on the Article link as shown in the following screenshot:

If the previous step is successfully executed, the page shown in the following screenshot will be opened. Enter Title and Body and save it.

Check at the frontend. The content added by the user should be reflected at the frontend.