

Now that you understand how App Engine works and the composition of an App Engine app, it's time to get our hands on some real code and play with it. We will use Python to develop applications, and we've got a few reasons to do so. For one, Python is a very simple and an easy-to-grasp language. No matter what your background is, you will be up and running it quickly. Further, Python is the most mature and accessible runtime environment because it is available since the introduction of App Engine, Further almost all new experimental and cutting-edge services are first introduced for Python runtime environment before they make their way to other runtimes.
Enough justification. Now, to develop an application, you will need an SDK for the runtime environment that you are targeting, which happens to be Python in our case. To obtain the Python SDK, visit https://developers.google.com/appengine/downloads. From the download page, select and download the SDK version for your platform. Now let's examine installation process for each platform in detail.
The installation of the Linux SDK is quite simple. It is just a matter of downloading and unzipping the SDK. Besides this, you have to ensure that you have Python 2.7.x installed, which usually is the case with most Linux distributions these days.
To check whether you have Python, open a terminal and type the following command:
$ python --version
Python 2.7.6
If you get a response that states that the command was not found or your version number shows something other than 2.7.x (the least significant digit isn't important here), then you'll have to install Python. For Ubuntu and Debian systems, it will be simple:
$ sudo apt-get install python2.7
Once you're done with the preceding process, you just have to unzip the SDK contents into a directory such as /home/mohsin/sdks.
Note
The best way to work with SDK is to add it to system's PATH environment variable. This way, all the command line tools would be available from everywhere. To do that, you can modify the PATH like this:
$ export PATH=$PATH:/path/to/sdk
This change would stay as long as the shell is active to better you add the above like in your .bashrc which is located at ~/.bashrc.
So as you can see, the installation on Linux is pretty simple and involves simply uncompressing the SDK contents and optionally adjusting the system path.
The requirements for Python presence on the system remain the same, and Mac OS X comes with Python. So, this is already satisfied and we're done with it. So now, drag the .dmg file to Applications as you'd install any normal app for Mac and perform the following steps:
In Finder, browse Go | Applications. This shall open the
Applicationsfolder.Double-click on the
.dmgfile that you just downloaded and drag theGoogleAppEngineLaunchericon to theApplicationsfolder.Now, double-click on the Launcher icon that you just dragged to the
Applicationsfolder.When you're prompted for to make the
symlinkscommand, click on OK because Launcher alone is just a useful utility that is used to run the App Engine apps locally, but its GUI lacks many of the features and commands that are otherwise available in the SDK. So, makingsymlinkswill let you access them on a terminal from anywhere.Your SDK contents will be at
/usr/local/google_appengine.
Now, you're done with the installation.
A little unwarranted rant—Windows is usually not a very good platform for development if you want to use open source tool chains, because from Ruby to Python and node.js, everything is developed, tested, and usually targeted for the *nix systems. This is why they might not work out of the box on Windows. On this note, the Python SDK for App Engine is available for Windows, and it requires a Python installation too, which can be downloaded from http://www.python.org.
Download the .msi installer for Python 2.7.x (where x is whatever latest minor version which right now is 10) and follow the instructions. You will have everything right there required to run Python programs. Next, download the Google App Engine SDK for Windows and install that too and you are done.
Now that we have a good overview of how App Engine scales, available runtimes, and the services that are at our disposal, it's time to do something real and write our first app.
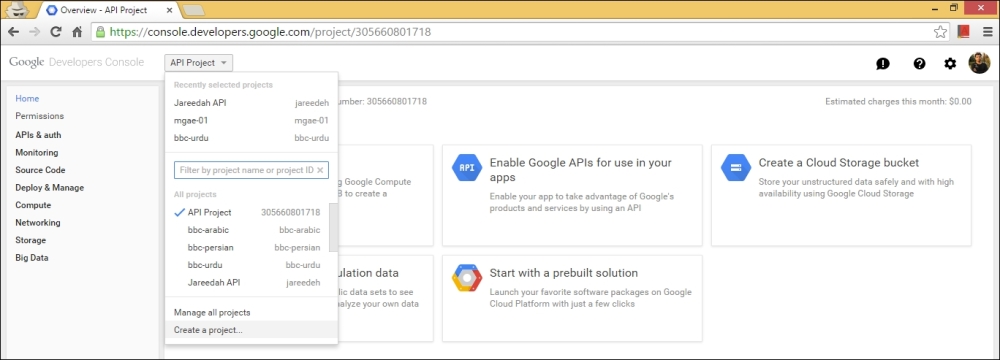
We will write a simple app that will print all the environment variables. Before you write any code, you'll need to create the app on Google App Engine. If you don't do this, you can still test and run the applications locally, but to deploy, you have to create an app on Google App Engine. To do this, navigate to http://appengine.google.com. Here, you'll be asked to log in using your Gmail credentials. Once you've logged in, you will have to click on Create a Project… from the drop down menu as shown below:
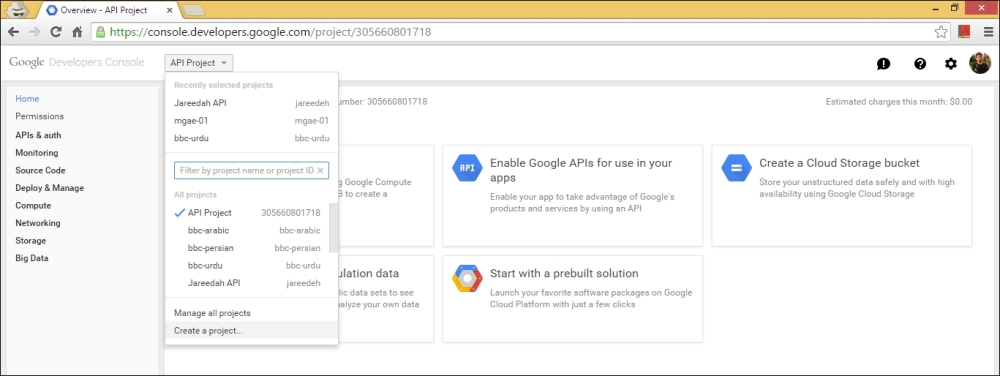
Creating a new project from Google Developer Console.
Once you click this, you'll be presented with this dialog:
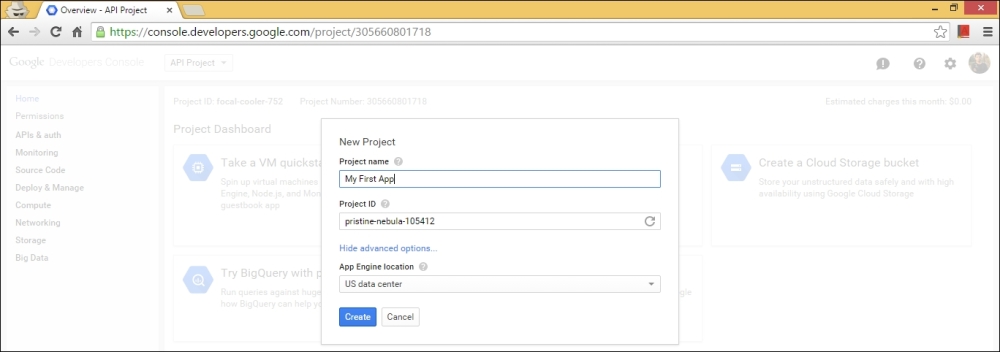
Popup to enter information for your new project
In its most basic form, the pop-up would only contain the name of the project, but we have expanded all the options to demonstrate. The first thing is the Project name and this can be anything you like it to be. The second thing is the Project ID. This is the ID that you will use in your app.yaml file. This ID must be unique across all the App Engine applications and it is automatically generated for you, but you can specify your own as well. If you specify your own, you will be warned if it is not unique and you won't be able to proceed.
The next advanced option is about the location that your app would be served from. By default, all the applications would be hosted from the data centers located in USA, but you can select the European ones. You should select the European data center if most of the user base is close to or is in Europe. For example, if we're building an app for which we expect most of the traffic from Asia, Middle-east, or Europe, then probably it would make more sense to go for European data center.
Once done, left-click on Compute | App Engine | Dashboard. When presented with the dialog box, select Try App Engine:
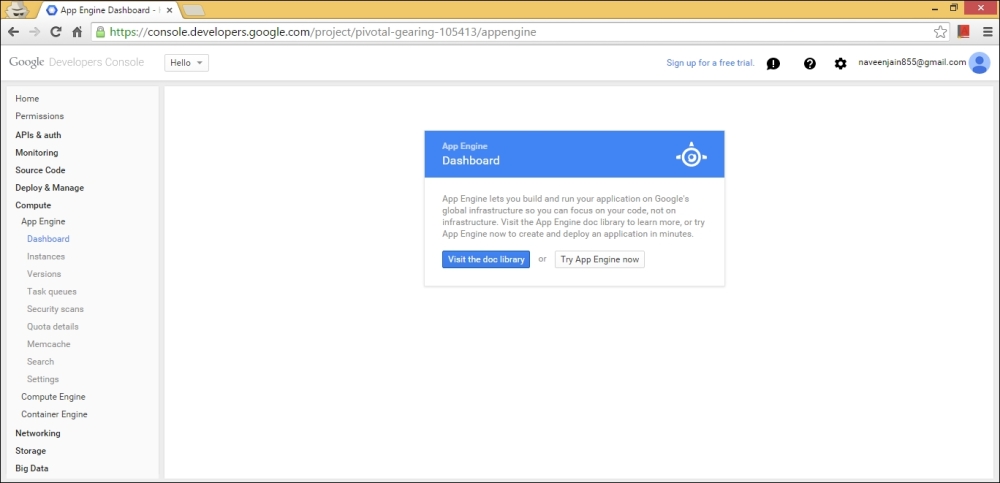
You'll be greeted with this dialog on selecting Google App Engine.
Tip
Downloading the example code
You can download the example code fi les for all Packt books you have purchased from your account at http://www.packtpub.com. If you purchased this book elsewhere, you can visit http://www.packtpub.com/support and register to have the fi les e-mailed directly to you.
And finally, you'll see the following screen:
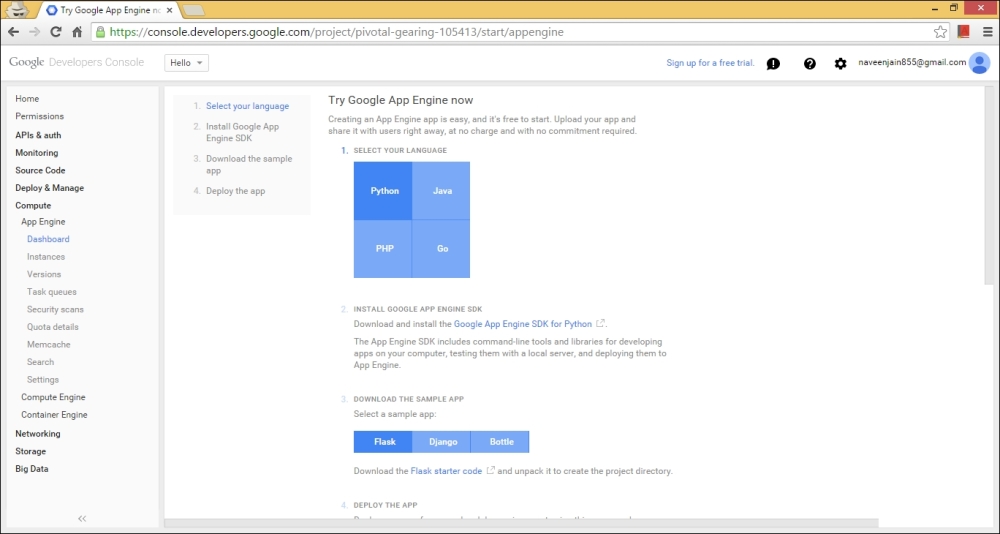
The welcome page shows steps to deploy a sample application.
This welcome page appears because you have no application deployed as yet. Once deployed, you'll see a dashboard, which we'll see in a while.
You can follow the above instructions from the welcome page, if you want to deploy a sample application as shown in the preceding screenshot, but for our purpose, we will deploy our own application. To deploy our own app, all we need is the project ID for which you can click on Home on the left side, which will show the following page:
Your newly created project. All we need is the Project ID
We only need the Project ID from the first box on the top-left, which we will enter in app.yaml for application directive and then we're all good. For example, in this chapter, we used mgae-01 as the Project ID and that's what we are using. Because application IDs must be unique across all the App Engine applications, therefore, you cannot use this ID while deploying your own application and you will have to select something else.
Once you have deployed the app, your dashboard (accessible from Compute | App Engine | Dashboard) will look like this, instead of the welcome page that we saw earlier:

The application dashboard of a deployed application
Now that we are done with the basic setup, we will write the code and run and test it locally.
Create a directory somewhere. Create a file named app.yaml and enter the following into it:
application: mgae-01
version: 1
runtime: python27
api_version: 1
threadsafe: false

handlers:
- url: /.*
  script: main.py
This app.yaml file is what defines your application. Application is the unique ID that we discussed. The version is your version of the app. You can have multiple versions of the same app. As you change this string, it will be considered a new version and would be deployed as a new version, whereas the previous version will be retained on the App Engine servers. You can switch to a previous version from the dashboard whenever you like. Besides this, you can also split the traffic between the various versions of an application.
The next attribute is the runtime. We have many choices here, such as go if we want to have our app in the Go programming language. Previously for Python, we had choice of either Python 2.7 or Python 2.5. However, support for the Python 2.5 runtime environment is deprecated, and new apps cannot be created with Python 2.5 since January 2014.
Next comes the api_version. This indicates the version of the system services that you'd like to use. There is only one version of all the available system APIs (the ones that we discussed under runtime services), but in case Google does release any incompatible changes to the services, this API version number will be incremented. Thus, you will still be able to maintain the apps that you developed earlier, and you can opt for a newer version of APIs if you want to use them in newer applications or upgrade your existing applications to use newer versions.
Next comes the thread safe thing. Here, you indicate whether your application is thread-safe or not. As a rule of thumb, if your code does not write to any global variables or compute them on the fly to populate their values for later reference, your app is thread-safe. Hence, multiple requests can be handed over to your App Engine instance. Otherwise, you'll be handed over a single request at a time, which you'll have to finish processing before you can get the next request to be processed.
Multithreading was not available for the Python 2.5 environment because it worked via CGI, but Python 2.7 supports WSGI, which allows concurrent requests. However, this particular app uses the 2.7 runtime environment, but it is not a WSGI app. All of this might seem Greek to you for now, but we shall discuss CGI, WSGI, and concurrent requests in detail in the next chapter.
Next comes the handlers section. Here, we list URLs as regular expressions and state what has to be done with them. They might be handled by a script or mapped to a static directory. We'll discuss the latter case in the next chapter, which will let us serve static application resources, such as images, styles, and scripts. An important thing that you should note is that the URLs in the list are always checked in the order in which they are defined, and as soon as the first match is found, the listed action is taken. Here, are mentioning tell that whatever URL we get, simply execute the Python script. This is the CGI way of doing things. WSGI will be slightly different, and we'll examine this in detail later.
So, this was the explanation of the app.yaml, which describes the contents and details of your app. Next comes the actual script, which will generate the output for the web page. Create a main.py file in the same directory as that of app.yaml and enter the following code:
import os
print 'Content-Type: text/plain'
print ''

print "ENVIRONMENT VARIABLES"
print "======================\n"

for key in os.environ:
print key, ": ", os.environ[key]
Now, let's examine this. This is actually a CGI script. First, we imported a standard Python module. Next, we wrote to the standard output (stdout), and the first statement actually is writing an HTTP header, which indicated that we are generating plain text.
Next, the print statement printed a blank line because the HTTP headers are supposed to be separated by a blank line from the HTTP body.
Next, we actually iterated over all the environment variables and printed them to stdout, which in turn will be sent to the browser. With that, we're done with our example application.
Now that we understand how it works, let's run it locally by executing the following command:
$ ~/sdks/google_appengine/dev_appserver.py ~/Projects/mgae/ch01/hello/
Here, ~/Project/mgae/ch01/hello is the directory that contains all the previously mentioned application files. Now, when you point your browser to http://localhost:8080, you'll find a list of environment variables printed. Hit it with any URL, such as http://localhost:8080/hello, and you'll find the same output except for a few environment variables, which might have a different value.
Let's deploy the application to the cloud, as follows:
$ ~/sdks/google_appengine/appcfg.py update ~/Projects/mgae/ch01/hello/ --oauth2
10:26 PM Application: mgae-01; version: 1
10:26 PM Host: appengine.google.com
10:26 PM
Starting update of app: mgae-01, version: 1
10:26 PM Getting current resource limits.
Email: [email protected]
Password for [email protected]:
10:26 PM Scanning files on local disk.
10:26 PM Cloning 2 application files.
10:27 PM Uploading 2 files and blobs.
10:27 PM Uploaded 2 files and blobs
10:27 PM Compilation starting.
10:27 PM Compilation completed.
10:27 PM Starting deployment.
10:27 PM Checking if deployment succeeded.
10:27 PM Deployment successful.
10:27 PM Checking if updated app version is serving.
10:27 PM Completed update of app: mgae-01, version: 1
This that indicates that our app is deployed and ready to sever. Navigate your browser to http://yourappid.appspot.com and you will see something like this:
REQUEST_ID_HASH :  FCD253ED
HTTP_X_APPENGINE_COUNTRY :  AE
SERVER_SOFTWARE :  Google App Engine/1.9.11
SCRIPT_NAME :
HTTP_X_APPENGINE_CITYLATLONG :  0.000000,0.000000
DEFAULT_VERSION_HOSTNAME :  mgae-01.appspot.com
APPENGINE_RUNTIME :  python27
INSTANCE_ID :  00c61b117c09cf94de8a5822633c28f2f0e85efe
PATH_TRANSLATED :  /base/data/home/apps/s~mgae-01/1.378918986084593129/main.pyc
REQUEST_LOG_ID :  54230d4200ff0b7779fcd253ed0001737e6d6761652d3031000131000100
HTTP_X_APPENGINE_REGION :  ?
USER_IS_ADMIN :  0
CURRENT_MODULE_ID :  default
CURRENT_VERSION_ID :  1.378918986084593129
USER_ORGANIZATION :
APPLICATION_ID :  s~mgae-01
USER_EMAIL :
DATACENTER :  us2
USER_ID :
HTTP_X_APPENGINE_CITY :  ?
AUTH_DOMAIN :  gmail.com
USER_NICKNAME :
The --oauth2 option will open the browser, where you will have to enter your Google account credentials. You can do without --oauth2. In this case, you will be asked for your email and password on the command shell, but you'll also get a notice that states that this mode of authentication is deprecated.
Let's examine a few interesting environment variables that are set by Google App Engine. REQUEST_ID_HASH and REQUEST_LOG_ID are set by App Engine to uniquely identify this request. That's the request ID that we talked about in the section about how scaling works. The APPENGINE_RUNTIME indicates the runtime environment that this app is running on. There is a DATACENTER header that is set to us2, which indicates that our app is being executed in the US data centers. Then, we have INSTANCE_ID, which is the unique ID that is assigned to the instance handling this request.
Then, some user-specific headers such has USER_IS_ADMIN, USER_EMAIL, USER_ID, USER_NICKNAME, and AUTH_DOMAIN are set by the User service that we discussed in the services section. If a user had logged in, these headers will have their email, ID, and nickname as values.
These headers are added by Google App Engine, and a feature of the environment in which your code executes. So that's all, folks!