

Now that we have Node.js installed on our system, we will take a look at some very simple code, and we'll also will talk a little bit about npm and what that is.
First of all, let's go to the nodejs.org website and click on the About link:
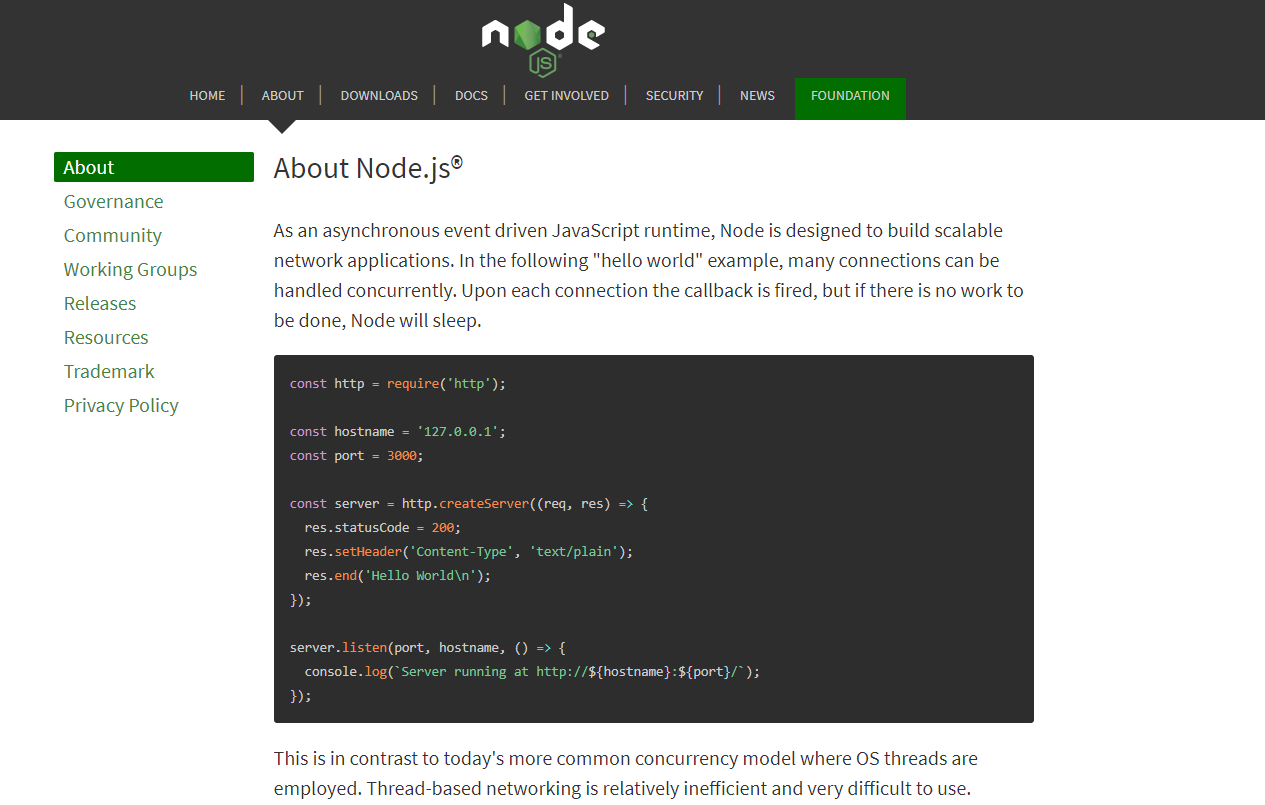
We will see a really simple example of an extremely simple web server that basically will just serve up some text for us.
Next, let's take a look at the code:
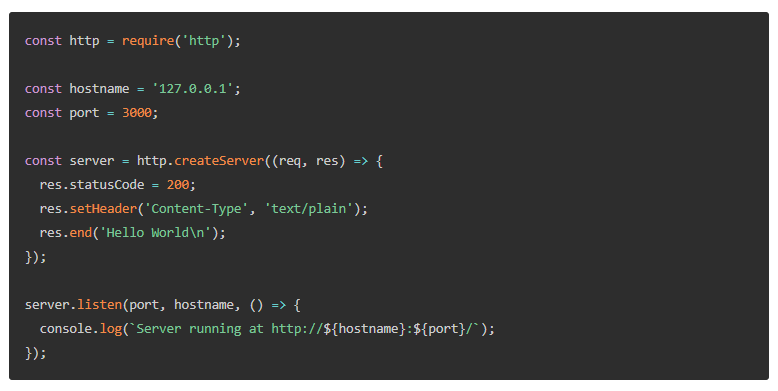
- The first line that we have is
const http; here, we're just defining a variable calledhttp, and we're defining this variable as a constant because it not will change. - We're then setting the variable to
require('http')to include thehttpmodule. Whenever you seerequire, remember that it's either including a module or another file. - Next, we have the
hostnameandportconstants (ourhostnamewill be ourlocalhost), and then,portis1337.
- We'll take that
httpmodule and use thecreateServermethod or thecreateServerfunction; this takes in a request (req) and response (res) parameter. Also, we'll use thewriteHeadmethod of the response and give it a status of200, which means that everything is okay and we're also setting theContent-Typetotext/plain. Then, we will end the response and printHello Worldin the browser. Then we have to enter.listenand pass theportandhostnamename. Once this happens, we can useconsole.log, letting the user know that the server is running.
So, this piece of code is extremely simple and we'll actually run it and see how it works. Before we do this, I just want to go over to npmjs.com and show you this website:
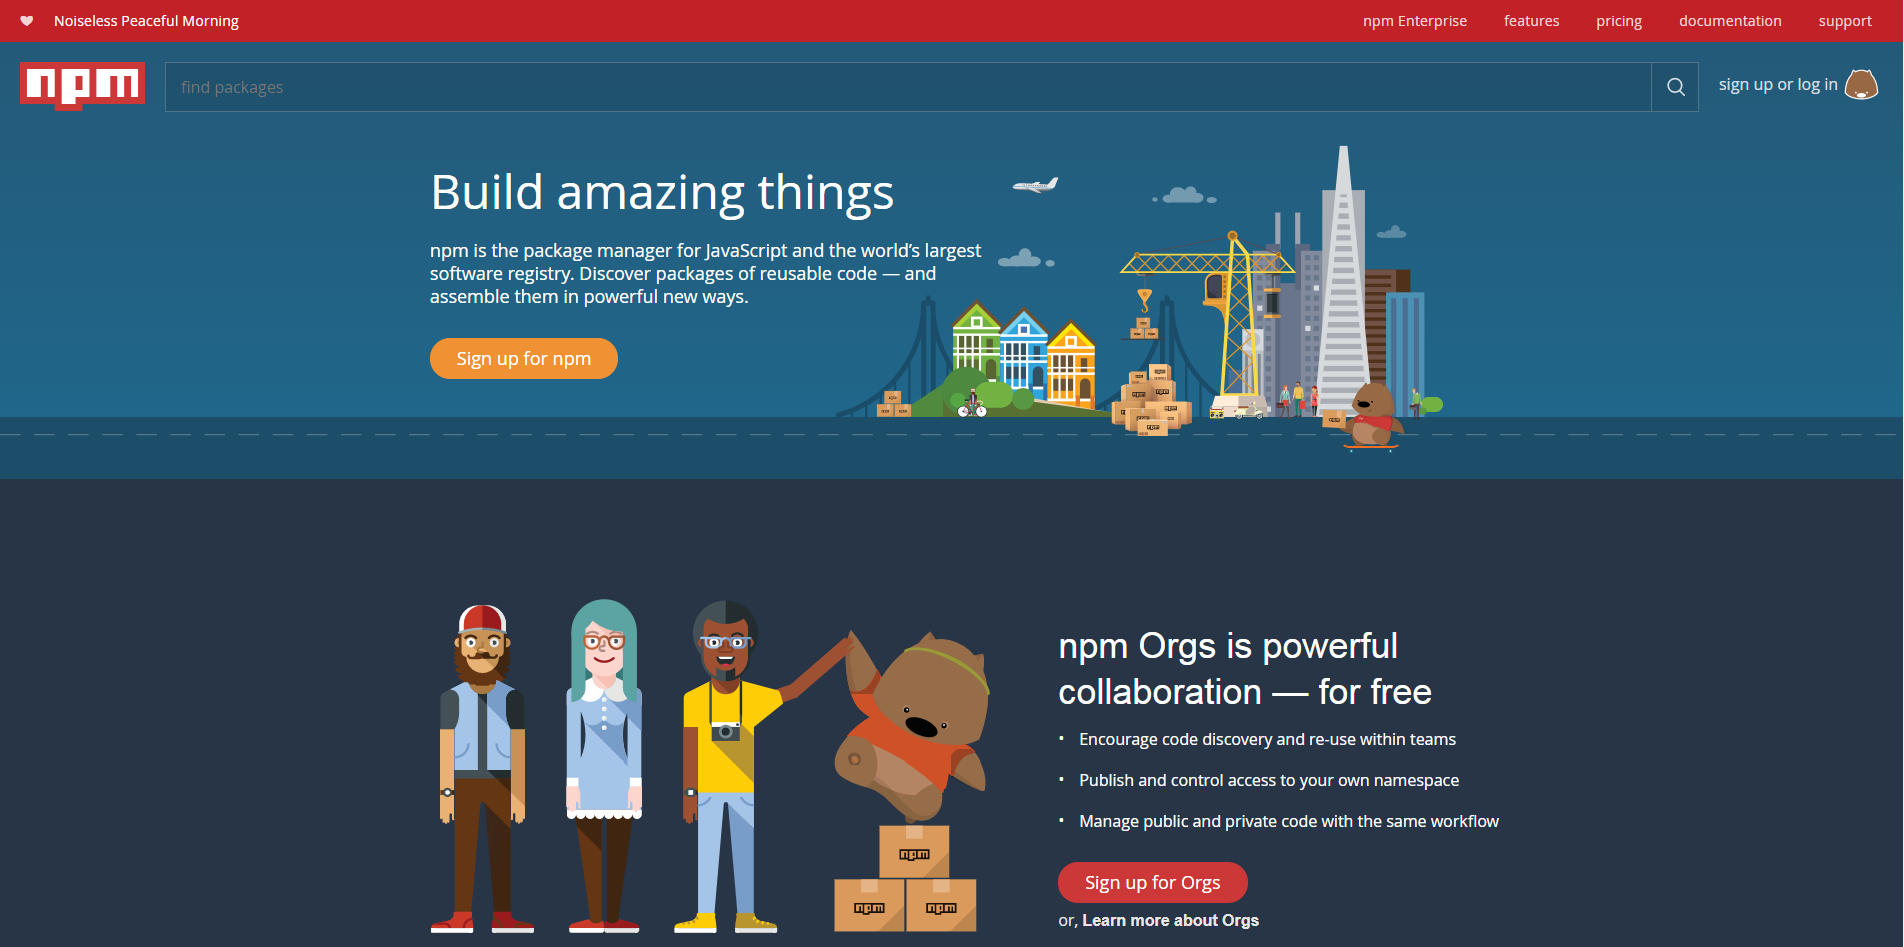
This is basically a repository for all of the Node package modules. You have modules that are extremely simple all the way up to a module such as Express, which is an entire HTTP server and framework (which we'll get into later on). You can install these modules from your command line if you have Node installed; you also have npm, which we'll get into a little later.
We'll go to the C: drive. I have a folder called Projects, and I will create another folder in there, called simpleserver. This will be our application folder. Now all of our Node applications need to have a file called package.json, which is a JSON file that holds a lot of different information such as the application name and description; we have to list all the dependency modules that we want to use. We could create that manually, but we can also use the command line. So I will use my Git Bash tool and just go right into the Git Bash folder.
To create this file, we'll run the npm init command, which will initialize a series of questions. For the app name, whatever is in parentheses is the default, since this is fine, we'll keep it; version 1.0.0 is good. For description, we'll just say Very simple server; for entry point, you could call this what you want; I like to call it server.js. We don't need any of these; for author, you can put your own name. It will verify this stuff and then, we'll press Enter.
Now, you can see that we have the package.json file. Let's open up this file and take a look at it. I'm using Sublime Text, but of course, you can use whatever editor you want. You can see that we have all that information, such as name and version, all of that:
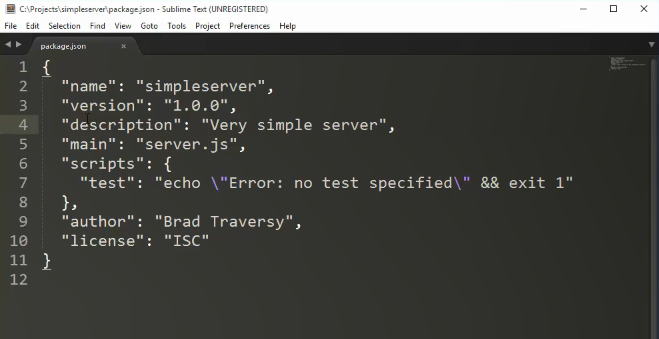
Now if we were using something such as Express or some other kind of Node module, we'd have to put that in our dependencies here; however, we'll get into that a little later.
Since we have our package.json file, let's now create the server.js file and we will open up that up; I'll just make Sublime my default application, real quick. Now, we'll go to that About page and just copy the following block of code:
We'll just paste this code in the server.js file, save it, and go back into our command line. We'll type node and then the name of the file; you can type either server or server.js:
node server.jsYou can see that the command is running:

We get Server is running at http://127.0.0.1:1337/. Let's check this in the browser. We can enter the localhost:1337 address. We'll get Hello World. So this is, in fact, a Node application that we're running.
Now, a lot of times, you'll see that instead of writing node server, you'll see npm start; so, if I do that, remember that it does the same thing. You can either use node and then the filename, the base server filename, or npm start.
So there you go! It is a very simple application, but doesn't do much. In the next section, we'll discuss how we can actually serve HTML files instead of just serving some text like this.