

Since we have just set up Drupal, and created our user account, we are now logged into our new web site. On this front page, we have a link to the configuration section where we can configure our installation.

The customize and configure link takes us to the Site Configuration page, which contains various sections of the options we can configure.
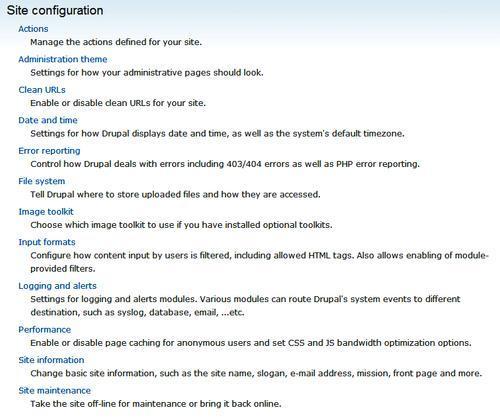
Let us take a look at these options and what they allow us to do, and configure them for our DinoSpace site.
Actions are tasks which Drupal can perform, such as unpublishing a comment, making a post sticky, or sending an email. These actions can be performed by some of the modules within Drupal when triggered by a certain event. For instance, we could automatically set posts or comments containing links to the competing web sites to be unpublished.
On their own, these actions won't do anything, they need to be triggered. However, triggers are not enabled by default, different modules and custom development may introduce the need for actions and triggers later.
The Administration theme setting allows us to set a different theme when on the administration pages.
Note
A Theme is a collection of files, which make up the design, layout, and style of our Drupal web site. New themes can be added, modified, and applied to change the look of our site. In Chapter 8, Designing our Site, we will look at themes in detail.
Since we don't know what these different themes look like, we can't yet make a judgement on whether we would prefer a different one for administering the site. The advantage of this is that if we were to have a very stylish image-heavy design for our site, we may opt for a simpler design for the administration options to make it easier and faster to administer the site, while keeping the site itself more visually appealing. There is also the option to use the Administration theme when editing and creating content, which is generally done outside the Administration section.
We have already set the Clean URLs option, when we installed Drupal. But this section allows us to change this, and enable or disable the Clean URLs at any time, should we need to. We don't need to; so, let's leave this as it is.
The Date and time settings allow us to change the locale and format of the date and time used, including:
The default time zone (which we set on installation).
User-configurable time zones (to allow users to set their own time zones, which adjust the display of dates for them). This is already enabled, and makes a more enjoyable experience for users in another time zone, as it may be difficult for users to find out what time something was posted or replied to.
The first day of the week, used for calendar views.
Format of the short representation of a date.
Format of a medium length representation of a date.
Format of a long length representation of a date.
The formatting settings are primarily a personal choice, I'm happy with them as they are, so I'm going to leave them at their defaults. Why don't you explore these options and adjust them to your personal taste.
Using the Error reporting settings, we can specify a page to redirect the user to if they try to access a page which either they have no permission to view, or which does not exist.
We haven't actually created any pages yet. So we can't redirect our users. However, we will come back to this in Chapter 2, Preparing Drupal for a Social Networking Site.
The other option on the page is with regards to displaying technical error messages generated by Drupal. The two options available are Write errors to the log and to the screen and Write errors to the log. These error messages are useful when developing and creating a site. However, displaying them to visitors can confuse them, as they will be technical, and can pose a security risk by revealing information on our site's setup. Let's change this to Write errors to the log. If we do encounter any problems, we can always check the log.
Note
If you wish to leave it as it is, don't forget to change it to just the log when you put your site live on the web!
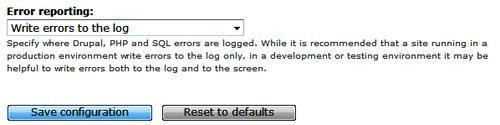
Once we have made those changes, we can click on the Save configuration button, and then return to the configuration options by clicking the Site configuration link near the top of the page.
The File system options determine where the files that we may allow our users to upload to our site or download from our site are stored. There are settings for:
File system path—this is the location on the server where the files will be stored.
Temporary directory—where uploaded files are stored during previews.
Download method (either public or private)—Public downloads mean that anyone could gain access to the files as they are stored in a web accessible folder, whereas the private method would require Drupal to generate the download for the user. The Private method is useful, if we don't want guests to be able to download the files and only want registered users to access them.
Changing the download method on a site which is in use can cause problems with the existing files. So now is the perfect time to change this if we need to. For DinoSpace, there is no reason to have the files tagged private, so let's leave these options as they are.
Tip
Changing the download method, and a note on the temporary path
If you do change the download method, you should change the file system path to reflect a location which isn't accessible via the Internet, that is, outside your web site's root directory. The temporary path is generated automatically based on your server's settings; change this only if you know what you are doing. When working on a live web site in a hosting environment, your web host should be able to instruct how you should configure the file system path and the temporary directory settings, should you wish to change them, or use the private download method.
Many web servers provide options for manipulating images, the most common ones are the GD image library and ImageMagick. We have the GD library installed (from Appendix A). However, we could remove this, or use the ImageMagick library instead. These libraries provide options for tasks including things like:
Adding watermarks
Changing the size of an image
Cropping an image
Converting the format of images
Combining images
The Image toolkit settings provide settings specific to the image library (or toolkit as Drupal refers to it) we have installed. With the GD library, the only setting is related to the quality of images which are manipulated by Drupal.
By default, this is 75%, which means if we were to upload an image and we set Drupal to generate a thumbnail, the thumbnail image would only be 75% of the quality it could be. This option weighs the quality of the image over the size of the image. If we increase the quality of the images, uploaded images will be of a larger size, which may take longer to download, whereas if we reduce the quality of the image, we get lower file sizes, however, the quality of the images is reduced.
Let's adjust this to 85%, as we want to use high-quality images on our site. If this becomes a problem, we can always change it later. You may find it useful to adjust this setting letter if the additional bandwidth is not an issue for you, or the quality of the image is too poor.
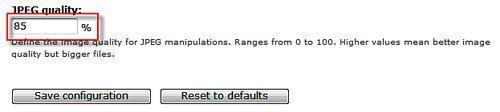
Then we need to click Save configuration and return to the Site configuration page.
Note
Please note that this section is a little more advanced than the other settings pages, as it requires a little more technical understanding.
The Input formats dictate how Drupal should process data which a user has supplied, and depending on the user, we may wish to assign a different format.
The two formats available are:
Filtered HTML
Full HTML
Filtered HTML only allows certain HTML tags, and automatically converts web addresses into links, and new lines into paragraphs where appropriate (although this can be altered). The Full HTML option allows all HTML tags, including things such as JavaScript which could potentially be harmful, if they were submitted by a malicious user. You should never offer this input format to people outside your circle of trust. This would be a serious security risk and should only be available to those who are trusted and involved in the creation of your web site, not general users of the site.
Note
HTML tags are used to structure a web site, for instance, a paragraph would be contained within <p> and </p> tags, and a hyperlink would be contained within the <a> </a> tags. Different tags do different things and pose different risks.
The roles column in the table of Input formats indicate which users can use which format. By default, only administrators can use full HTML (although it says no roles may use it, anyone who can administer the input formats can also use them all). Let's look at the configuration options for Filtered HTML, which will be the input format our users will use, and see what we can configure. The configure link allows us to configure the input format.

Note
Users are grouped into roles; by default, there are anonymous user roles (users who are not logged in) and authenticated user roles. The roles define the permissions for those users. However, the administrator user created when installing Drupal has permission to do anything on the site.
Configurable options include the roles which can use the format, and the filters which the format has. We can't adjust the roles, because this is the default format. So all roles must be enabled for this format.
Currently, any web addresses entered by our visitors will be turned into a hyperlink to that site. Unchecking this may help prevent spam. However the <a> tag is still allowed, so links could still be created.
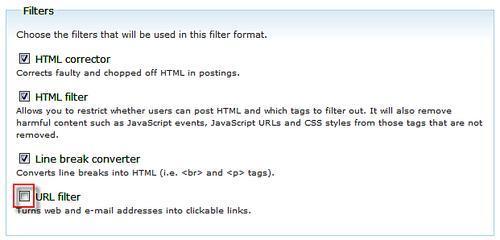
Instead, let's enable the spam link deterrent option. This option is found by clicking the Configure link at the top of the page, which also allows us to edit the specific HTML tags that are not allowed by this input format.

These configuration options allow us to set:
The maximum length of text in a link (longer links will be shortened)
How tags should be filtered
Tags that are allowed
Whether help on HTML should be shown
The Spam link deterrent option adds a special bit of code to all the links that are submitted, which tell the search engines that we don't have editorial control over the content. This prevents the search engine from penalizing our search engine rankings if that link turns out to be a spam link.

Let's enable this option by checking the box, and then click the Save configuration button to save the change.
The next setting is for Logs and alerts, which currently only contains options for database logging. This sets how many logs should be retained, and by default, is set to keep the last 1000 log entries. These logs are viewable from the administration area. For the cut-off limit to work, we need to set up a scheduled task, called a Cron job, which we will look at in Chapter 9, Deploying and Maintaining our Site. Until then, changing this option won't do anything. So, let's leave it for now.
Logs include actions such as creating content, updating content and performing administration tasks. It is important to keep some of these, as it may help in keeping tabs on other administrators, or in investigating why a user had a problem doing something with the site. But the system stores logs for lots of different things, and it can soon build up and clog the database; so we don't want to keep too many of these for too long!
Next, we have Performance settings. These settings allow us to optimize the performance of our Drupal installation, which is particularly useful when we have lots of visitors to our web site. The Normal caching mode is recommended for production sites, but we are still working on our site. So we will need to remember to change this when we deploy our site.
Page caching prevents Drupal from loading and processing pages every time they are requested. Instead, it stores a copy of the processed page (known as a cached version) and when anonymous users visit the site (who are less likely to use dynamic elements that require processing, Drupal serves them the cached version of the page. With web sites under a lot of strain, caching is very useful in reducing unnecessary load on the server from many visits. The Minimum cache lifetime setting prevents Drupal from processing the page too frequently. This ensures that the cached version is used for at least a specific time period, before a new, more up-to-date copy is processed, and the cached version is updated. This setting is more suited for very busy sites.
Every time a user visits our site, data is transferred from our web server (well it will be when we have it deployed; for now, it is stored on our local computer, and is not being transferred) to the user. This data transfer is usually within a specific bandwidth limit set by hosting companies or service providers. Very busy sites can use lots of bandwidth, which can in turn cost the web site owners a lot of money. Drupal has some basic Bandwidth optimizations available for us to reduce the amount of data transferred.
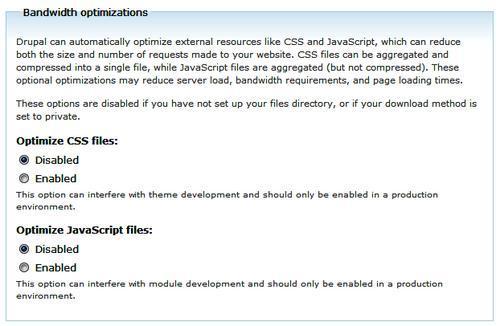
We are not anticipating a large number of users to our social network, at least, not right away; so let's leave those Disabled for now. We can always keep an eye on our bandwidth usage and enable it later if we need to.
The Site information options give us a few options which we can actually alter now, as they relate to what the site is, and what it is for. The options available are:
Site name—The name of the site, which in our case is Dino Space! This was set when we installed Drupal
Site e-mail address—The email address from which automated emails from the web site will be sent; this was also set at the time of installation
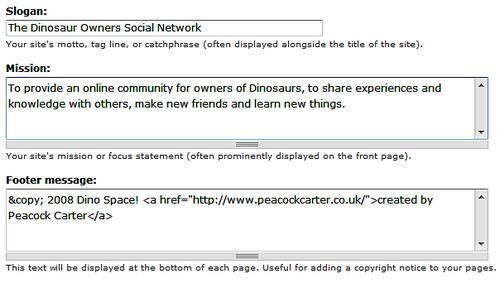
Slogan—A motto or tag line for the site
Mission—A mission or focus statement
Footer message—A message to be displayed at the bottom of each page, in the footer
The names of anonymous users
The page which will act as our front page
We already have our name and email address set at the time of Drupal installation; so let's set the other options.
Out of the remaining options, we already have a name for the anonymous users, and as we have not created any pages, we can't set our default front page just yet!
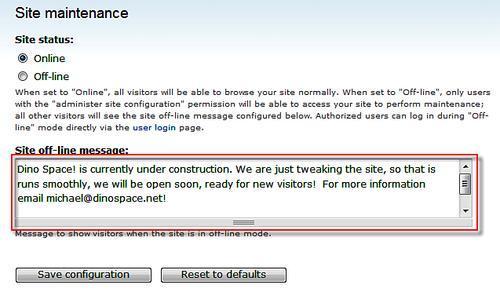
The final configuration option is the Site maintenance settings. This allows us to take our web site offline, so that only administrators can access it and display a message to visitors trying to get in. This would be useful when making big changes, which could interfere with what our visitors are doing on the site at that time. So during these updates, we would take the site offline to prevent any problems.
When we put our web site online, we will need to tweak some settings before they become usable. So, let's set a message now saying something along the lines of the site currently being configured for use. That way, when we put the site online, we can put it into maintenance mode, and it will display the message we have set now.
We have now done as much configuration as possible at this stage!