

Understanding events involved in service worker registration and state transitions will give you greater control over your application by using this feature. In this detailed registration demo, we will take a look at the state transitions of service worker registration.
To get started with service workers, you will need to have the service worker experiment feature turned on in your browser settings. If you have not done this yet, refer to the previous recipe: Setting up service workers. Service workers only run across HTTPS. To find out how to set up a development environment to support this feature, refer to the following recipes: Setting up GitHub pages for SSL, Setting up SSL for Windows, and Setting up SSL for Mac.
Follow these instructions to set up your file structure:
First, we need to create an
index.htmlfile as follows:<!DOCTYPE html> <html lang="en"> <head> <meta charset="UTF-8"> <title>Detailed Registration</title> </head> <body> <p>Registration status: <strong id="status"></strong></p> <p>State: <strong id="state"></strong></p> <script> function printState(state) { document.getElementById('state').innerHTML = state; } if ('serviceWorker' in navigator) { navigator.serviceWorker.register( 'service-worker.js', { scope: './' } ).then( function(registration) { var serviceWorker; document.getElementById('status').innerHTML = 'successful'; if (registration.installing) { serviceWorker = registration.installing; printState('installing'); } else if (registration.waiting) { serviceWorker = registration.waiting; printState('waiting'); } else if (registration.active) { serviceWorker = registration.active; printState('active'); } if (serviceWorker) { printState(serviceWorker.state); serviceWorker.addEventListener('statechange', function(e) { printState(e.target.state); }); } }).catch(function(error) { document.getElementById('status').innerHTML = error; }); } else { document.getElementById('status').innerHTML = 'unavailable'; } </script> </body> </html>Create a JavaScript file called
service-worker.jsin the same folder as theindex.htmlfile with the following code:self.addEventListener('install', function(e) { console.log('Install Event:', e); }); self.addEventListener('activate', function(e) { console.log('Activate Event:', e); });With your two files in place, you can navigate to the GitHub page,
https://username.github.io/service-workers/01/02/index.html, and you will see the success message in your browser.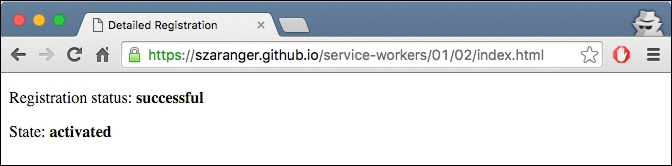
When the registration is successful, we inspect the state of the registration and print it to the browser. In this case it is installing, waiting, or active:
if (registration.installing) {
serviceWorker = registration.installing;
printState('installing');
} else if (registration.waiting) {
serviceWorker = registration.waiting;
printState('waiting');
} else if (registration.active) {
serviceWorker = registration.active;
printState('active');
}The printState(state) helper function will print out the state to the browser.
At the end we attach an event listener to the service worker called statechange. The callback of this event listener will print the state changes to the browser:
if (serviceWorker) {
printState(serviceWorker.state);
serviceWorker.addEventListener('statechange', function(e) {
printState(e.target.state);
});
}When the registered service worker is in the activated state, we can refresh the page to see the service worker taking control.
To demonstrate a page loading, without the service worker taking control, press Shift and refresh the page. You will see the activate event logged in the web console.
We are subscribing to two event listeners in the service-worker.js file, install and activate:
self.addEventListener('install', function(e) {
  console.log('Install Event:', e);
});

self.addEventListener('activate', function(e) {
  console.log('Activate Event:', e);
});These events get fired when this version of the script first gets registered for the given scope.
The install event is a good place to prefetch data and initialize caches, and the activate event works well for cleaning up data from the old version of the script.
When the service worker is successfully registered, it will go through the following stages.
In the life cycle of service workers, at the point when the service worker has registered without errors, but is not yet active, any service workers previously activated will still be in control. The service worker is considered new if there is any change in the service worker file between page reloads. It will therefore go through the installation step. At this stage, the service workers are not intercepting any requests.
The service worker is said to be at the activate stage when it becomes active for the first time. The service worker is now able to intercept requests. This will happen when we close the tab and reopen it, or the page is refreshed by a hard refresh using Shift + reload. It will not occur immediately after the install event.
This can happen at any time, even outside of a request. But the termination happens mostly when the browser needs to reclaim memory. When a new request is made, the service worker will be restarted as needed, or a message will be received, but it will not go back through the activate step.
The service worker will intercept a request it is registered to catch all the time, even if it needs to be restarted in order to do so. But, having said that, we cannot guarantee it will be around for any length of time. Because of this, the global state will not be preserved, so we have to make sure to avoid using any global variables within the service worker file. Instead, we can use indexed or localStorage for persistence.