

GitHub provides a fully featured issue tracker, tightly tied to each repository.
Its primary use is that of a bug tracker, since reporting and discussing bugs play a vital role in the growth of your project. It can also be used to make feature requests, served as a discussion board of a blog or a project, and even used as a notepad for house repairing! For this, you can refer to the following links:
Go to https://github.com/<username>/<repository>/issues for an overview of all issue activity. If no one has ever opened an issue in your project, you will be presented with a blank page with GitHub urging you to open a new issue.
Let's go ahead and do this. Click on the big green button that says New issue:
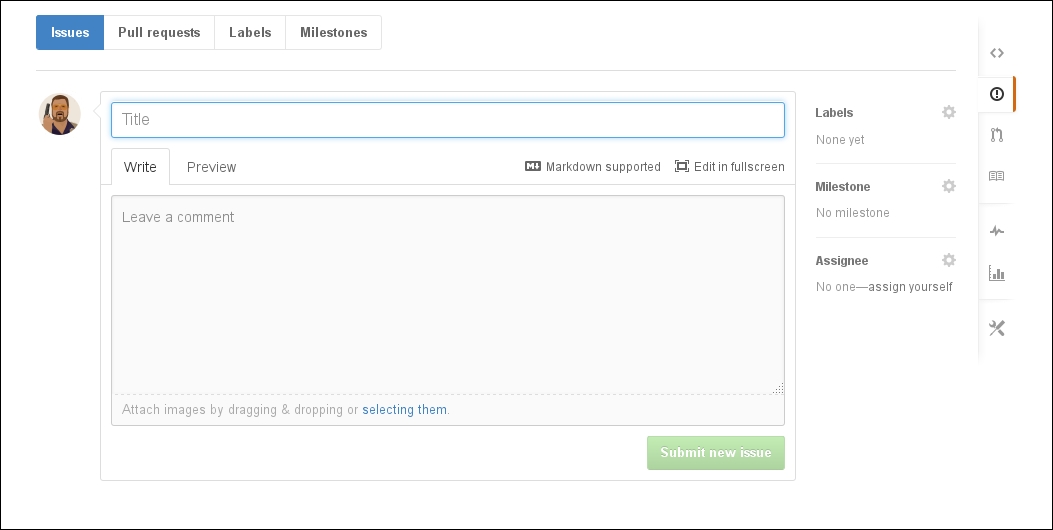
An issue is valid to be created when you at least provide a title. Watch the preceding screenshot carefully where the Submit new issue button is grayed out and cannot be clicked. The title should be as descriptive as possible to the message one tries to pass when creating an issue.
Below, under the Write tab, you can provide the details and essentially start a discussion with everyone who wants to participate (if the repository is public, that is). That's why GitHub cleverly suggests to Leave a comment.
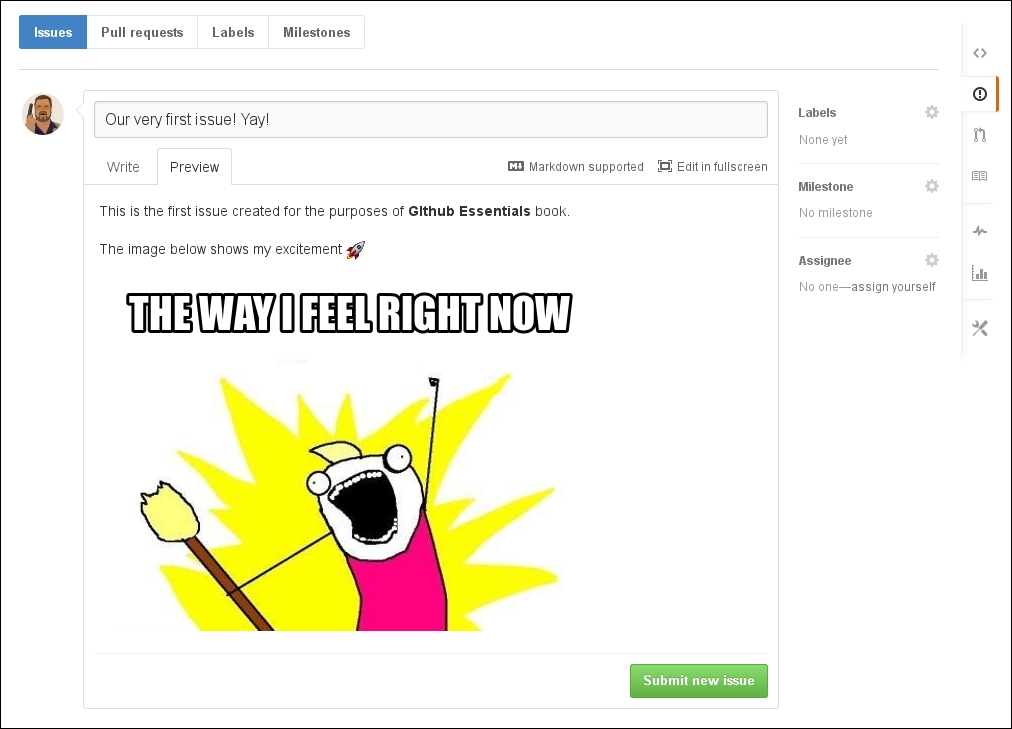
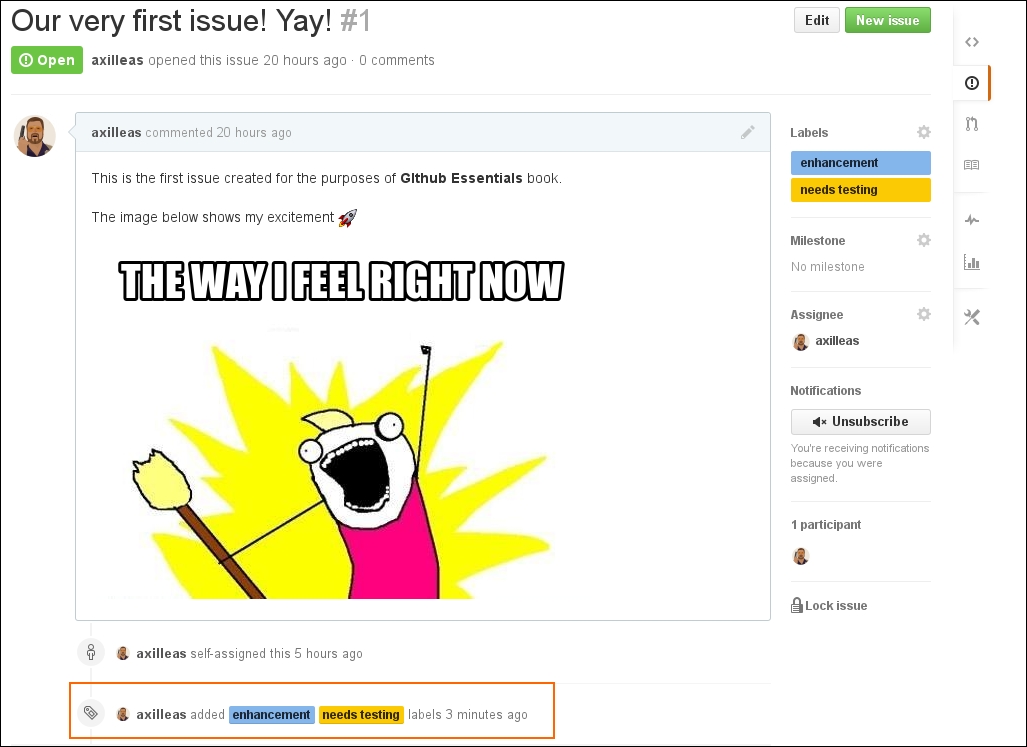
Besides writing, you can also attach images by a simple drag and drop or by selecting them using the folder navigation. Here's how the very first issue of this repository looks like:

Next to the Write tab is the Preview tab. In order to understand its purpose, you must first learn about Markdown.
In brief, Markdown is a text-to-HTML conversion tool, so that you can write text that contains structural information and then automatically get converted to valid HTML. Written by John Gruber and adopted by GitHub (among many others), Markdown is the most well-known text-to-HTML conversion tool for its ease to use.
Note
You can read all about how GitHub extends Markdown's functionality in the guide available at https://guides.github.com/features/mastering-markdown/.
Now, back to our new issue; as the name suggests, Preview shows what the result will be when you submit the issue. It will style the regular text of the Write tab into a meaningful text accordingly, with URLs properly formatted, images shown, emojis displayed, and so on. The following screenshot shows how the preview of the issue is rendered:
Note
As we will see later in this book, GitHub-flavored Markdown has many little gems that leverage the usage of the issue tracker. What you have seen here is just the tip of the iceberg.
Feeling ready to submit it? Hit Submit new issue at the bottom of the page. Congratulations on making your first issue! The result will look like the following:
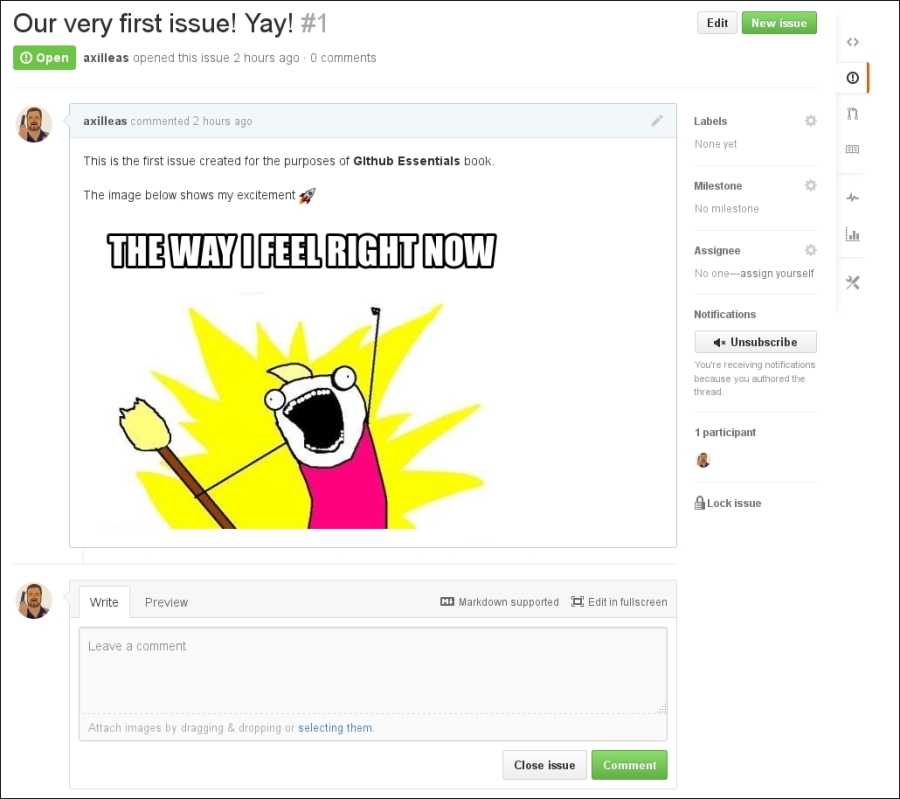
Each created issue is assigned a unique number that we can later use in other issues for reference. In our example, since this was the very first issue, it was assigned to number #1. Some useful information is provided in the title area. You can see that the issue is marked as Open, the username of the person who created it, the time it was created, and how many comments there are.
If you later realize that you made a mistake, don't panic; you can always edit the issue you created. The Edit button allows you to edit the title, and the pencil icon is used for editing the description.
Close the issues with the Close issue button.
A repository can have more than one collaborator. A collaborator is a person who has push access to the repository and, in our case, can also edit and close issues.
User assignment works well in repositories with large traffic where a team is involved and is responsible for bug fixes, enhancements, and so on.
There are two ways to assign an issue to someone. First, as you have seen in the previous images, there is an Assignee section inside each issue:
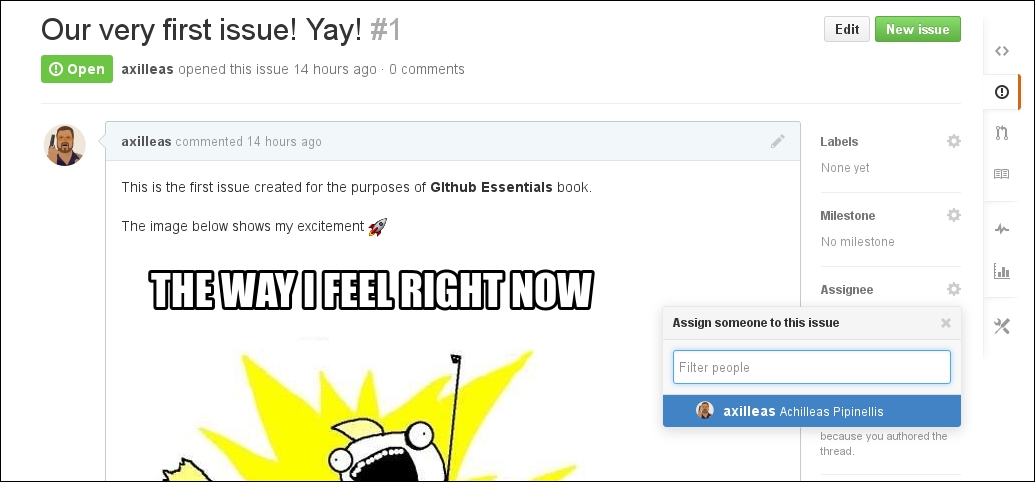
At this particular stage, there is only one collaborator, me, so only my name appears in the list. Okay, we learned how to assign an issue to a collaborator from inside the issue, but what happens if you have dozens of issues that you want to assign to someone? Going one by one and assigning them is a bit tedious and time consuming. You'll be happy to know that you can mass-assign issues to a person.
For this purpose, let's create two more issues. Next, head over the Issues page, select the boxes of the issues that you want to assign, and select an assignee, as shown in the following screenshot:
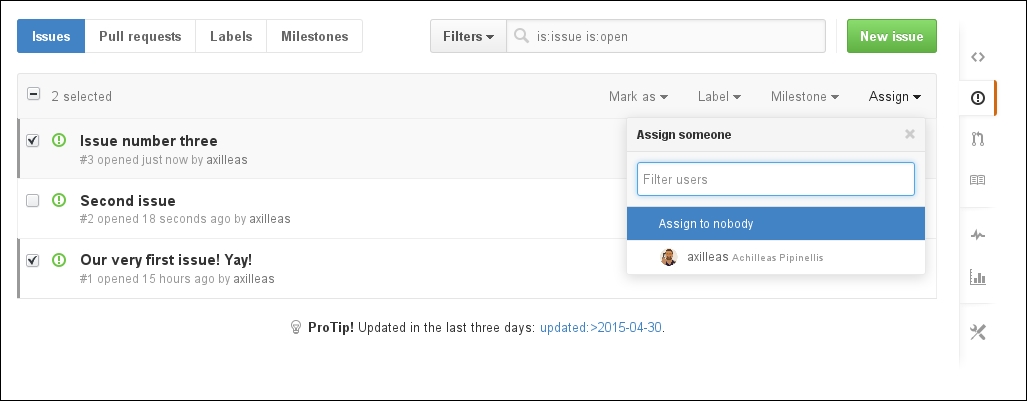
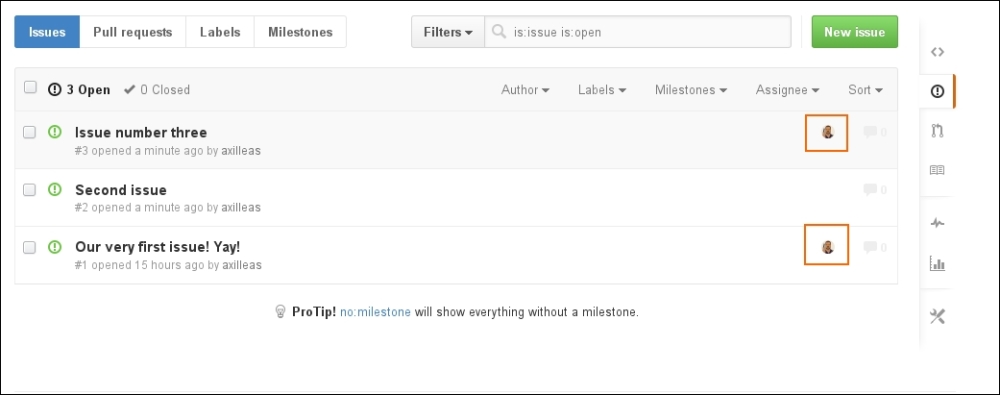
After selecting the assignee, the issues will immediately get updated with the new information. You can see that the avatar of the assignee appears on each issue they are assigned to:
If you have worked with WordPress, labels are like tags. This is not to be confused with Git tags, though. We will explore how to create labels and use them effectively to easily categorize batches of issues.
Labels provide an easy way to categorize the issues based on descriptive titles such as bug, feature, and any other words you feel like using. They have colors and are visible throughout the issue tracker or inside each issue individually.
With labels, you can navigate to the issue tracker and filter any bloated information to visualize only the issues you are interested in. Let's see how that works.
Head over the issue tracker and navigate to the label page by clicking on Labels, as shown in the following screenshot:
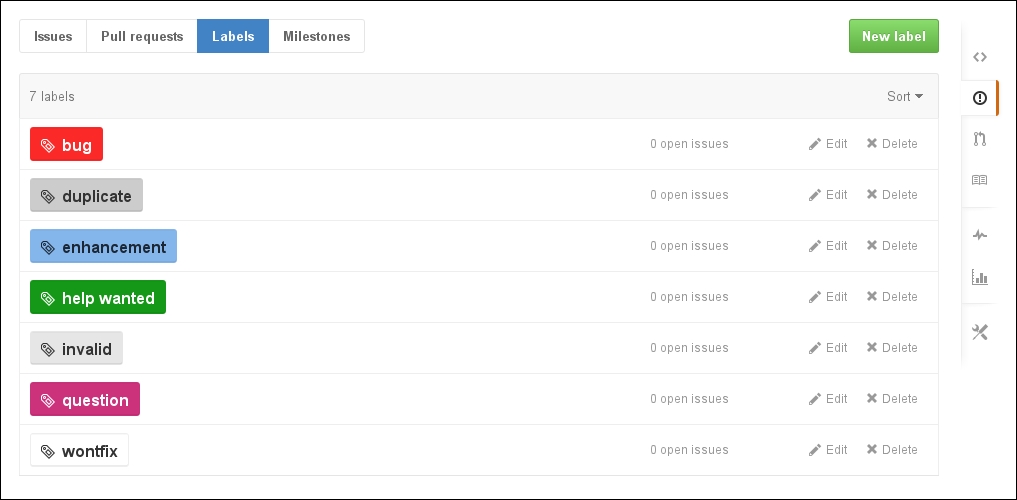
As you can see, GitHub sets up some predefined labels that are ready to use. The name and the color are fully customizable for new and existing ones.
Creating a new label is as easy as pressing the New label button, filling in the name, and choosing a color. In fact, a random color is already picked, so the only prerequisite is the name. I have created a new yellow label named needs testing, as shown in the following screenshot:

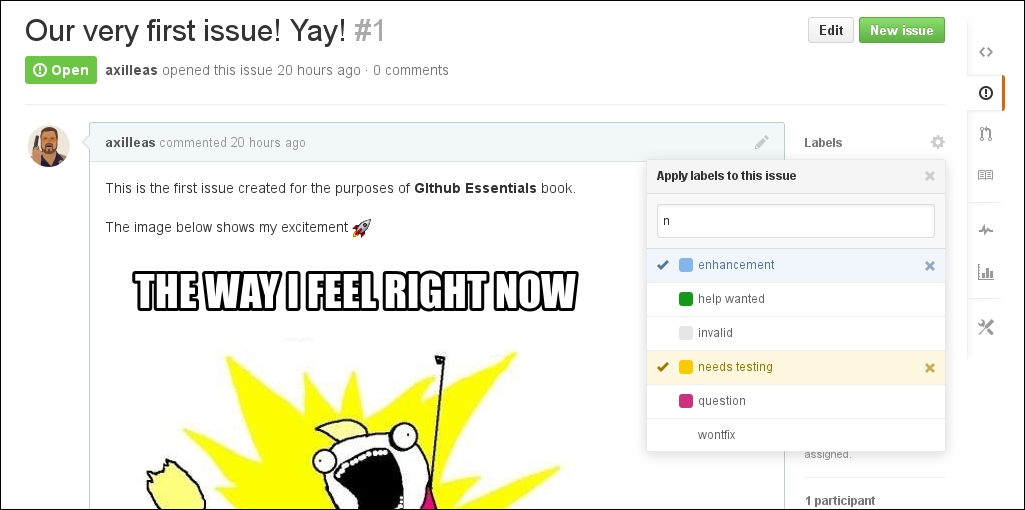
Immediately, the label is created and it appears in the list. Back to the issues, let's go inside the first one and give it the label we just created. Click on the gear for the dropdown to appear. Start typing to narrow down the search.
Now, we only have 8 labels, but imagine having more than 42. You'd have to scroll and scroll until you find it:
As you might have guessed, you can choose more than one label in an issue. After you choose them, just click anywhere out of the label window to save the action. Immediately, you see the changes:
Notice how GitHub makes note of any change made to the issue. This way, you know who took a specific action and when the action was taken. Nothing escapes GitHub's eye! Try to remove the enhancement label to see what happens.
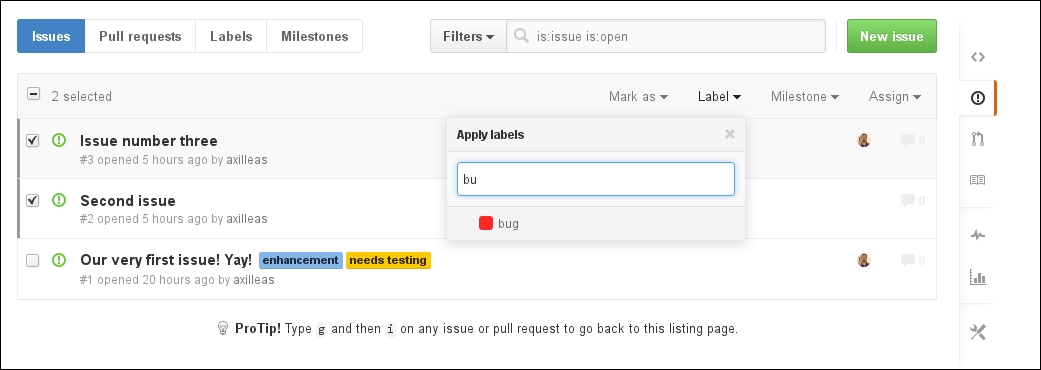
As with the assignees, you can also mass-assign labels to issues. Let's try this by going to the main issues page and selecting some issues; then, choose the bug label:
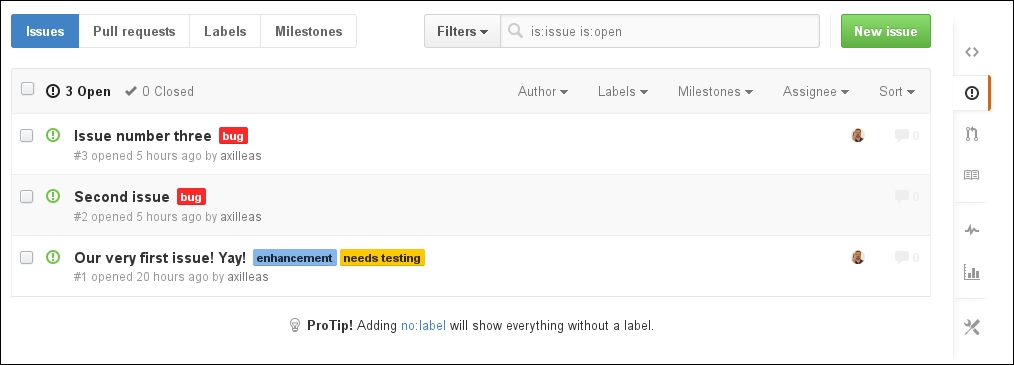
The issue tracker gets updated and now you can have an overview of the issues with the labels assigned to them:
Suppose you have 100 opened issues, many labeled as bugs. Wouldn't it be cool if somehow only those issues appeared in the issues main page? Well guess what, clicking on the bug label, GitHub basically makes a query and, as a result, only the aforementioned issues appear. Grouping to the rescue!
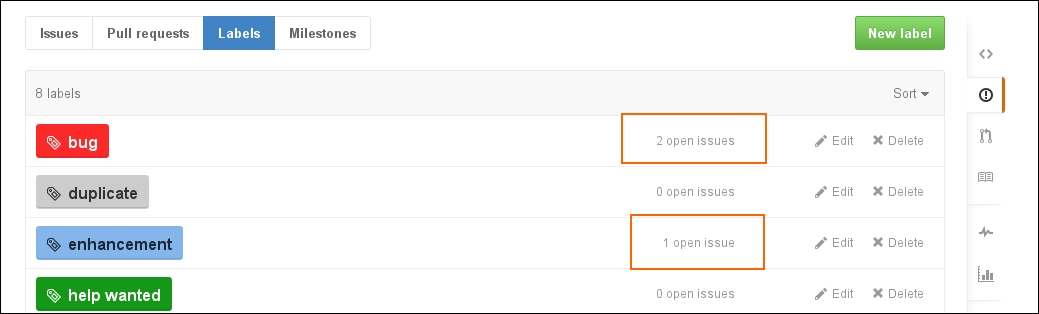
Back to the Labels page, you can see that one can have an overview of the number of issues assigned to each label:
Milestones, much like labels, are primarily used to group issues, but for different purposes. Consider a milestone like a special label that has a title, a description, and an optional due date.
It is common knowledge that applications are released in versions. From the BIOS of your laptop to the web browser you use to explore the Internet, they all use versioning.
Many companies, or even community-driven open source projects, tend to have a road map that dictates the time the new product will be released to the public.
GitHub integrates this feature with the issue tracker. Let's dive in and learn how to create a new milestone, attach issues to it, and use the overview to see what issues remain resolved or unresolved.
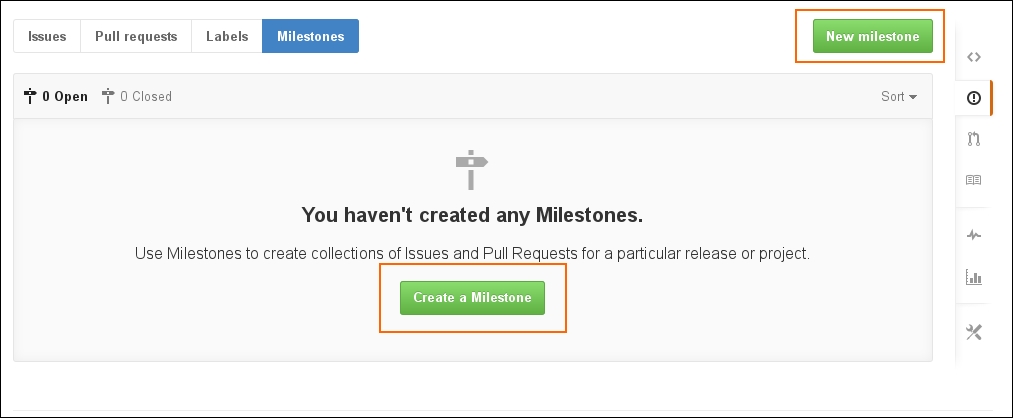
While at the main page of the issue tracker, click on the Milestones link, next to the Labels link. If no milestone has been created yet, you have two buttons that create a milestone. Generally, the New milestone button will be the main one to use, as shown in the following screenshot:
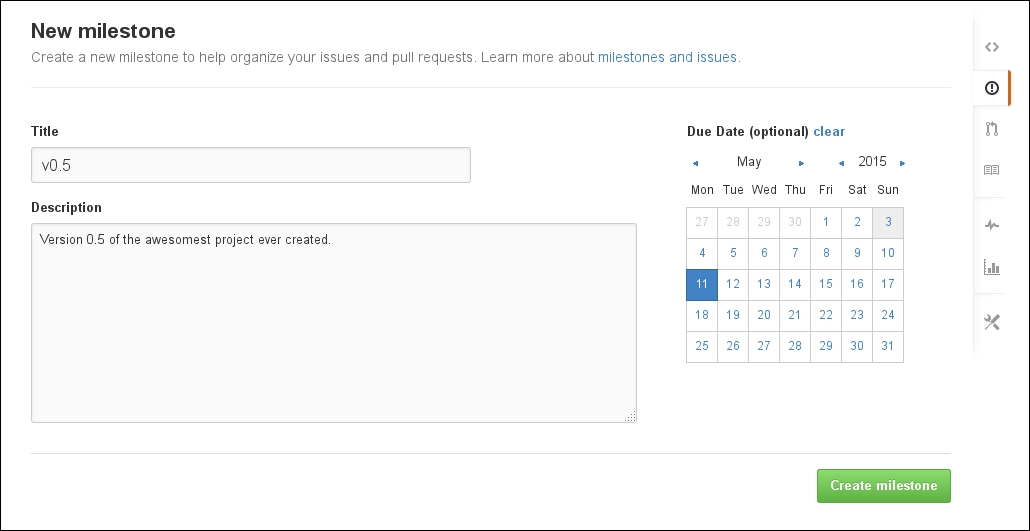
Now, let's create our first milestone. The only requirement is the title. The Description and Due Date fields are optional. However, to see what it looks like, let's add all the information:
After you create it, it will appear in the Milestones page with all the information we previously entered:

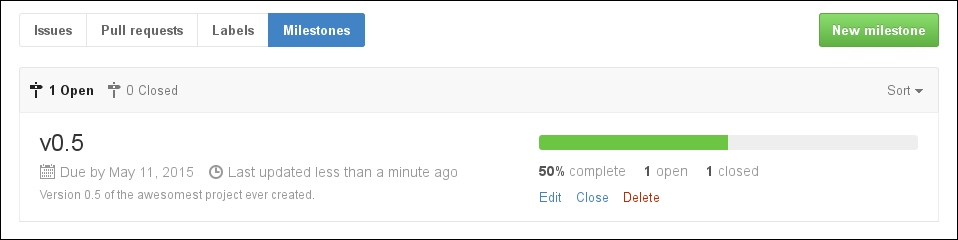
On the left-hand side, there is the name, the due date, the description, and a note of the time it was last updated. On the right-hand side, you can see the percentage of completion and the number of open and closed issues. Of course, you can edit, close, or delete it completely.
Now that we have at least one milestone, let's add an issue to it.
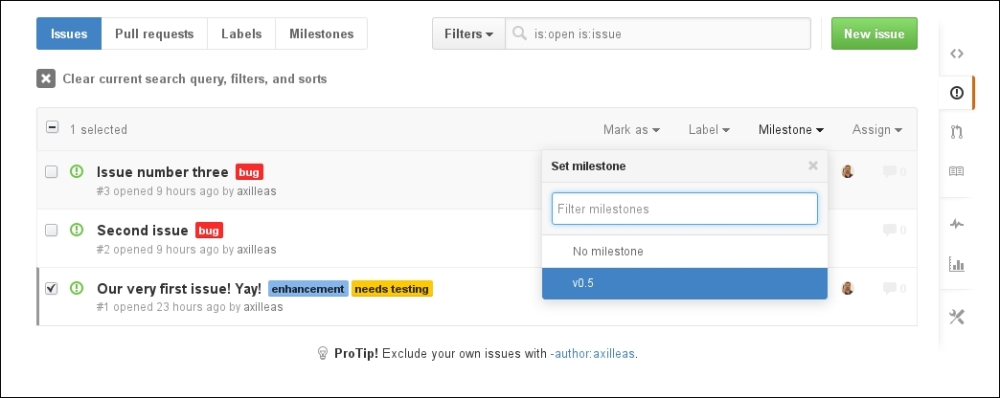
Again, there are two ways to add a milestone to an issue. Much like assignees and labels, you can do this inside each issue or mass-add it when in the issues main page. Here, I will try the second approach; you can try the first one on your own:
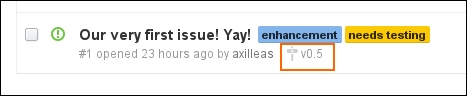
After selecting the milestone, the page will be refreshed and the issue will now be added to the selected milestone. If you watch carefully, you can see a small icon and the name of the milestone next to it:
When dealing with hundreds of issues, bug reports, and enhancements, it is nice to have an overview of what is resolved and what is not.
Let's add another issue to the milestone and immediately close it, marking it as resolved. Head over the milestones page and see that the bar is now half full (at 50%):
The README files are essential for your project as they add useful information to the start page. Let's briefly explore this feature and then learn about keyboard shortcuts.
The
README file is used to provide information about your project. Its contents are automatically shown on the front page of your repository, so it is always a good idea to provide one file.
GitHub checks whether the README file comes with an extension; if it is supported for rendering, it automatically gets formatted according to its implementation.
For example, a README file can have a .md extension that stands for markdown, .rst that stands for restructured text, .adoc that stands for AsciiDoc, and so on.
If the extension is not supported, GitHub treats it like a regular text file and no formatting is done.
For a list of supported markups, go to https://github.com/github/markup#markups.