A compiler without a good editor won't be enough (if you are not a believer of Notepad). Thanks to the efforts made by the TypeScript community, there are plenty of great editors and IDEs ready for TypeScript development.
However, the choice of an editor could be much about personal preferences. In this section, we'll talk about the installation and configuration of Visual Studio Code and Sublime Text. But other popular editors or IDEs for TypeScript will also be listed with brief introductions.
Visual Studio Code is a free lightweight editor written in TypeScript. And it's an open source and cross-platform editor that already has TypeScript support built-in.
You can download Visual Studio Code from https://code.visualstudio.com/ and the installation will probably take no more than 1 minute.
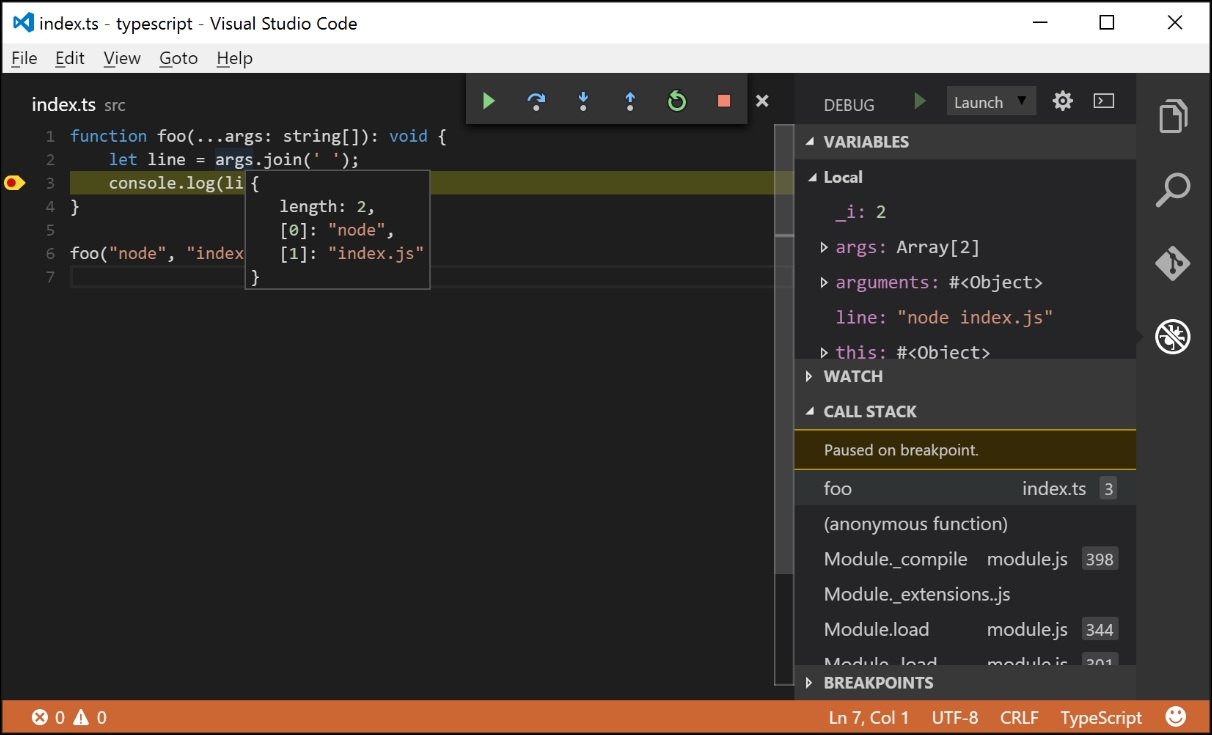
The following screenshot shows the debugging interface of Visual Studio Code with a TypeScript source file:

As Code already has TypeScript support built-in, extra configurations are actually not required. But if the version of TypeScript compiler you use to compile the source code differs from what Code has built-in, it could result in unconformity between editing and compiling.
To stay away from the undesired issues this would bring, we need to configure TypeScript SDK used by Visual Studio Code manually:
Press F1, type
Open User Settings, and enter. Visual Studio Code will open the settings JSON file by the side of a read-only JSON file containing all the default settings.Add the field
typescript.tsdkwith the path of thelibfolder under the TypeScript package we previously installed:1. Execute the command
npm root -gin your console to get the root of global Node.js modules.2. Append the root path with
/typescript/libas the SDK path.
Visual Studio Code is a file- and folder-based editor, which means you can open a file or a folder and start work.
But you still need to properly configure the project to take the best advantage of Code. For TypeScript, the project file is tsconfig.json, which contains the description of source files and compiler options. Know little about tsconfig.json? Don't worry, we'll come to that later.
Here are some features of Visual Studio Code you might be interested in:
Tasks: Basic task integration. You can build your project without leaving the editor.
Debugging: Node.js debugging with source map support, which means you can debug Node.js applications written in TypeScript.
Git: Basic Git integration. This makes comparing and committing changes easier.
The default key binding for a build task is
Ctrl
+
Shift
+
B
or cmd
+
Shift
+
B
on OS X. By pressing these keys, you will get a prompt notifying you that no task runner has been configured. Click Configure Task Runner and then select a TypeScript build task template (either with or without the watch mode enabled). A tasks.json file under the .vscode folder will be created automatically with content similar to the following:
{
  "version": "0.1.0",
  "command": "tsc",
  "isShellCommand": true,
  "args": ["-w", "-p", "."],
  "showOutput": "silent",
  "isWatching": true,
  "problemMatcher": "$tsc-watch"
}
Now create a test.ts file with some hello-world code and run the build task again. You can either press the shortcut we mentioned before or press Ctrl/Cmd + P, type task tsc , and enter.
If you were doing things correctly, you should be seeing the output test.js by the side of test.ts.
There are some useful configurations for tasking that can't be covered. You may find more information on the website of Visual Studio Code: https://code.visualstudio.com/.
From my perspective, Visual Studio Code delivers the best TypeScript development experience in the class of code editors. But if you are not a fan of it, TypeScript is also available with official support for Sublime Text.
Sublime Text is another popular lightweight editor around the field with amazing performance.
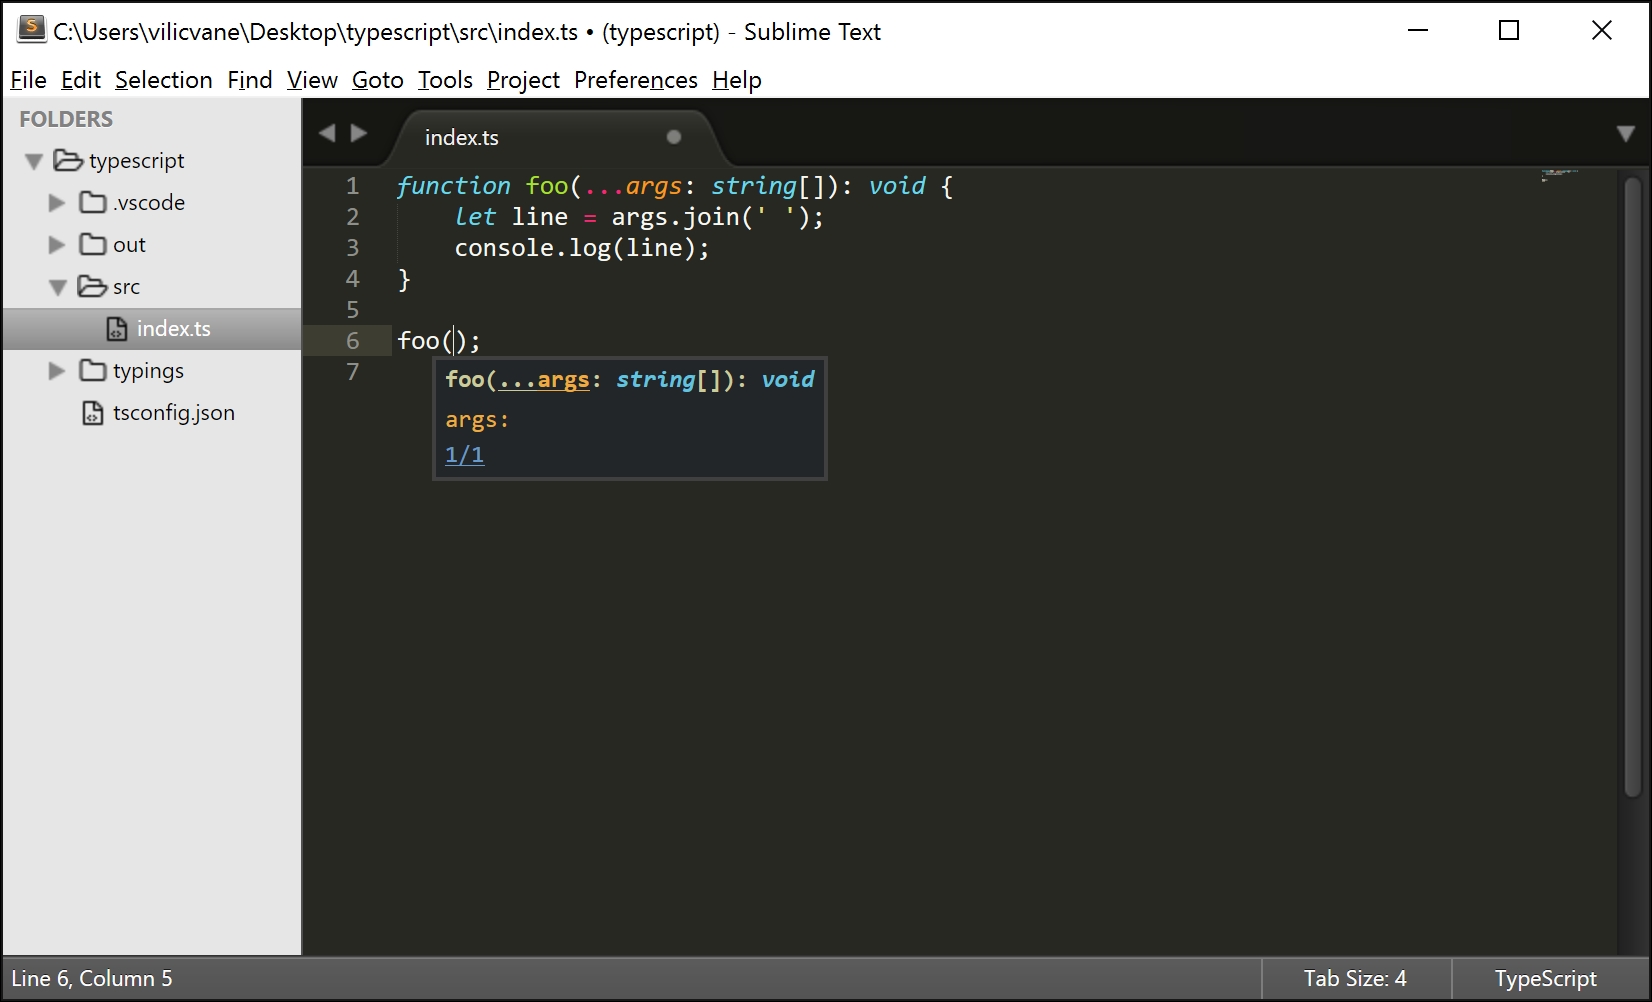
The following image shows how TypeScript IntelliSense works in Sublime Text:

The TypeScript team has officially built a plugin for Sublime Text (version 3 preferred), and you can find a detailed introduction, including useful shortcuts, in their GitHub repository here: https://github.com/Microsoft/TypeScript-Sublime-Plugin.
Note
There are still some issues with the TypeScript plugin for Sublime Text. It would be nice to know about them before you start writing TypeScript with Sublime Text.
Package Control is de facto package manager for Sublime Text, with which we'll install the TypeScript plugin.
If you don't have Package Control installed, perform the following steps:
Click Preferences > Browse Packages..., it opens the Sublime Text packages folder.
Browse up to the parent folder and then into the Install Packages folder, and download the file below into this folder: https://packagecontrol.io/Package%20Control.sublime-package
Restart Sublime Text and you should now have a working package manager.
Now we are only one step away from IntelliSense and refactoring with Sublime Text.
With the help of Package Control, it's easy to install a plugin:
Open the Sublime Text editor; press Ctrl + Shift + P for Windows and Linux or Cmd + Shift + P for OS X.
Type
Install Packagein the command palette, select Package Control: Install Package and wait for it to load the plugin repositories.Type
TypeScriptand select to install the official plugin.
Now we have TypeScript ready for Sublime Text, cheers!
Like Visual Studio Code, unmatched TypeScript versions between the plugin and compiler could lead to problems. To fix this, you can add the field "typescript_tsdk" with a path to the TypeScript lib in the Settings - User file.
Visual Studio Code and Sublime Text are recommended due to their ease of use and popularity respectively. But there are many great tools from the editor class to full-featured IDE.
Though we're not going through the setup and configuration of those tools, you might want to try them out yourself, especially if you are already working with some of them.
However, the configuration for different editors and IDEs (especially IDEs) could differ. It is recommended to use Visual Studio Code or Sublime Text for going through the workflow and examples in this book.
Atom is a cross-platform editor created by GitHub. It has a notable community with plenty of useful plugins, including atom-typescript. atom-typescript is the result of the hard work of Basarat Ali Syed, and it's used by my team before Visual Studio Code. It has many handy features that Visual Studio Code does not have yet, such as module path suggestion, compile on save, and so on.
Like Visual Studio Code, Atom is also an editor based on web technologies. Actually, the shell used by Visual Studio Code is exactly what's used by Atom: Electron, another popular project by GitHub, for building cross-platform desktop applications.
Atom is proud of being hackable, which means you can customize your own Atom editor pretty much as you want.
Then you may be wondering why we turned to Visual Studio Code. The main reason is that Visual Studio Code is being backed by the same company that develops TypeScript, and another reason might be the performance issue with Atom.
But anyway, Atom could be a great choice for a start.
Visual Studio is one of the best IDEs in the market. And yet it has, of course, official TypeScript support.
Since Visual Studio 2013, a community version is provided for free to individual developers, small companies, and open source projects.
If you are looking for a powerful IDE of TypeScript on Windows, Visual Studio could be a wonderful choice. Though Visual Studio has built-in TypeScript support, do make sure it's up-to-date. And, usually, you might want to install the newest TypeScript tools for Visual Studio.
WebStorm is one of the most popular IDEs for JavaScript developers, and it has had an early adoption to TypeScript as well.
A downside of using WebStorm for TypeScript is that it is always one step slower catching up to the latest version compared to other major editors. Unlike editors that directly use the language service provided by the TypeScript project, WebStorm seems to have its own infrastructure for IntelliSense and refactoring. But, in return, it makes TypeScript support in WebStorm more customizable and consistent with other features it provides.
If you decide to use WebStorm as your TypeScript IDE, please make sure the version of supported TypeScript matches what you expect (usually the latest version).


