

Now, in this recipe, let's add a Windows Presentation Foundation (WPF)-based application to the solution and use the class library created in a previous recipe. WPF is the shortened name for Windows Presentation Foundation. The purpose of this recipe is to demonstrate how to share a library within the different .NET-based applications.
For this recipe, you will require the solution and the class library you built in the previous recipe. Open Visual Studio 2017 and prepare for the project. Click Build | Build Solution, or press Ctrl + Shift + B, and the solution should build successfully. Everything's ready for testing our class library.
- Open Visual Studio 2017.
- Now open the solution from the previous recipe. Click
File|Open|Open Project/Solution, or press Ctrl + Shift + O, and select theChapter1.Librarysolution. - Now click on the
Chapter1.Librarysolution label. ClickFile|Add|New Project. - In the
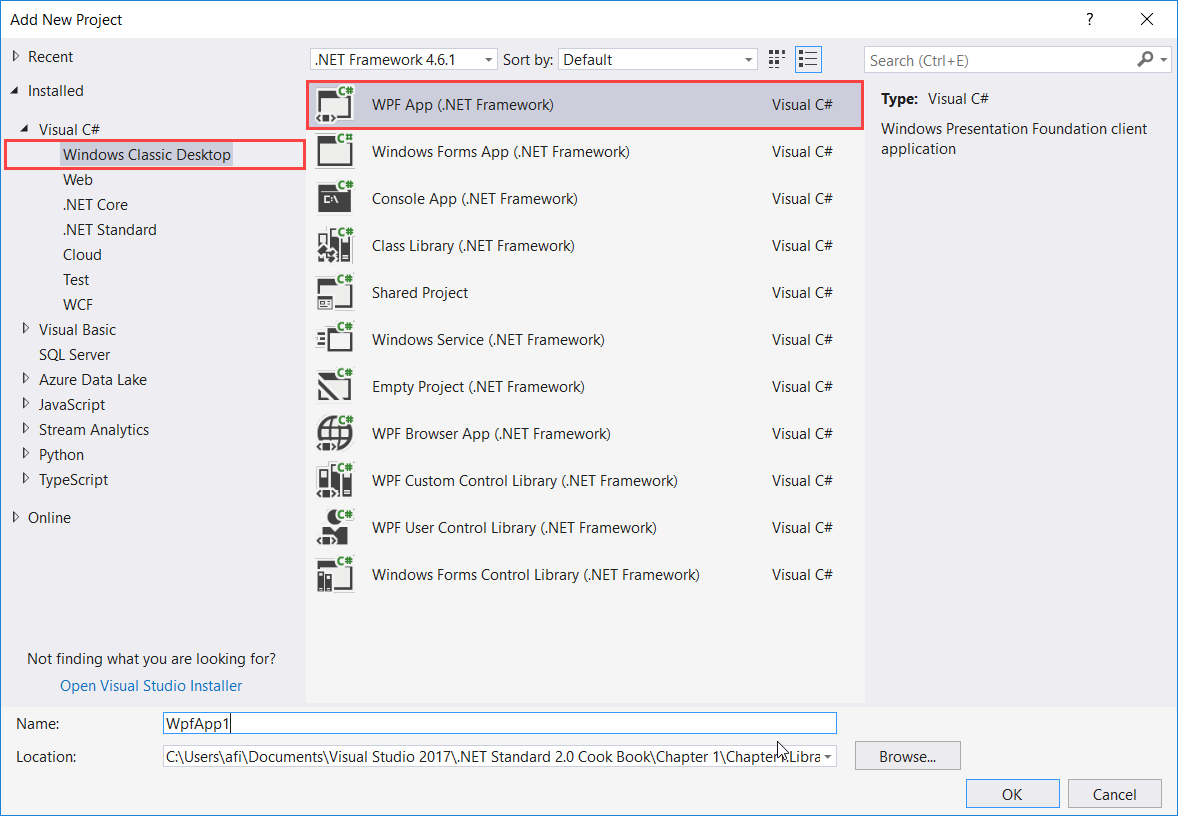
Add New Projecttemplate dialog box, expand the Visual C# node in the left-hand pane. - Select
Windows Classic Desktopand selectWPF App (.NET Framework)in the right template pane.

- Now the
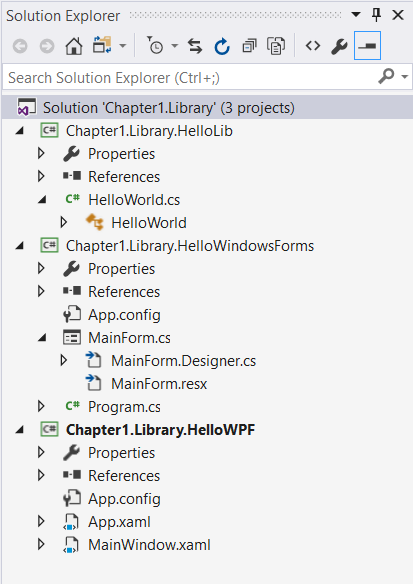
Solution Explorer(if it's not visible, press Ctrl + Alt + L) should look like this:
- Now click on the
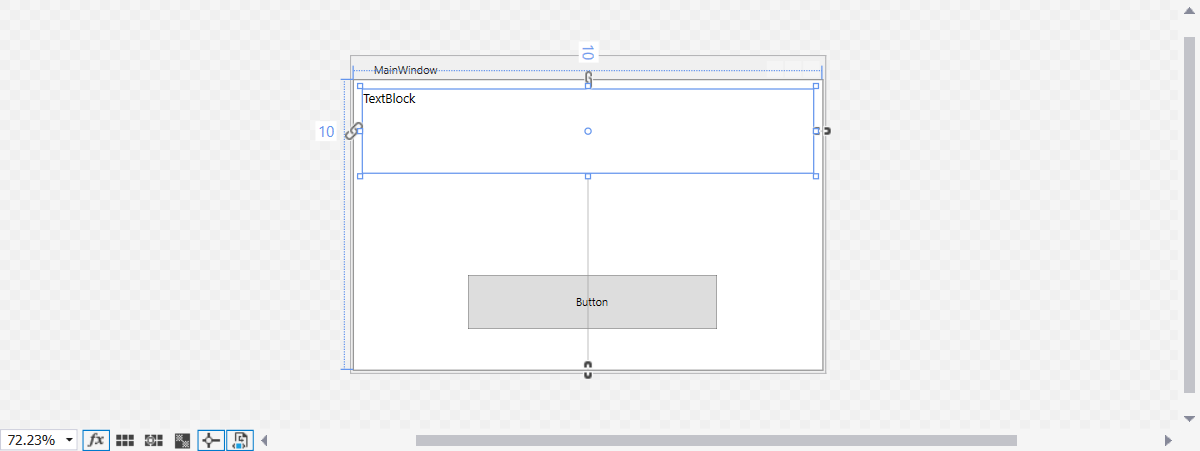
MainWindow.xamltab and make sure you are in the Design mode. - Now, drag and drop a
Buttonand aTextBlockfrom the tool box (to view the tool box, press Ctrl + Alt + X). You can find these components underCommon WPF Controls. - The main window should look like this:
- Let's name our controls and change some properties as follows:
Control
Property
Value
TextBlockNameMessageLabelTextBlockLayout | Width498TextBlockLayout | Height93TextBlockText | FontBoldTextBlockText | FontSize 14TextBlockCommon | TextPress the button to see the messageButtonNameHelloButtonButtonLayout | Width276ButtonLayout | Height60ButtonCommon | ContentSay Hello
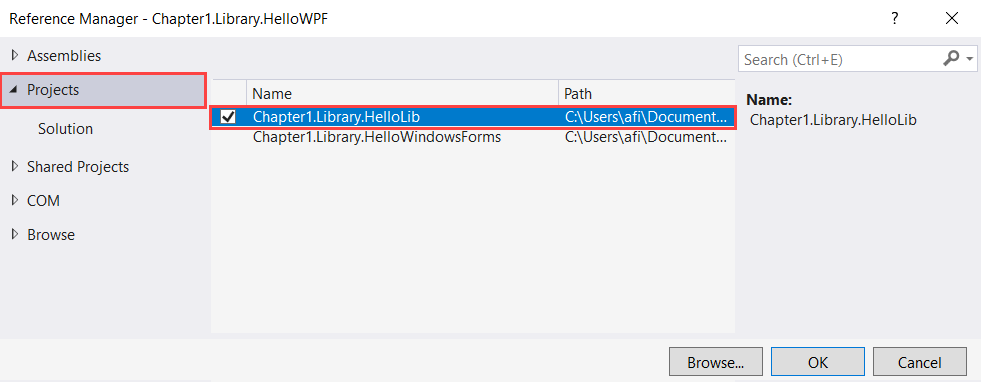
- Let's add our class library as a reference to the WPF project we have just created. Expand the
Chapter1.Library.HelloWPFproject node and expand theReferencesnode in theSolution Explorer(if you don't see theSolution Explorerpress Ctrl + Alt + L). - Right-click on the
Referenceslabel and selectAdd Reference.... - Under the
Reference Managerdialog box, click on theProjectslabel in the left-hand pane. In the middle pane, check theChapter1.Library.HelloLibproject:
- Click
OK. - In the
MainWindow.xamltab, double-click on theSayHellobutton. - In the
MainWindow.xamal.cstab, scroll up till you see theusingcode block. Add this code as the last line of theusingcode block:
using Chapter1.Library.HelloLib;
- Now scroll down till you reach the
HelloButton_Clickmethod. Type the following code block in between the curly brackets of theHelloButton_Clickmethod:
      var yourName = "Fiqri Ismail";
      var helloMessage = new HelloWorld();

      MessageLabel.Text = helloMessage.SayHello(yourName);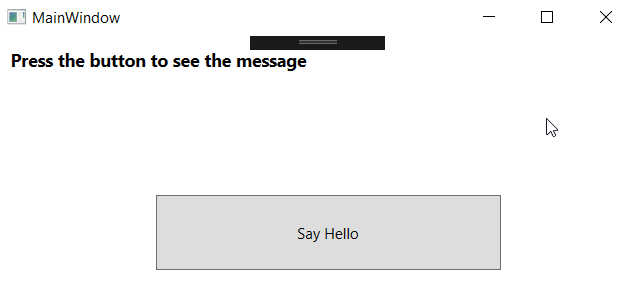
- Click on the
Say Hellobutton to see the message from the class library:
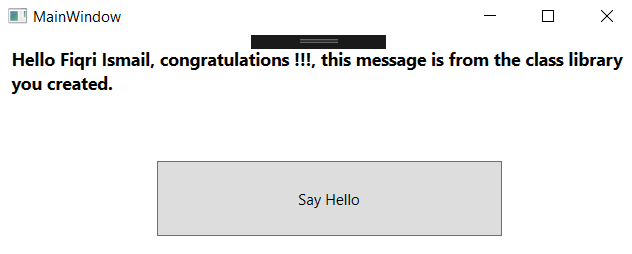
- Congratulations!!! You have just used a library created with a WPF application.
Let's have a look at the bits and pieces and how they are bound together. From steps 1 to 7, we have opened an existing solution and added a WPF project to that solution. In steps 8 to 10, we added a control to the WPF main form, from the toolbox. Since this is a WPF application, we went through an additional element; setting up the UI. In step 11, we have set up the UI elements using the properties window.
In steps 12 to 15, we added a reference to the WPF project. Referencing the library we have created is the most important part. Without referencing, the WPF project is totally unaware of the library. After referencing the library only, it will available to the WPF project. Step 17 tells the compiler to use the namespace of the library. Now we don't have to call the full namespace of the class inside the library. In step 18, we created a simple variable and stored a name. The next line creates an instance of the HelloWorld class inside the library. Finally, we used the Text property of the WPF TextBlock control to store the value from the SayHello(string name) method.
In the final steps – 19 to 20, we have executed the code and tested it.