Classes and Modules were added to ES6. Classes were introduced as a way to expand on prototype-based inheritance by adding some object oriented concepts. Modules were introduced as a way to organize multiple code files in JavaScript and expand on code reusability and scoping among files.
Classes were added to ECMAScript 6 primarily as syntactic sugar to expand on the existing prototype-based inheritance structure. Class syntax does not introduce object oriented inheritance to JavaScript. Class inheritance in JavaScript do not work like classes in object oriented languages.
In JavaScript, a class can be defined with the keyword class. A class is created by calling the keyword class, followed by the class name and curly braces. Inside the curly braces, we define all of the functions and logic for the class. The syntax is as follows:
Snippet 1.58: Class syntax
A class can be created with the optional function constructor. The constructor, if not necessary for a JavaScript class, but there can only be one method with the name constructor in a class. The constructor is called when an instance of the class in initialized and can be used to set up all of the default internal values. An example of a class declaration is shown in the following code:
Snippet 1.59: Basic class creation
In the example, we create a class called House. Our House class has a constructor method. When we instantiate the class, it calls the constructor. Our constructor method takes in three parameters, two of them with default values. The constructor saves these values to variables in the this scope.
The keyword this is mapped to each class instantiation. It is a global scope class object. It is used to scope all functions and variables globally inside a class. Every function that is added at the root of the class will be added to the this scope. All the variables that is added to the this scope will be accessible inside any function inside the class. Additionally, anything added to the this scope is accessible publicly outside of the class.
Exercise 12: Creating Your Own Class
To create a simple class and demonstrate internal class variables, perform the following steps:
Declare a class called Vehicle.
Add a constructor function to the class. Have the constructor take in two variables, wheels and topSpeed.
In the constructor, save the input variables to two variables in the this scope, that is, this.wheels and this.topSpeed.
Instantiate the class with wheels = 3 and topSpeed = 20 and save it into the tricycle variable.
Log the value for wheels and topSpeed from the class that was saved in tricycle.
Code
Snippet 1.60: Creating a class
Outcome
You have successfully created a simple class with values.
We instantiated a new instance of a class with the new keyword. To create a new class, simply declare a variable and set it equal to the expression new className(). When we instantiate a new class, the parameters that are passed into the class call are passed into the constructor function, if one exists. An example of a class instantiation is shown in the following code:
Snippet 1.61: Class instantiation
In this example, the class instantiation happens on the line with the new keyword. This line of code creates a new instance of the House class and saves it into the myHouse variable. When we instantiate the class, we are providing the parameters for address, floors, and garage. These value are passed into the constructor and then saved into the instantiated class object.
To add functions to a class, we declare them with the new ES6 object function declaration. As a quick reminder, when using the new ES6 object function declaration, we can omit the function keyword and object key name. When a function is added to an object, it is automatically attached to the this scope. Additionally, all functions that are added to the class have access to the this scope and will be able to call any function and access any variable attached to the this scope. An example of this is shown in the following code:
Snippet 1.62: Creating a class with functions
As we can see from this example, the two functions getFloors and setFloors were added with the new ES6 enhanced object property syntax for function declarations. Both functions have access to the this scope. They can get and set variables in that scope, as well as call functions that have been attached to the this scope.
In ES6, we can also create subclasses using the extends keyword. Subclasses inherit properties and methods from the parent class. A subclass is defined by following the class name with the keyword extends and the name of the parent class. An example of a subclass declaration is shown in the following code:
Snippet 1.63: Extending a class
In this example, we will create a class called House, and then we will create a subclass called Mansion that extends the class House. When we create a subclass, we need to take note of the behavior of the constructor method. If we provide a constructor method, then we must call the super() function. super is a function that calls the constructor of the parent object. If we try to access the this scope without a call to call super, then we will get a runtime error and our code will crash. Any parameters that are required by the parent constructor can be passed in through the super method. If we do not specify a constructor for the subclass, the default constructor behavior will automatically call the super constructor. An example of this is shown in the following code:
Snippet 1.64: Extending a class with and without a constructor
In this example, we created a subclass that extended our House class. The Mansion subclass has a defined constructor, so we must call super before we can access the this scope. When we call super, we pass the address parameter to the parent constructor, which adds it to the this scope. The constructor for Mansion then continues execution and adds the floors variable to the this scope. As we can see from the output logging at the end of this example, the subclass's this scope also includes all variables and functions that were created in the parent class. If a variable or function is redefined in the subclass, it will overwrite the inherited value or function from the parent class.
In summary, classes allow us to expand on the prototype-based inheritance of JavaScript by introducing some object oriented concepts. Classes are defined with the keyword class and initialized with the keyword new. When a class is defined, a special scope called this is created for it. All items in the this scope are publicly accessible outside the class. We can add functions and variables to the this scope to give our class functionality. When a class is instantiated, the constructor is called. We can also extend classes to create subclasses with the extends keyword. If an extended class has a constructor, we must call the super function to call its parent-class constructor. Subclasses have access to the parent class methods and variables.
Almost every coding language has a concept of modules. Modules are features that allow the programmer to break code into smaller independent parts that can be imported and reused. Modules are critical for the design of programs and are used to prevent code duplication and reduce file size. Modules did not exist in vanilla JavaScript until ES6. Moreover, not all JavaScript interpreters support this feature.
Modules are a way to reference other code files from the current file. Code can be broken into multiple parts, called modules. Modules allow us to keep unrelated code separate so that we can have smaller and simpler files in our large JavaScript projects.
Modules also allow the contained code to be quickly and easily shared without any code duplication. Modules in ES6 introduced two new keywords, export and import. These keywords allow us to make certain classes and variables publicly available when a file is loaded.
Note
JavaScript modules do not have full support across all platforms. At the time of writing this book, not all JavaScript frameworks could support modules. Make sure that the platforms you are releasing your code on can support the code you have written.
Modules use the export keyword to expose variables and functions contained in the file. Everything inside an ES6 module is private by default. The only way to make anything public is to use the export keyword. Modules can export properties in two ways, via named exports or default exports. Named exports allow for multiple exports per module. Multiple exports may be useful if you are building a math module that exports many functions and constants. Default exports allow for just a single export per model. A single export may be useful if you are building a module that contains a single class.
There are two ways to expose the named contents of a module with the export keyword. We can export each item individually by preceding the variable or function declaration with the export keyword, or we can export an object containing the key value pairs that reference each variable and function we want exported. These two export methods are shown in the following example:
Snippet 1.65: Named Exports
Both of the modules outlined in the preceding example export three constant variables and one function. The first module, math-module-1.js, exports each item, one at a time. The second module, math-module-2.js, exports all of the exports at once via an object.
To export the contents of a module as a default export, we must use the default keyword. The default keyword comes after the export keyword. When we default export a module, we can also omit the identifier name of the class, function, or variable we are exporting. An example of this is shown in the following code:
Snippet 1.66: Default exports
In the preceding example, we created two modules. One exports a class and the other exports a function. Notice how we include the default keyword after the export keyword, and how we omit the name of the class/function. When we export a default class, the export is not named. When we are importing default export modules, the name of the object we are importing is derived via the module's name. This will be shown in the next section, where we will talk about the import keyword.
The import keyword allows you to import a JavaScript module. Importing a module allows you to pull any items from that module into the current code file. When we import a module, we start the expression with the import keyword. Then, we identify what parts of the module we are going to import. Then, we follow that with the from keyword, and finally we finish with the path to the module file. The from keyword and file path tell the interpreter where to find the module we are importing.
Note
ES6 modules may not have full support from all browsers versions or versions of Node.js. You may have to make use of a transpiler such as Babel to run your code on certain platforms.
There are four ways we can use the import keyword, all of which are shown in the following code:
Snippet 1.67: Different ways to import a module
In the code shown in preceding snippet, we have created a simple module that exports a few constants and four import example files. In the first import example, we are importing a single value from the module exports and making it accessible in the variable API. In the second import example, we are importing multiple properties from the module. In the third example, we are importing properties and renaming them to new variable names. The properties can then be accessed from the new variables. In the fourth example, we are using a slightly different syntax. The asterisk signifies that we want to import all exported properties from the module. When we use the asterisk, we must also use the as keyword to give the imported object a variable name.
The process of importing and using modules is better explained through the following snippet:
Snippet 1.68: Importing a module
To use an import in the browser, we must use the script tag. The module import can be done inline or via a source file. To import a module, we need to create a script tag and set the type property to module. If we are importing via a source file, we must set the src property to the file path. This is shown in the following syntax:
Snippet 1.69: Browser import inline
Note
The script tag is an HTML tag that allows us to run JavaScript code in the browser.
We can also import modules inline. To do this, we must omit the src property and code the import directly in the body of the script tag. This is shown in the following code:
Snippet 1.70: Browser import in script body
Note
When importing modules in browsers, browser versions that do not support ES6 modules will not run scripts with type="module".
If the browser does not support ES6 modules, we can provide a fallback option with the nomodule attribute. Module compatible browsers will ignore script tags with the nomodule attribute so that we can use it to provide fallback support. This is shown in the following code:
Snippet 1.71: Browser import with compatibility option
In the preceding example, if the browser supports modules, then the first script tag will be run and the second will not. If the browser does not support modules, then the first script tag will be ignored, and the second will be run.
One final consideration for modules: be careful that any modules you build do not have circular dependencies. Because of the load order of modules, circular dependencies in JavaScript can cause lots of logic errors when ES6 is transpiled to ES5. If there is a circular dependency in your modules, you should restructure your dependency tree so that all dependencies are linear. For example, consider the dependency chain: Module A depends on B, module B depends on C, and module C depends on A. This is a circular module chain because through the dependency chain, A depends on C, which depends on A. The code should be restructured so that the circular dependency chain is broken.
Exercise 13: Implementing Classes
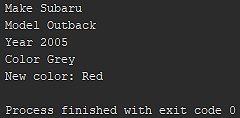
You have been hired by a car sales company to design their sales website. You must create a vehicle class to store car information. The class must take in the car make, model, year, and color. The car should have a method to change the color. To test the class, create an instance that is a grey (color) 2005 (year) Subaru (make) Outback (model). Log the car's variables, change the car's color, and log the new color.
To build a functional class to demonstrate the capabilities of a class, perform the following steps:
Create a car class.
Add a constructor that takes in the make, model, year, and color. Save the make, model, year, and color in internal variables (this scope) in the constructor function.
Add a function called setColor that takes in a single parameter, color, and updates the internal variable color to the provided color.
Instantiate the class with the parameters Subaru, Outback, 2005, and Grey. Save the class into the Subaru variable.
Log the internal variables, that is, make, model, year, and color, of the class stored in Subaru.
Change the color with the setColor of the class stored in Subaru class method. Set the color to Red.
Log the new color.
Code
Snippet 1.72: Full class implementation
Outcome
You have successfully built a functional class.
In this section, we introduced JavaScript classes and ES6 modules. We discussed the prototype-based inheritance structure and demonstrated the basics of class creation and JavaScript class inheritance. When discussing modules, we first showed how to create a module and export the functions and variables stored within them. Then, we showed you how to load a module and import the data contained within. We ended this topic by discussing browser compatibility and providing HTML script tag options for supporting browsers that do not yet support ES6 modules.


 Free Chapter