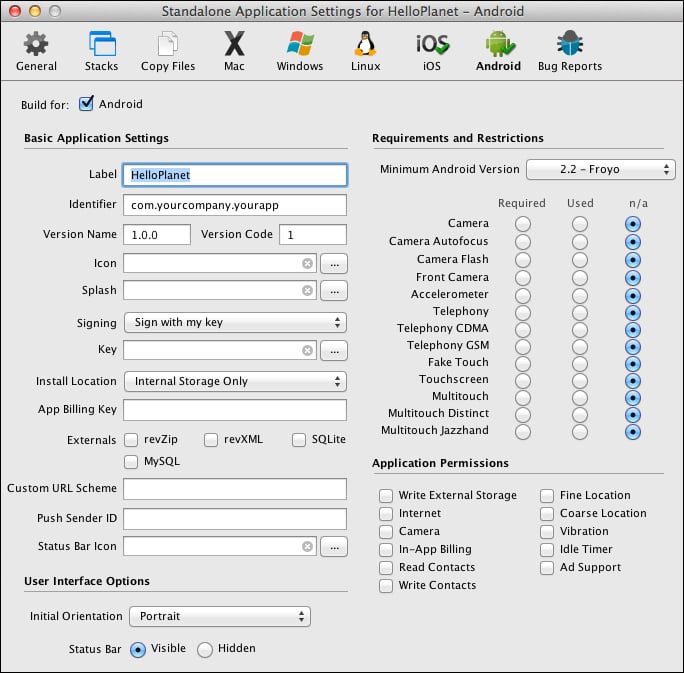
When we develop apps for Android devices, we have several specific settings to set in the Standalone Application Settings dialog screen.
As you can see in the following screenshot, the Standalone Application Settings dialog window has a large number of options that must be reviewed prior to publishing an Android binary file:
This dialog window's options are divided into five sections as indicated in the following screenshot:
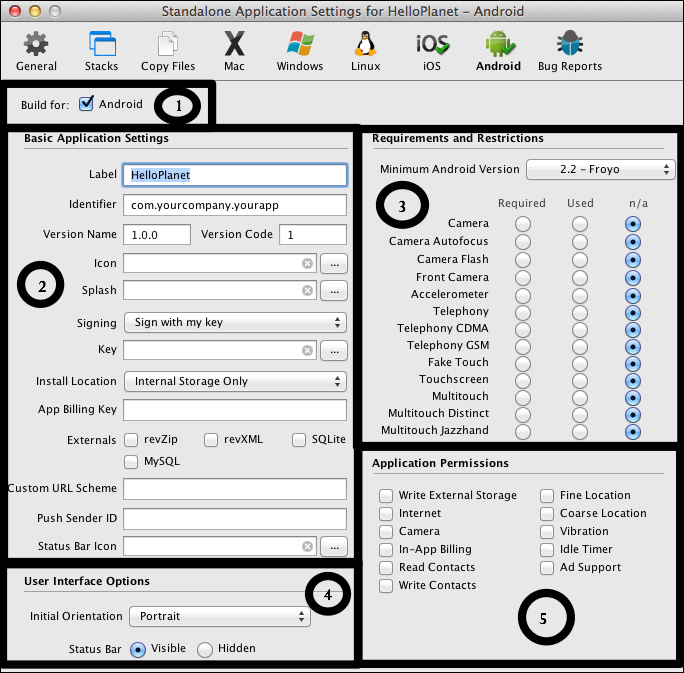
The first section is the Build for: area of the window.
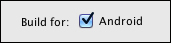
The Build for: option provides us with the ability to select and deselect the option to publish a binary file formatted for Android devices.
The second section is Basic Application Settings.
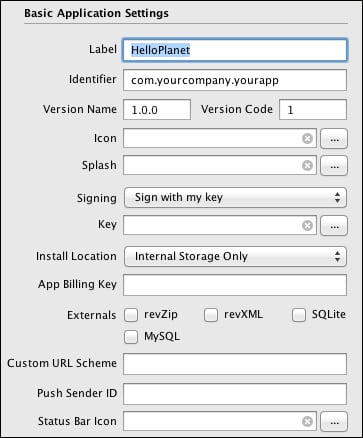
There are several settings in the Basic Application Settings area of the dialog window. The description for each of these settings is as follows:
Label: This is the label that will be displayed on the launch screen of the Android device.
Identifier: This is a unique identifier specific to your app.
Version Name: This is the version of your app in a human-readable format.
Version Code: This is the version number used by the Android OS.
Icon: This is where you will upload your app's launch icon.
Splash: If you have a personal or educational LiveCode license, you will upload a splash screen image here. If you have a commercial license, this does not apply to you.
Signing: You are presented with three options: Sign with my key, Sign for development only, and Do not sign.
Key: This setting links to a key-store file that is used when the Sign with my key option within Signing is selected.
Install Location: This is where you set your app's preference for storing data. The options are Internal Storage Only, Allow External Storage, and Prefer External Storage.
App Billing Key: This is where you will enter your billing key from your Android Play Store account. This key is used for in-app purchases.
Externals: If your app uses any of the listed externals, they must be selected here prior to generating a binary file.
Custom URL Scheme: This feature allows you to design a custom URL that can be used to launch your app from within another app.
Push Sender ID: This is a unique project number associated with your app. This ID is used while you are using push notifications.
Status Bar Icon: Here you will upload your status bar icon.
The third section is Requirements and Restrictions.
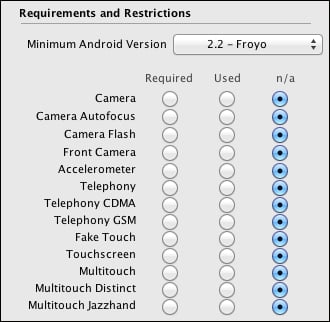
The first section of the Requirements and Restrictions area allows you to indicate the minimum Android version that must be installed on a user's device for your app to run. The options include 2.2 - Froyo, 2.3 - Gingerbread, 2.3.3, 3.0 - Honeycomb, and 3.1.
The section contains 13 sets of radio buttons. These buttons allow you to select which services are required, used, or not applicable.
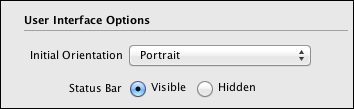
The fourth section is User Interface Options.
In this section of the dialog window, you select your app's initial orientation (Portrait or Landscape) and whether or not to display the status bar.
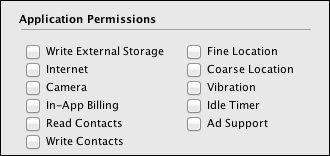
The fifth and final section is Application Permissions.
This final section of the Standalone Application Settings dialog window is where you will select which services and accesses your app will use.