In this first section, we'll look at the basic language syntax for Swift, and you'll write your first fully functional Swift program.
Like many modern programming languages, Swift draws its most basic syntax from the programming language C. If you have previous programming experience in other C-inspired languages, such as C++, Java, C#, Objective-C, or PHP, many aspects of Swift will seem familiar, and many Swift concepts you will probably find quite familiar.
We can say the following about Swift's basic syntax:
Programs are made up of statements, executed sequentially
More than one statement are allowed per editor line when separated by a semicolon (;)
Units of work in Swift are modularized using functions and organized into types
Functions accept one or more parameters, and return values
Single and multiline comments follow the same syntax as in C++ and Java
Swift data type names and usage are similar to that in Java, C#, and C++
Swift has the concept of named variables, which are mutable, and named constants, which are immutable
Swift has both struct and class semantics, as do C++ and C#
If you have prior experience in other C-inspired languages, such as Java, C#, or C++, Swift has some improvements and differences that will take some time and practice for you to become accustomed to:
Semicolons are not required at the end of statements—except when used to separate multiple statements typed on the same line in a source file.
Swift has no main() method to serve as the program's starting point when the operating system loads the application. Swift programs begin at the first line of code of the program's source file—as is the case in most interpreted languages.
Functions in Swift place the function return at the right-hand side of the function declaration, rather than the left.
Function parameter declaration syntax is inspired by Objective-C, which is quite different and often at first confusing for Java, C#, and C++ developers.
The difference between a struct and a class in Swift is similar to what we have in C# (value type versus reference type), but not the same as in C++ (both are the same, except struct members are public by default).
For those coming to Swift from Java, C++, C#, and similar languages, your previous experience with other C-inspired languages will help accelerate your progress learning Swift. However, be sure to study the language syntax carefully and be on the lookout for subtle differences.
When learning a new language, it's traditional for a first program to make sure the development environment is installed and properly configured by writing a program that outputs something to the screen. That's what we'll do next.
Now, let's use an Xcode playground to create a simple Swift program to display the string Hello, World to the playground console, by following these steps:
Begin by launching Xcode. You should be presented with a Welcome to Xcode screen with the following commands listed on the left:
Get started with a playground
Create a new Xcode project
Clone an existing project
Since we'll be writing code but not building an application in this lesson, choose the Get started with a playground option to open an interactive code window.
Choose Blank as the playground template, and then press the Next button.
Next, Xcode will prompt where to save the playground. This will save your code in a file with a playground file extension. Name the playground HelloWorld, and save it to your desktop.
When Xcode creates a new playground, it adds some default code to the editing window. Press ⌘ A on your keyboard and then the Delete key on the keyboard to delete the sample code.
In the now-blank editor window, add the following two lines of code:
let message = "Hello, World."
print(message)
Congratulations! You've just written your first Swift program. If you see the text Hello, World. output in the bottom pane of the playground window, your program has worked.
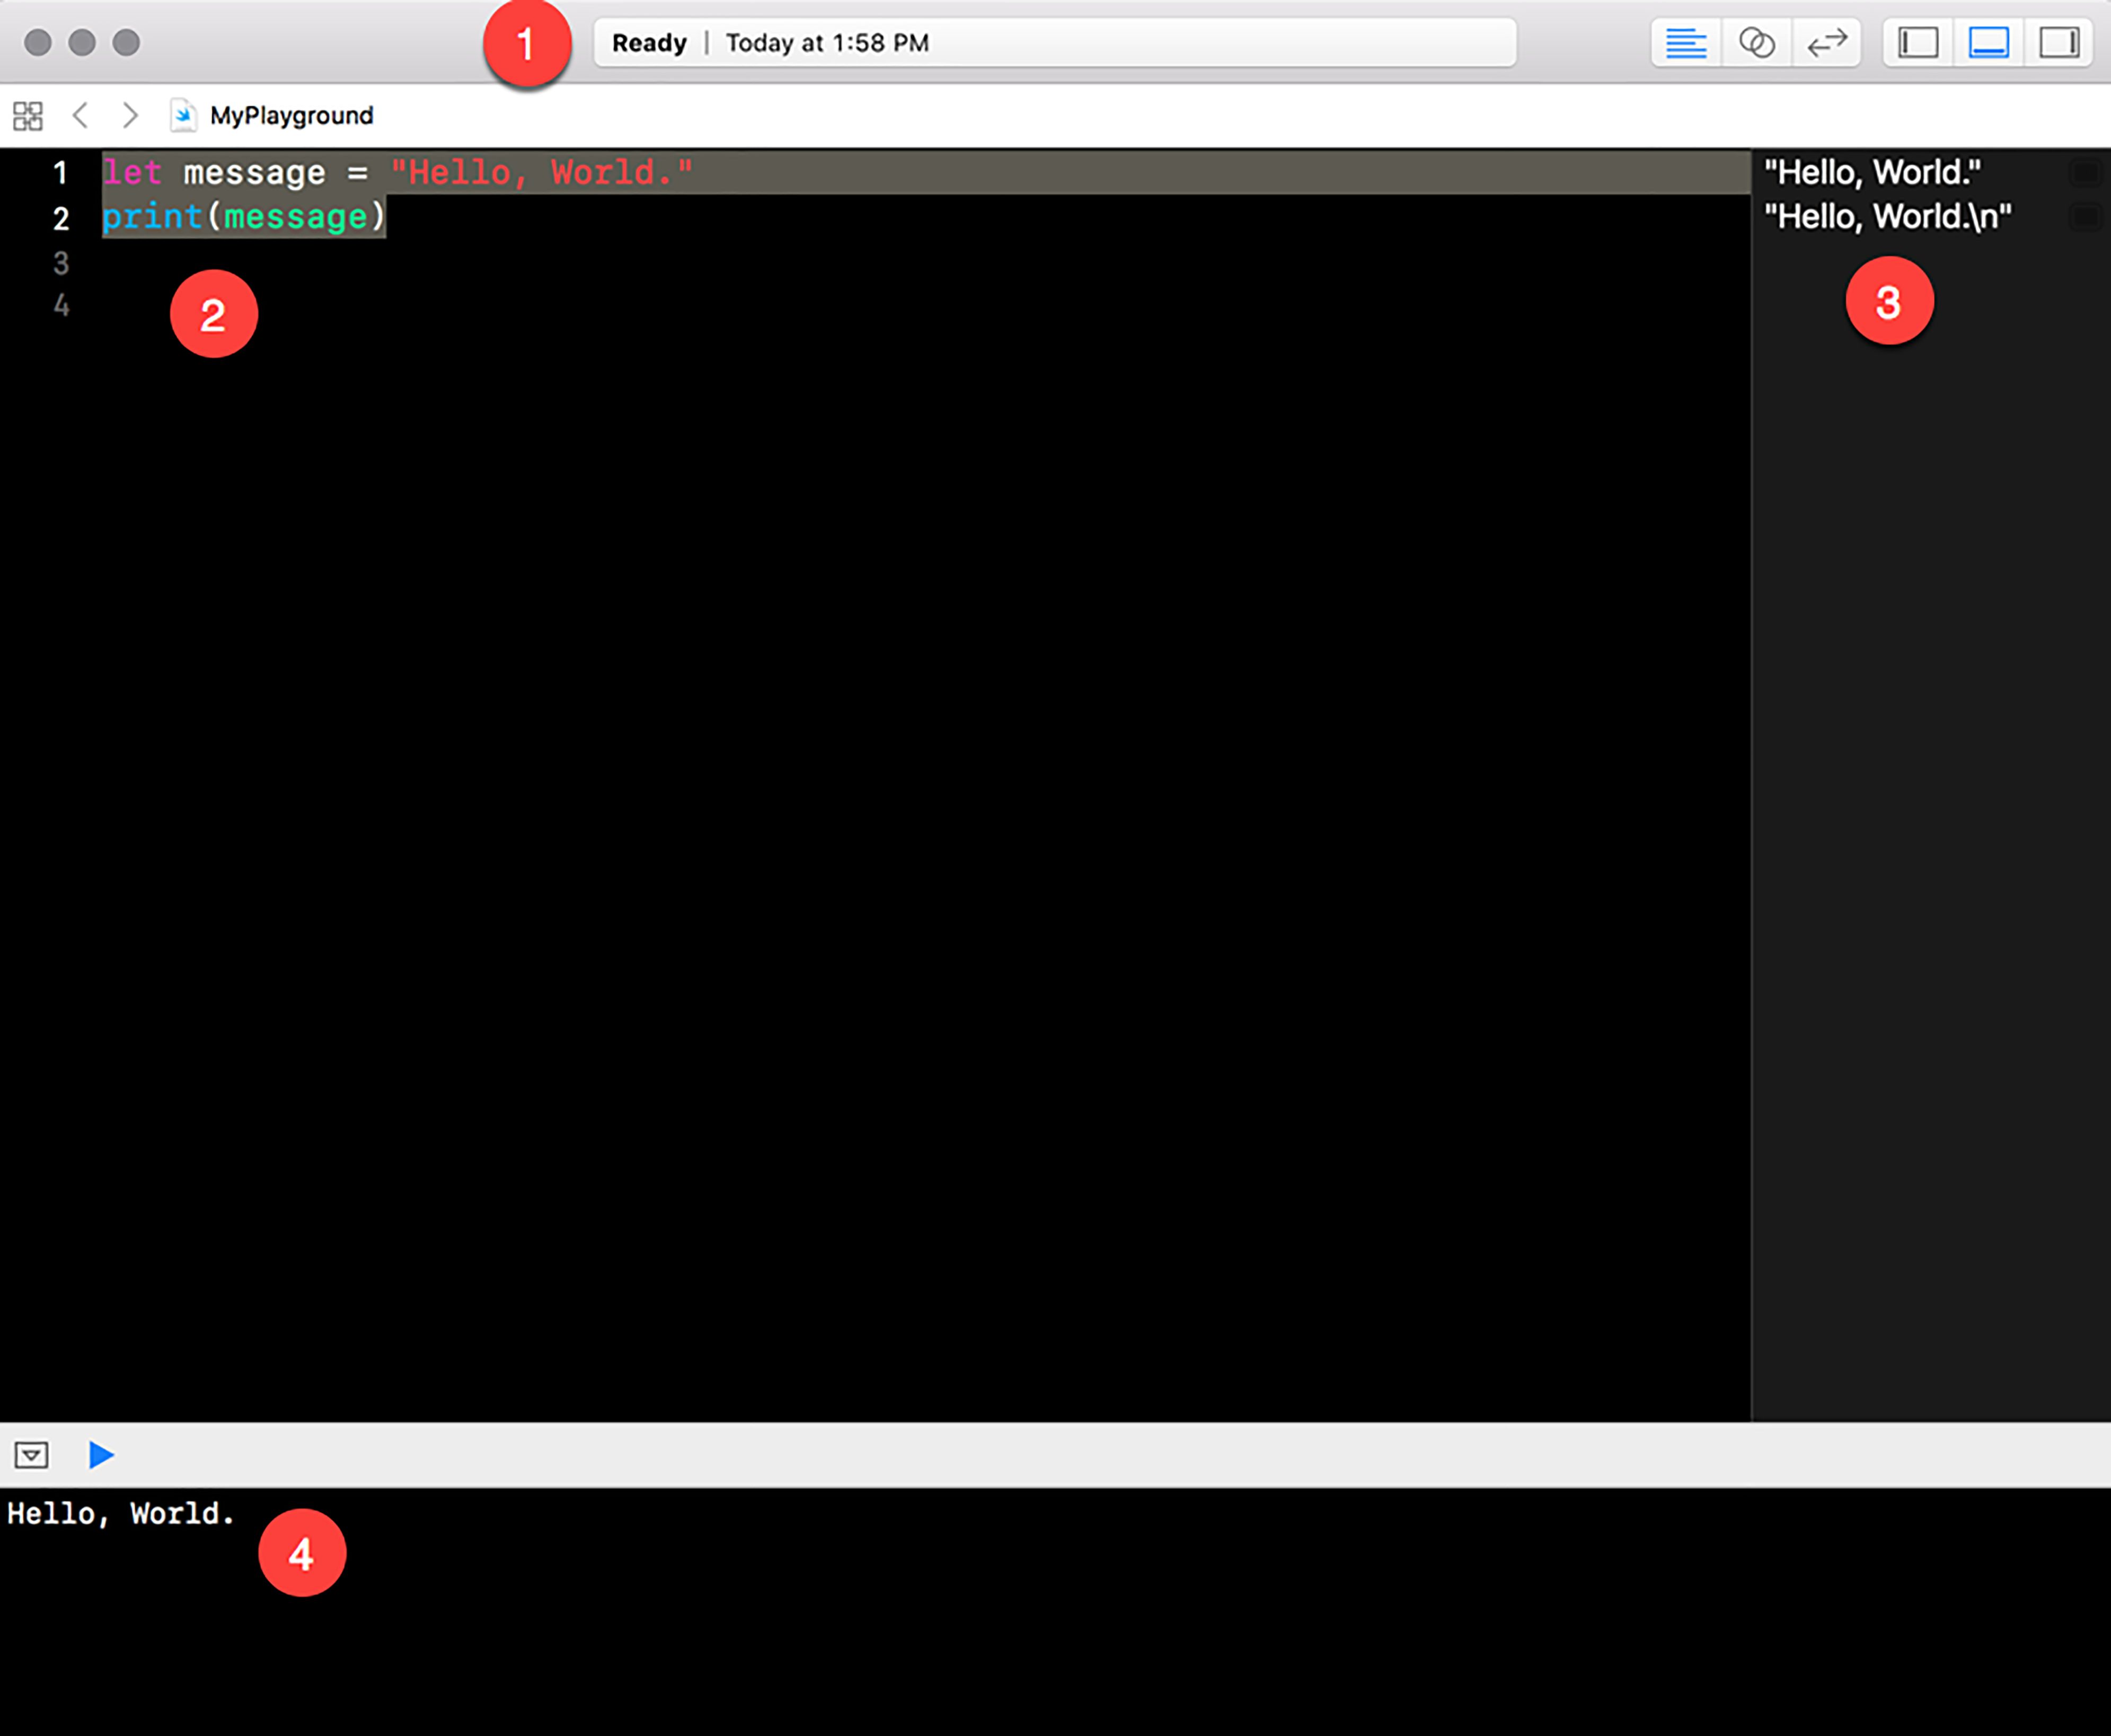
Before we move on, let's look at the structure of the playground window:

Note the following regions in the playground window, as indicated by the numbers within the red circles:
1: At the top of the window is a status bar which tells you the state of the playground.
2: The editing pane of the window is where you type the code to run in the playground.
3: The right-hand pane of the playground window shows information about the effect of each line of code. In this simple program, it shows the value message has been set to ("Hello, World."), and the text that was sent to the console ("Hello, World.\n"). Note the right pane discloses that the print() function added a newline (\n) character to the output.
4: The output pane of the playground window shows the debug console, which in this case displays what the Swift program has output. If your code has errors, the debug console will output information about those errors as well.
Now that we have a development environment up and running where we can create and run Swift code, let's move on to learning about and using the Swift language.


