

Here you can find the installation requirements of the PowerPivot add-in for Microsoft Excel 2010 only. There is no need to follow this installation requirement for the Excel 2013 PowerPivot version, since the PowerPivot add-in would have already installed when the installation of your Microsoft Office 2013 package was completed. So, if you have successfully installed the Excel 2013 version on your computer, you only have to enable the PowerPivot add-in. You will find related information in the following pages on how to enable your PowerPivot add-in for Excel 2013.
Machines that will be used to create PowerPivot workbooks must meet the following minimum hardware and software requirements for Office 2010.
Before installation of the PowerPivot add-in for Excel 2010, make sure that the following hardware requirements are met for the machine on which the PowerPivot is being loaded:
Make sure the following software requirements are met for the machine on which PowerPivot is being loaded:
The 64-bit version and the 32-bit version of Microsoft Excel PowerPivot have some differences. The 32-bit version, as compared to the 64-bit version, lacks some important features for large data users. The 32-bit version of Windows allows only up to 1 million rows, which sums up to 2 GB of data to be managed and 500–700 MB of file size. If this limit is exceeded, data inconsistencies can occur. When using such large volumes of data, it is recommended you switch to Windows 64-bit, since the 64-bit version of PowerPivot can manage 4 GB of data and 2 GB of file size. But in Excel 2013, for the 64-bit version of PowerPivot, all these limitations have been removed. It means that, the only restriction that is placed on the physical data is that of one's own machine.
Users of the 32-bit Windows version of Microsoft PowerPivot will be able to manage data satisfactorily as long as the 1 million row limit is observed. Fast and efficient performance analysis with sufficient amounts of memory for larger volumes of data is attainable for those using the 64-bit version of Windows.
Before downloading the free PowerPivot add-in, you have to determine if you are using the 32-bit or 64-bit version of Excel 2010. If you have installed the 32-bit version of Excel, you must install the 32-bit version of PowerPivot for Excel. Likewise, if you have installed the 64-bit version of Excel, you must install the 64-bit version of PowerPivot for Excel.
In order to know which version of Excel 2010 you have installed on your computer, perform the following steps:
Open Microsoft Excel 2010.
Click on File from the menu bar.
Select Help.
Note the version of Excel you have installed on your computer.
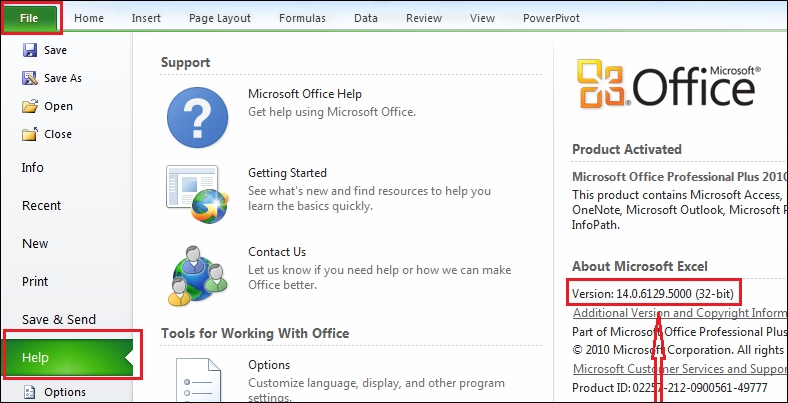
Identifying the version of Excel 2010
The download and installation of the PowerPivot add-in for Excel 2010 is easily done with the help of the following instructions:
Go to http://www.microsoft.com/en-us/download/details.aspx?id=29074.
Select the version you want to download and click on the Next button.
Once you have clicked on the Next button, your setup file will be downloaded.
Double-click on the setup file and then click on Run.
Click on Next to get started.
Accept the license agreement and then click on Next.
Click on Install.
Click on Finish.
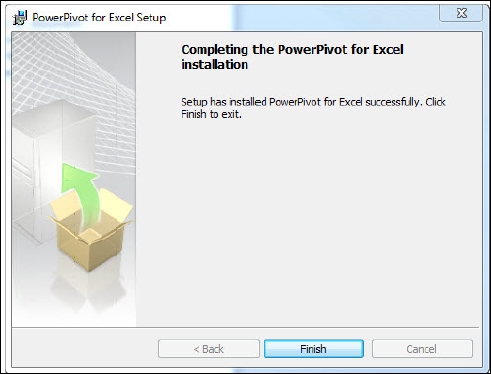
Completing the installation
If PowerPivot in Excel 2013 has already been installed on your Microsoft Office 2013 Professional Plus package, but wasn't enabled, to enable the add-in, perform the following instructions:
Open Excel 2013.
Navigate to File | Options | Add-Ins.
In the Manage box select COM Add-ins and click on the Go... button.
Check the PowerPivot for Excel box, and then click on OK.
If you have other versions of the PowerPivot add-in installed, those versions will also be listed in the COM Add-ins list. Be sure to select the PowerPivot add-in for Excel 2013.
Now, enable the PowerPivot add-in in your Excel 2013.
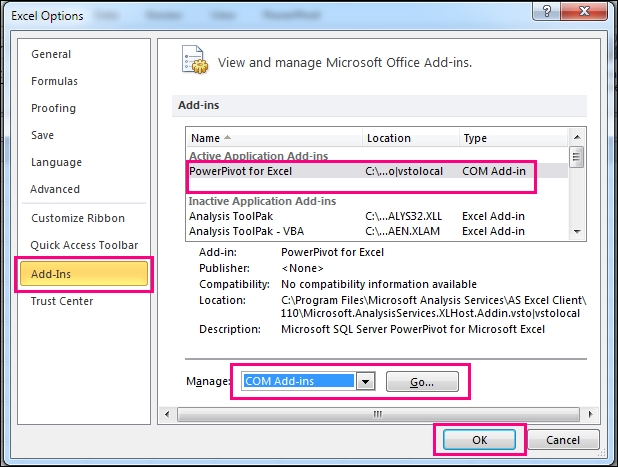
Enabling the PowerPivot add-in
If the PowerPivot add-in does not appear in the Excel ribbon, you have to troubleshoot using the following instructions:
Open Excel 2013.
Navigate to File | Options | Add-Ins.
In the Manage box, select Disabled Items and then click on Go.
Select PowerPivot for Excel and then click on Enable.
Now PowerPivot will be enabled.