
You are now ready to run the notebook. First, we create a directory named my_notebooks to hold your notebooks and open a terminal window at this directory. Different operating systems perform different steps.
Microsoft Windows users need to perform the following steps:
Mac OS X and other Unix-like systems' users need to perform the following steps:
Open a terminal window.
Run the following commands:
mkdir my_notebooks
cd my_notebooks
Then, execute the following command on the terminal window:
ipython notebook
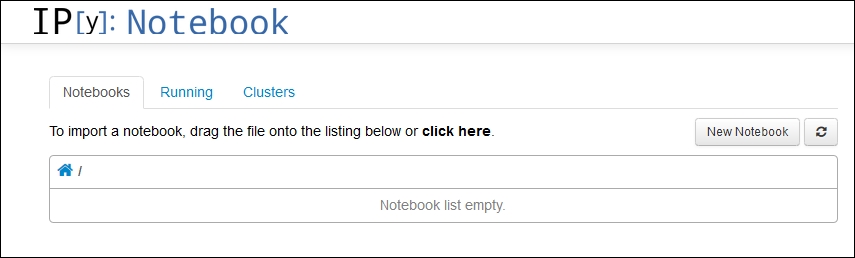
After a while, your browser will automatically load the notebook dashboard as shown in the following screenshot. The dashboard is a mini filesystem where you can manage your notebooks. The notebooks listed in the dashboard correspond exactly to the files you have in the directory where the notebook server was launched.
Tip
Internet Explorer does not fully support all features in the IPython notebook. It is suggested that you use Chrome, Firefox, Safari, Opera, or another standards-conforming browser. If your default browser is one of those, you are ready to go. Alternatively, close the Internet Explorer notebook, open a compatible browser, and enter the notebook address given in the command window from which you started IPython. This will be something like http://127.0.0.1:8888 for the first notebook you open.
To access Wakari, simply go to https://www.wakari.io and create an account. After logging in, you will be automatically directed to an introduction to using the notebook interface in Wakari. This interface is shown in the following screenshot:
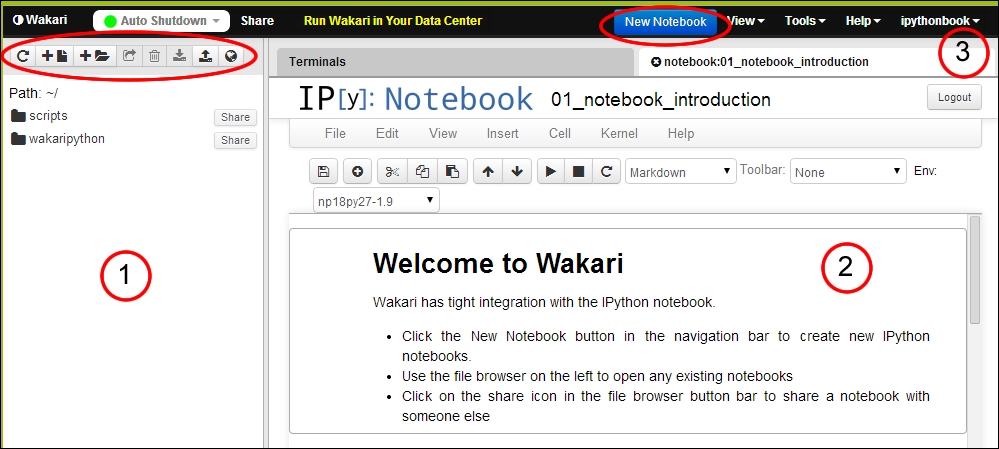
The interface elements as seen in the preceding screenshot are described as follows:
The section marked 1 shows the directory listing of your notebooks and files. On the top of this area, there is a toolbar with buttons to create new files and directories as well as download and upload files.
The section marked 2 shows the Welcome to Wakari notebook. This is the initial notebook with information about IPython and Wakari. The notebook interface is discussed in detail in Chapter 2, The Notebook Interface.
The section marked 3 shows the Wakari toolbar. This has the New Notebook button and drop-down menus with other tools.
Note
This book concentrates on using IPython through the notebook interface. However, it's worth mentioning the two other ways to run IPython.
The simplest way to run IPython is to issue the ipython command in a terminal window. This starts a command-line session of IPython. As the reader may have guessed, this is the original interface for IPython.
Alternatively, IPython can be started using the ipython qtconsole command. This starts an IPython session attached to a QT window. QT is a popular multiplatform windowing system that is bundled with the Anaconda distribution. These alternatives may be useful in systems that, for some reason, do not support the notebook interface.
We are ready to create our first notebook! Simply click on the New Notebook button to create a new notebook.
In a local notebook installation, the New Notebook button appears in the upper-left corner of the dashboard.
In Wakari, the New Notebook button is at the top of the dashboard, in a distinct color. Do not use the Add File button.
Notice that the Wakari dashboard contains a directory list on the left. You can use this to organize your notebooks in any convenient way you choose. Wakari actually provides access to a fully working Linux shell.
We are now ready to start computing. The notebook interface is displayed in the following screenshot:
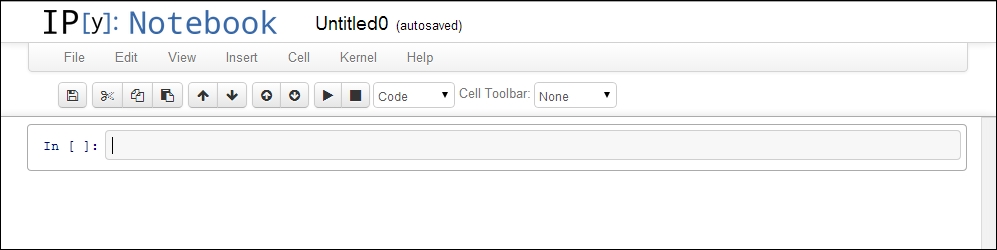
By default, new notebooks are named UntitledX, where X
is a number. To change it, just click on the current title and edit the dialog that pops up.
At the top of the notebook, you will see an empty box with the In [ ]: text on the left-hand side. This box is called a code cell and it is where the IPython shell commands are entered. Usually, the first command we issue in a new notebook is %pylab inline. Go ahead and type this line in the code cell and then press Shift + Enter (this is the most usual way to execute commands. Simply pressing Enter will create a new line in the current cell.) Once executed, this command will issue a message as follows:
Populating the interactive namespace from numpy and matplotlib
This command makes several computational tools easily available and is the recommended way to use the IPython notebook for interactive computations. The inline directive tells IPython that we want graphics embedded in the notebook and not rendered with an external program.
Commands that start with % and %% are called magic commands and are used to set up configuration options and special features. The %pylab magic command imports a large collection of names into the IPython namespace. This command is usually frowned upon for causing namespace pollution. The recommended way to use libraries in scripts is to use the following command:
import numpy as np
Then, for example, to access the arange() function in the NumPy package, one uses np.arange(). The problem with this approach is that it becomes cumbersome to use common mathematical functions, such as sin(), cos(), and so on. These would have to be entered as np.sin(), np.cos(), and so on, which makes the notebook much less readable.
In this book, we adopt the following middle-of-the road convention: when doing interactive computations, we will use the %pylab directive to make it easier to type formulae. However, when using other libraries or writing scripts, we will use the recommended best practices to import libraries.