

Before Spark can get up and running, there are some necessary prerequisites that need to be installed on a newly minted Ubuntu Desktop. This section will focus on installing and configuring the following on Ubuntu Desktop:
- Java 8 or higher
- Anaconda
- Spark
The only requirement for this section is having administrative rights to install applications onto the Ubuntu Desktop.
This section walks through the steps in the recipe to install Python 3, Anaconda, and Spark on Ubuntu Desktop:
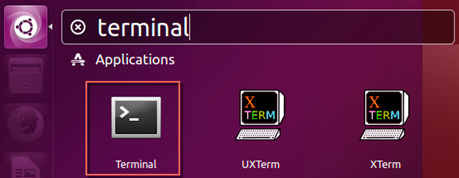
- Install Java on Ubuntu through the
terminalapplication, which can be found by searching for the app and then locking it to the launcher on the left-hand side, as seen in the following screenshot:
- Perform an initial test for Java on the virtual machine by executing the following command at the terminal:
java -version
- Execute the following four commands at the terminal to install Java:
sudo apt-get install software-properties-common
$ sudo add-apt-repository ppa:webupd8team/java
$ sudo apt-get update
$ sudo apt-get install oracle-java8-installer
- After accepting the necessary license agreements for Oracle, perform a secondary test of Java on the virtual machine by executing
java -versiononce again in the terminal. A successful installation for Java will display the following outcome in the terminal:
$ java -version
java version "1.8.0_144"
Java(TM) SE Runtime Environment (build 1.8.0_144-b01)
Java HotSpot(TM) 64-Bit Server VM (build 25.144-b01, mixed mode)
- Next, install the most recent version of Anaconda. Current versions of Ubuntu Desktop come preinstalled with Python. While it is convenient that Python comes preinstalled with Ubuntu, the installed version is for
Python 2.7, as seen in the following output:
$ python --version
Python 2.7.12
- The current version of Anaconda is v4.4 and the current version of Python 3 is v3.6. Once downloaded, view the Anaconda installation file by accessing the
Downloadsfolder using the following command:
$ cd Downloads/
~/Downloads$ ls
Anaconda3-4.4.0-Linux-x86_64.sh
- Once in the
Downloadsfolder, initiate the installation for Anaconda by executing the following command:
~/Downloads$ bash Anaconda3-4.4.0-Linux-x86_64.sh
Welcome to Anaconda3 4.4.0 (by Continuum Analytics, Inc.)
In order to continue the installation process, please review the license agreement.
Please, press ENTER to continue
Note
Please note that the version of Anaconda, as well as any other software installed, may differ as newer updates are released to the public. The version of Anaconda that we are using in this chapter and in this book can be downloaded from https://repo.continuum.io/archive/Anaconda3-4.4.0-Linux-x86.sh
- Once the Anaconda installation is complete, restart the
Terminalapplication to confirm that Python 3 is now the default Python environment through Anaconda by executingpython --versionin the terminal:
$ python --version
Python 3.6.1 :: Anaconda 4.4.0 (64-bit)
- The Python 2 version is still available under Linux, but will require an explicit call when executing a script, as seen in the following command:
~$ python2 --version
Python 2.7.12
- Visit the following website to begin the Spark download and installation process:
https://spark.apache.org/downloads.html
- Select the download link. The following file will be downloaded to the
Downloadsfolder in Ubuntu:
spark-2.2.0-bin-hadoop2.7.tgz
- View the file at the terminal level by executing the following commands:
$ cd Downloads/
~/Downloads$ ls
spark-2.2.0-bin-hadoop2.7.tgz
- Extract the
tgzfile by executing the following command:
~/Downloads$ tar -zxvf spark-2.2.0-bin-hadoop2.7.tgz
~/Downloads$ ls
spark-2.2.0-bin-hadoop2.7 spark-2.2.0-bin-hadoop2.7.tgz
~/Downloads$ mv spark-2.2.0-bin-hadoop2.7 ~/
~/Downloads$ ls
spark-2.2.0-bin-hadoop2.7.tgz
~/Downloads$ cd
~$ ls
anaconda3 Downloads Pictures Templates
Desktop examples.desktop Public Videos
Documents Music spark-2.2.0-bin-hadoop2.7
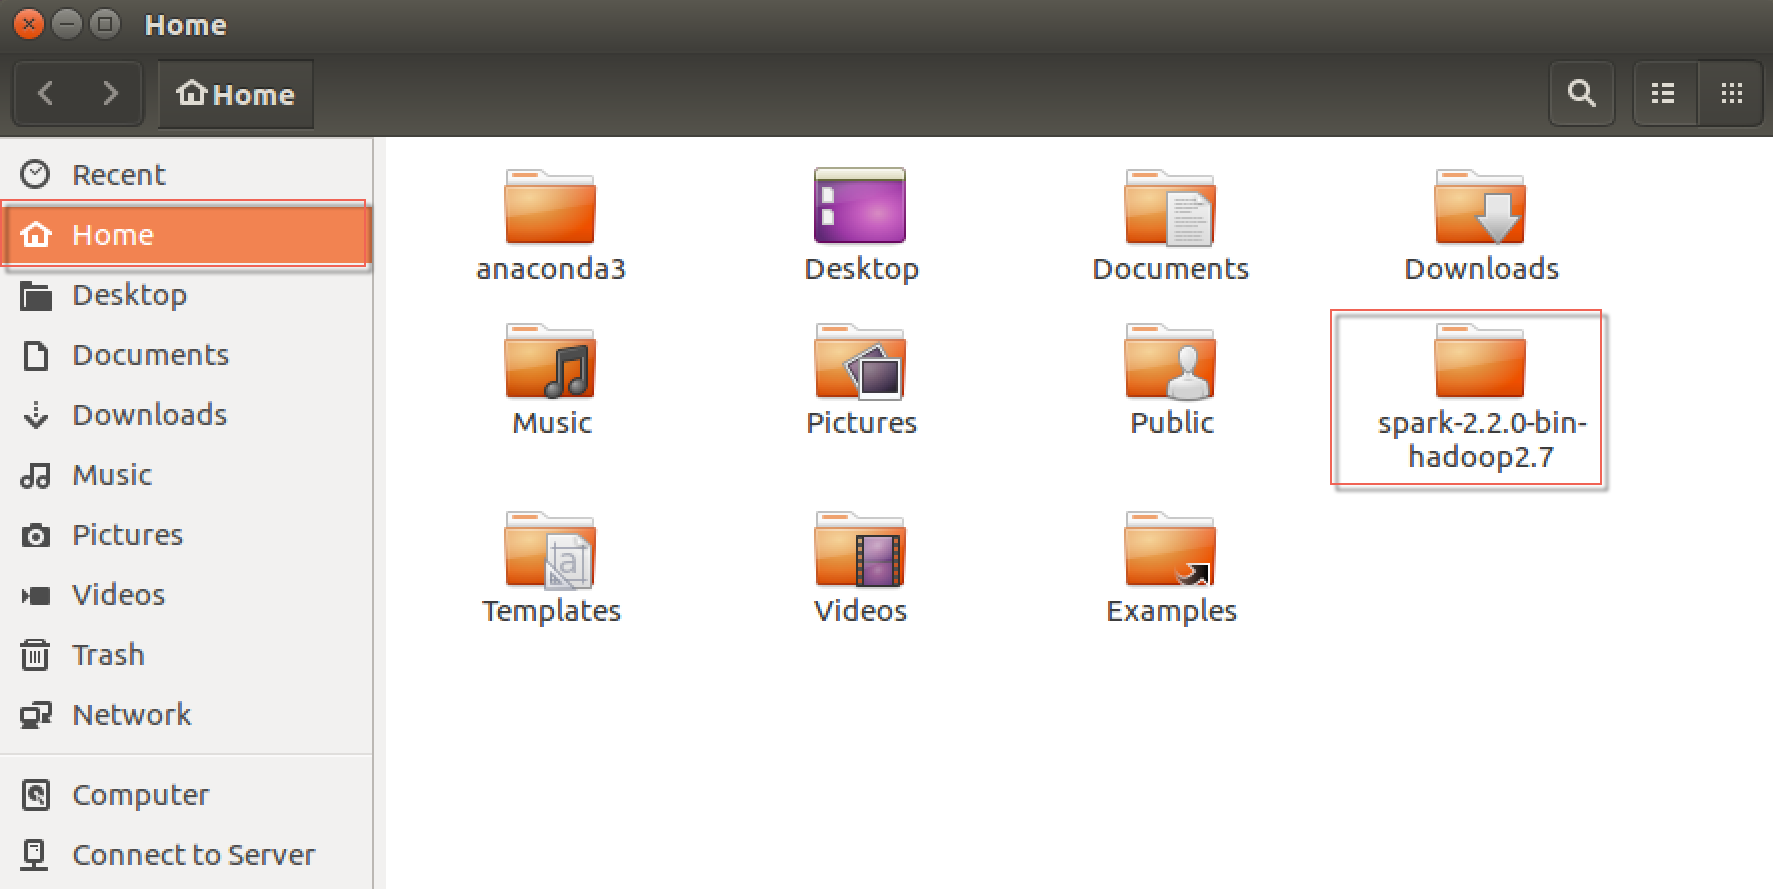
- Now, the
spark-2.2.0-bin-hadoop2.7folder has been moved to theHomefolder, which can be viewed when selecting theFilesicon on the left-hand side toolbar, as seen in the following screenshot:
- Spark is now installed. Initiate Spark from the terminal by executing the following script at the terminal level:
~$ cd ~/spark-2.2.0-bin-hadoop2.7/
~/spark-2.2.0-bin-hadoop2.7$ ./bin/pyspark
- Perform a final test to ensure Spark is up and running at the terminal by executing the following command to ensure that the
SparkContextis driving the cluster in the local environment:
>>> sc
<SparkContext master=local[*] appName=PySparkShell>This section explains the reasoning behind the installation process for Python, Anaconda, and Spark.
Note
In order for Spark to run on a local machine or in a cluster, a minimum version of Java 6 is required for installation.
- Ubuntu recommends the
sudo apt installmethod for Java as it ensures that packages downloaded are up to date. - Please note that if Java is not currently installed, the output in the terminal will show the following message:
The program 'java' can be found in the following packages:
* default-jre
* gcj-5-jre-headless
* openjdk-8-jre-headless
* gcj-4.8-jre-headless
* gcj-4.9-jre-headless
* openjdk-9-jre-headless
Try: sudo apt install <selected package>
- While Python 2 is fine, it is considered legacy Python. Python 2 is facing an end of life date in 2020; therefore, it is recommended that all new Python development be performed with Python 3, as will be the case in this publication. Up until recently, Spark was only available with Python 2. That is no longer the case. Spark works with both Python 2 and 3. A convenient way to install Python 3, as well as many dependencies and libraries, is through Anaconda. Anaconda is a free and open source distribution of Python, as well as R. Anaconda manages the installation and maintenance of many of the most common packages used in Python for data science-related tasks.
During the installation process for Anaconda, it is important to confirm the following conditions:
- Anaconda is installed in the
/home/username/Anaconda3location - The Anaconda installer prepends the Anaconda3 install location to a
PATHin/home/username/.bashrc
- Anaconda is installed in the
- After Anaconda has been installed, download Spark. Unlike Python, Spark does not come preinstalled on Ubuntu and therefore, will need to be downloaded and installed.
For the purposes of development with deep learning, the following preferences will be selected for Spark:
- Spark release: 2.2.0 (Jul 11 2017)
- Package type: Prebuilt for Apache Hadoop 2.7 and later
- Download type: Direct download
- Once Spark has been successfully installed, the output from executing Spark at the command line should look something similar to that shown in the following screenshot:
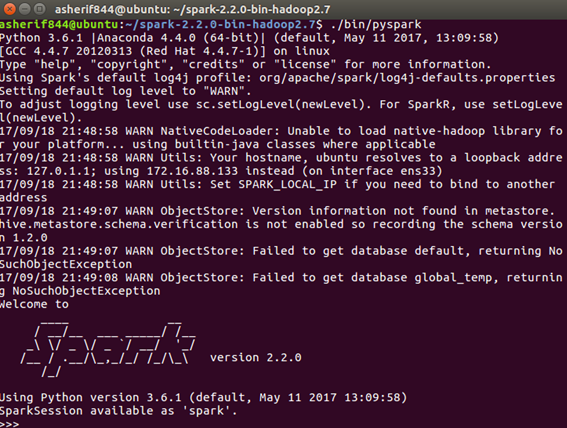
- Two important features to note when initializing Spark are that it is under the
Python 3.6.1|Anaconda 4.4.0 (64-bit)| framework and that the Spark logo is version 2.2.0. - Congratulations! Spark is successfully installed on the local Ubuntu virtual machine. But, not everything is complete. Spark development is best when Spark code can be executed within a Jupyter notebook, especially for deep learning. Thankfully, Jupyter has been installed with the Anaconda distribution performed earlier in this section.
You may be asking why we did not just use pip install pyspark to use Spark in Python. Previous versions of Spark required going through the installation process that we did in this section. Future versions of Spark, starting with 2.2.0 will begin to allow installation directly through the pip approach. We used the full installation method in this section to ensure that you will be able to get Spark installed and fully-integrated, in case you are using an earlier version of Spark.
To learn more about Jupyter notebooks and their integration with Python, visit the following website:
To learn more about Anaconda and download a version for Linux, visit the following website: