
If your boss asks you to build a presentation on that new business idea you mentioned to them at the Christmas party, you are bound to get very excited indeed. Then, if they ask whether you can present the idea to the board in an hour's time, you slowly start to melt in your chair.
Most people would grab a strong coffee, open up their copy of Prezi, insert images, text, video, and anything else they can find to help explain their idea. They would then link the key elements together with paths and be happy that their Prezi will really communicate their idea enough to get a good result.
A Prezi master, on the other hand, would not even dream of touching the Prezi software until they knew exactly how their Prezi was going to deliver their idea, which imagery to use, and what the key messages are. In fact, if they had one hour to build a Prezi, they would probably spend the first 15-20 minutes planning and the rest of the time actually building their Prezi. This is because they've taken the time to learn the three design steps to build a Prezi presentation.
One of these employees will get booted out of the boardroom for giving their senior management team motion sickness, and the other gets commended for delivering a wonderfully clear picture of their business idea. We're pretty sure you know who belongs to which category.
Tip
Ensure that you master the design steps explained in the following section. It is one thing to know the software, but to build really great presentations, you must go about the design in the right way.
The three-step approach explained over the next few pages is aimed at helping you get the most out of Prezi. By ensuring that you follow the three steps, you'll start to think in the right way, understand the key messages in your design, and also build the Prezi in a sensible and time-efficient way.
The three steps are:
Planning your Prezi.
Getting the style right.
Building in layers.
Failure to use this approach can get you frustrated during the design process and will make you lose track of everything on your canvas, waste valuable time, and/or you end up creating something that's sure to deliver motion sickness to your audience.
To master Prezi, you must master these steps.
The first design step is without a doubt the most important of all. Taking the time to plan your Prezi will give you a clear vision of exactly what it is that you need to say or show to your audience in order to deliver your message.
There are some questions you should always ask yourself at the start of any Prezi design:
What's the overall message I'm trying to get across?
What must people know by the end of my Prezi?
Are there any smaller key messages along the way that will help to make my point?
Will my Prezi be led by a presenter such as myself, or will it be accessed by people online?
Answering these questions before you start can give you a really good understanding of what your Prezi needs to say and how it can be said.
Have you ever been in a presentation and spent too much time trying to figure out what the image on screen means rather than what the actual message from the presenter is? Anything visual in your presentation can be extremely powerful for the audience, or it can be extremely distracting and can cloud the importance of your message.
Let's briefly look at some of the unique features of Prezi that can help us start planning from a Prezi perspective.
Prezi's zooming feature can help you deliver your message in a powerful way when it's used correctly. It's simple to create such a zooming effect technically, and we'll look at how to do that. However, first, it's even more important to think about why you're zooming. You don't want to simply zoom in and out just because you can easily do so. What will your zoom communicate? Let's take a look at an intentionally strong use of zoom to understand how this can be done:
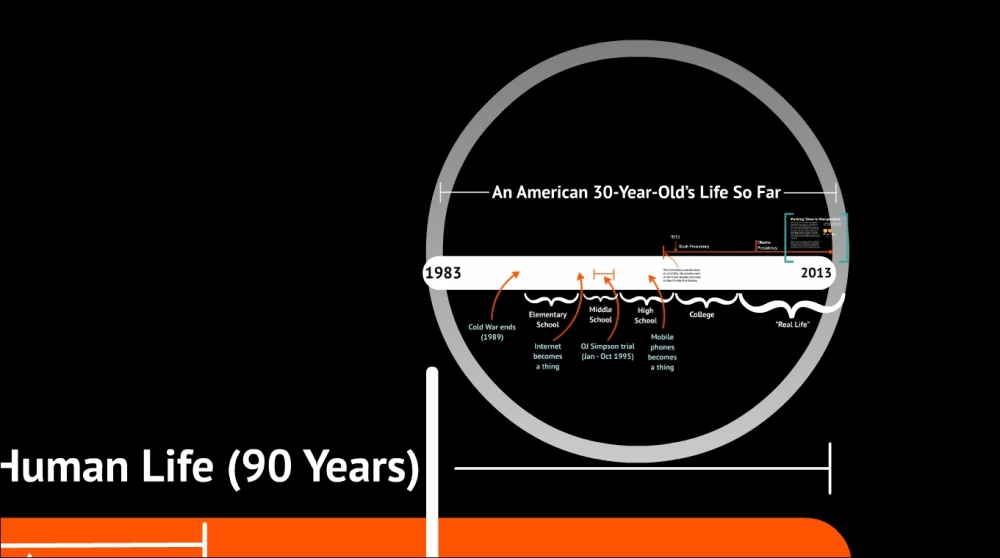
Screenshot from Putting Time into Perspective by Prezi Jedi
In this Prezi, the viewer starts by seeing the events that have shaped the life of a contemporary American who is 30 years old. The Prezi then zooms out further through each step of the presentation, revealing a larger time frame with each step. It finally ends with the time frame of the Behaviorally Modern Humans:
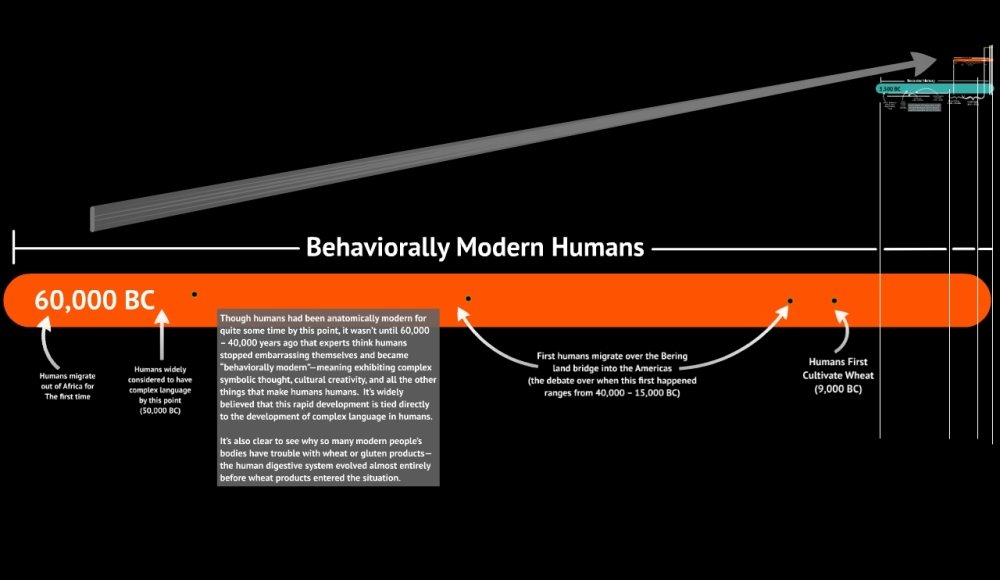
Screenshot from Putting Time into Perspective by Prezi Jedi
The original frame from Prezi is way up at the very top right corner now, way past the tip of the gray arrow—so small that you can't even see it. Here zoom is used intentionally to demonstrate how difficult it is for humans to conceive of time. You can see this effect in action and get the full impact at https://prezi.com/veychlhwrdgz/putting-time-in-perspective/.
Obviously, not every Prezi will be able to use the zoom feature in this way, but this style of zooming reflects the Prezi frame of mind that is so important to the design process. As part of your design process, ensure that you ask, "How will I use zooming in my Prezi?"
In Chapter 3, Consistent Branding for Business, we will look at how we can create templates that will allow us to reuse elements of the design we create for our Prezi. For now, though, the important thing is to start thinking in terms of Frames rather than slides. Although there are a lot of similarities, Prezi has decided to use the name frames to help emphasize the 3D nature of their canvas.
Prezi offers a few different ways to create frames. If you are looking to completely custom design your frame, you can use the frame menu option near the top-left corner of the Prezi window:
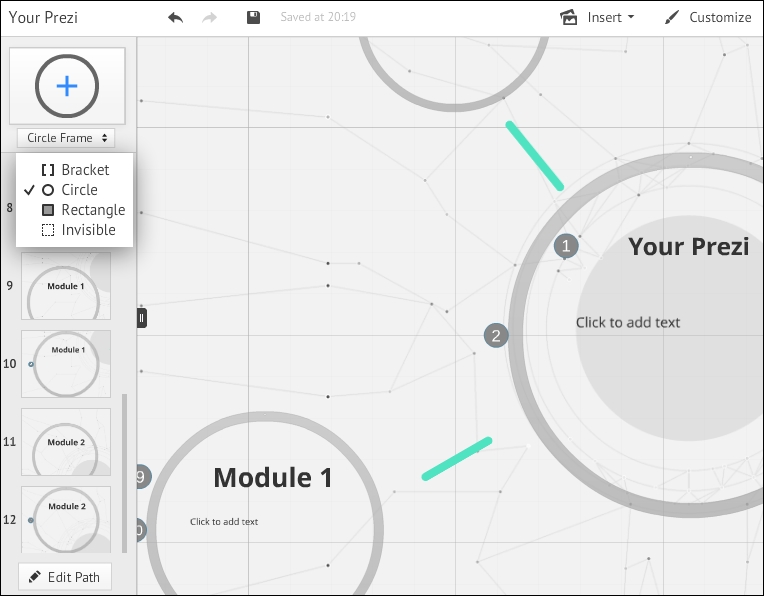
Prezi offers four different default frame styles: Bracket, Circle, Rectangle, and Invisible. The Invisible frames can be used to help determine the path layout of a presentation, but won't be seen by when the Prezi is used in presentation mode. All of the others will be visible at all times. You can see grey circle frames used in the preceding example of Prezi.
If you're looking for a bit more direction, Prezi offers the option to insert a layout, which is a frame with predefined areas to insert elements such as text and images. To access this, go to the top tool bar menu and navigate to Insert | Layouts…. This brings up a tool bar on the right that allows you to insert either single or multi-frame layouts.
Multi-frame layouts offer a wide range of options that have been used in popular Prezi templates. These include layouts that can be used either as part of a larger Prezi, or even as an entire presentation in itself, such as the timeline frame or the tip of the iceberg frame pictured here:
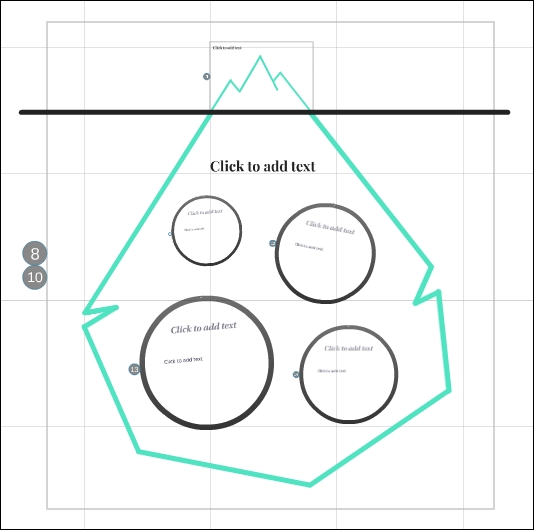
This template actually makes great use of both the frame and zooming features because the presentation can start as zoomed in at the very top, showing a more straightforward understanding of an issue, and then zoom out to the entire iceberg to reveal that there's actually much more complexity to an issue below the surface.
The key to your planning process is to realize that frames are liberated on a 3D canvas in a way that slides in PowerPoint are not.
Note
In a PowerPoint presentation, slides are sequential and always have to be just to the right or left of one another. However, frames can be placed anywhere, and their actual positions relative to one another can help create meaning in your presentation, as with the tip of the iceberg shown earlier. Making use of this new space can be challenging but it's also an opportunity to allow your creativity to flourish.
Now comes the easy part. Taking the Prezi design, you've designed in step 1 – Planning your Prezi, add all of the imagery and styles from step 2 – Getting the style right, and put it all together on the Prezi canvas. It's a piece of cake right?
We're pretty sure that every Prezi user comes unstuck now, and this is again because they rush into the canvas and try to add everything at once. This can lead to certain elements getting lost because you zoomed in too far and then back out again, or you might find that your Prezi doesn't end up looking quite like you'd planned.
In order to help you in this final step, we want you to think of making your Prezi in the same way that you'd make a delicious Victoria sponge cake like the one shown in the following image:
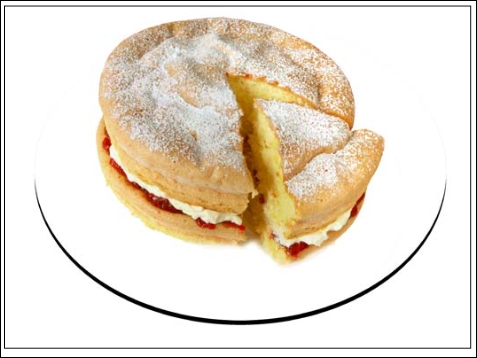
Once you've got all of your ingredients from step 1 – Planning your Prezi, and step 2 – Getting the style right, you should build your Prezi in the layers listed here.
If you're going to have some kind of background image that sits behind everything in your Prezi, then you must insert this onto your canvas before anything else. You may want to start your Prezi by zooming in to a small part of a much larger image that will be revealed at the end. In this case, ensure that it's the first thing you insert.
In the example shown in the following image, the Prezi starts in the top-left corner of the iPad screen at path points 1 and 2. The audience is then taken through the Prezi path, which is all contained inside the screen of the iPad. It is only when the audience reaches path point 12 that the Prezi zooms out to reveal the background image:
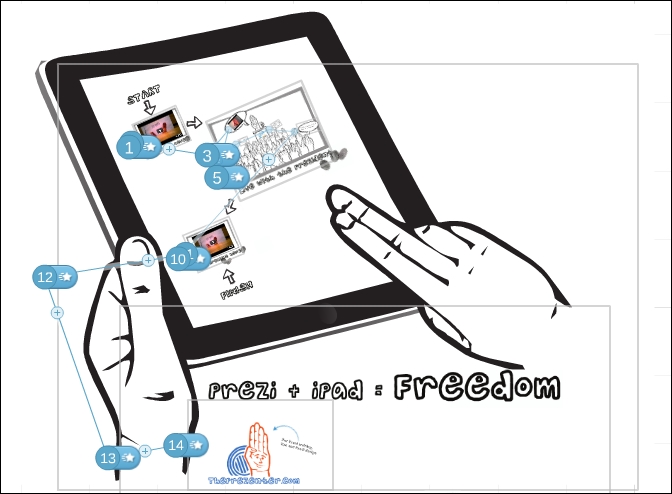
This example can be viewed online at http://prezi.com/yl9_u5si57pp/prezi-ipad-freedom/.
Now that you have your first layer of sponge in place, you can start to add those tasty ingredients and spread them right across your Prezi canvas. Yummy!
The cream and jam of your Prezi might include some or all of the following items:
Text
Images
Graphs
Video files (including sound)
YouTube clips
Flash animations
Frames
If you've planned your Prezi well enough in step 1 – Plan your Prezi, then you should have a good idea of where to place each of these elements on your canvas.
We'd encourage you to place the separate elements at slightly different angles from one another so that the canvas turns a little during transition. Again, try not to overcook this as too much spinning can make people feel ill.
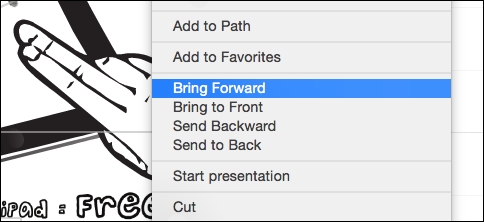
If you do need to adjust the position of any object at this stage, just right-click on it and use the Send Backward or Bring Forward options, as shown in the following screenshot:
Once you have your background imagery (bottom layer) and your different elements (cream and jam) on the same canvas, the only thing left to do is join them all together with paths so that your Prezi flows in the correct order.
Note
As we already mentioned, your Prezi design might not need a path if you're using a conversational presentation method. So, for some, this step might be optional.
It can be extremely difficult and frustrating to try to adjust paths when things need to be moved around on your canvas, so ensure that you are totally happy with the position of your cream and jam before adding this top layer of sponge.
Once you've added your paths, we strongly recommend that you take your Prezi into show mode and test that everything looks and tastes great.
We highly recommend that you master these three design steps as they will really help you to achieve great results and visualize the design before you even touch the Prezi software.
Knowing what you want to achieve from your Prezi at the start is crucial. It's extremely easy to get lost in the Prezi canvas and waste time looking for missing objects, so adding this very structured and logical approach will really help.
As a reminder, the three Prezi design steps are as follows:
Planning your Prezi.
Getting the style right.
Building in layers.
Once you master these steps, building any Prezi will be a piece of cake.
Tip
Don't get caught out
When building a Prezi for your business, you'll no doubt be under serious time constraints, have other work that needs your attention, and probably have a number of distractions around you. Don't allow yourself to skip over these steps because you think there isn't time. They'll actually save you time in the long run if used correctly.