

In this recipe, we will look at how to install and set up JIRA in a production environment. This includes setting up a dedicated user to run JIRA under and using an external database.
We will use the standalone archive distribution as the steps are consistent across both the Windows and Linux platforms.
The following things need to be checked before you start with this recipe:
Download the latest JIRA archive distribution from https://www.atlassian.com/software/jira/download and click on the All JIRA Download Options link.
Make sure your server environment meets JIRA's requirements by visiting https://confluence.atlassian.com/display/JIRA/Supported+Platforms.
Install Java on the system. At the time of writing, JIRA 7 requires Java 7. Make sure you get the latest update for Java, unless it is explicitly stated as unsupported by JIRA.
Make sure that the
JAVA_HOMEorJRE_HOMEenvironment variable is configured.Have a database system available, either on the server hosting JIRA or a different server accessible over the network. For this recipe, we will use MySQL; if you are using a different database, change the commands and queries accordingly.
Download the necessary database driver. For MySQL, you can download it from https://dev.mysql.com/downloads/connector/j.
We first need to create an empty MySQL database for JIRA:
Open up a new command prompt on the MySQL server.
Run the following command (you can also use another user instead of root as long as the user has permission to create new users and databases):
mysql -u root -pEnter the password for the user when prompted.
Create a new database for JIRA by running the following command:
create database jiradb character set utf8;Create a new user for JIRA in the database and grant the user access to the
jiradbdatabase we just created using the following command:grant all on jiradb.* to 'jirauser'@'localhost' identified by 'jirapassword';In the previous five steps, we created a new database named
jiradband a new database user namedjirauser. We will use these details later to connect JIRA with MySQL. The next step is to install JIRA.Create a dedicated user account to run JIRA under. If you're using Linux, run the following command as root or with sudo:
useradd --create-home --comment "Dedicated JIRA account" -- shell /bin/bash jiraCreate a new directory on the filesystem where JIRA will be installed. This directory will be referred to as
JIRA_INSTALL.Create another directory on the filesystem. This will be used for JIRA to store its attachments, search indexes, application data, and other information. You can create this directory on a different drive with more hard disk capacity, such as a network drive (this could slow down the performance). This directory will be referred to as
JIRA_HOME.Unzip the JIRA archive file in the
JIRA_INSTALLdirectory.Change both the
JIRA_INSTALLandJIRA_HOMEdirectories' owner to the new JIRA user.Open the
JIRA_INSTALL/atlassian-jira/WEB-INF/classes/jira-application.propertiesfile in a text editor.Locate the
jira.home=line in this file.Cut and paste this in the full path to the
JIRA_HOMEdirectory and remove the#symbol if present. Make sure you use the forward slash (/). The following line shows how it looks on a Linux system:jira.home=/opt/data/jira_home
Copy the database driver JAR file (obtained from the Getting ready section) to the
JIRA_INSTALL/libdirectory.Start up JIRA by running the
start-jira.sh(for Linux) orstart-jira.bat(for Windows) script from theJIRA_INSTALL/bindirectory as the JIRA user. You should see the outputTomcatstarted in your console; this means that JIRA is up and running.JIRA comes with a setup wizard that will help guide us through the final phase of the installation.
Open up a browser and go to
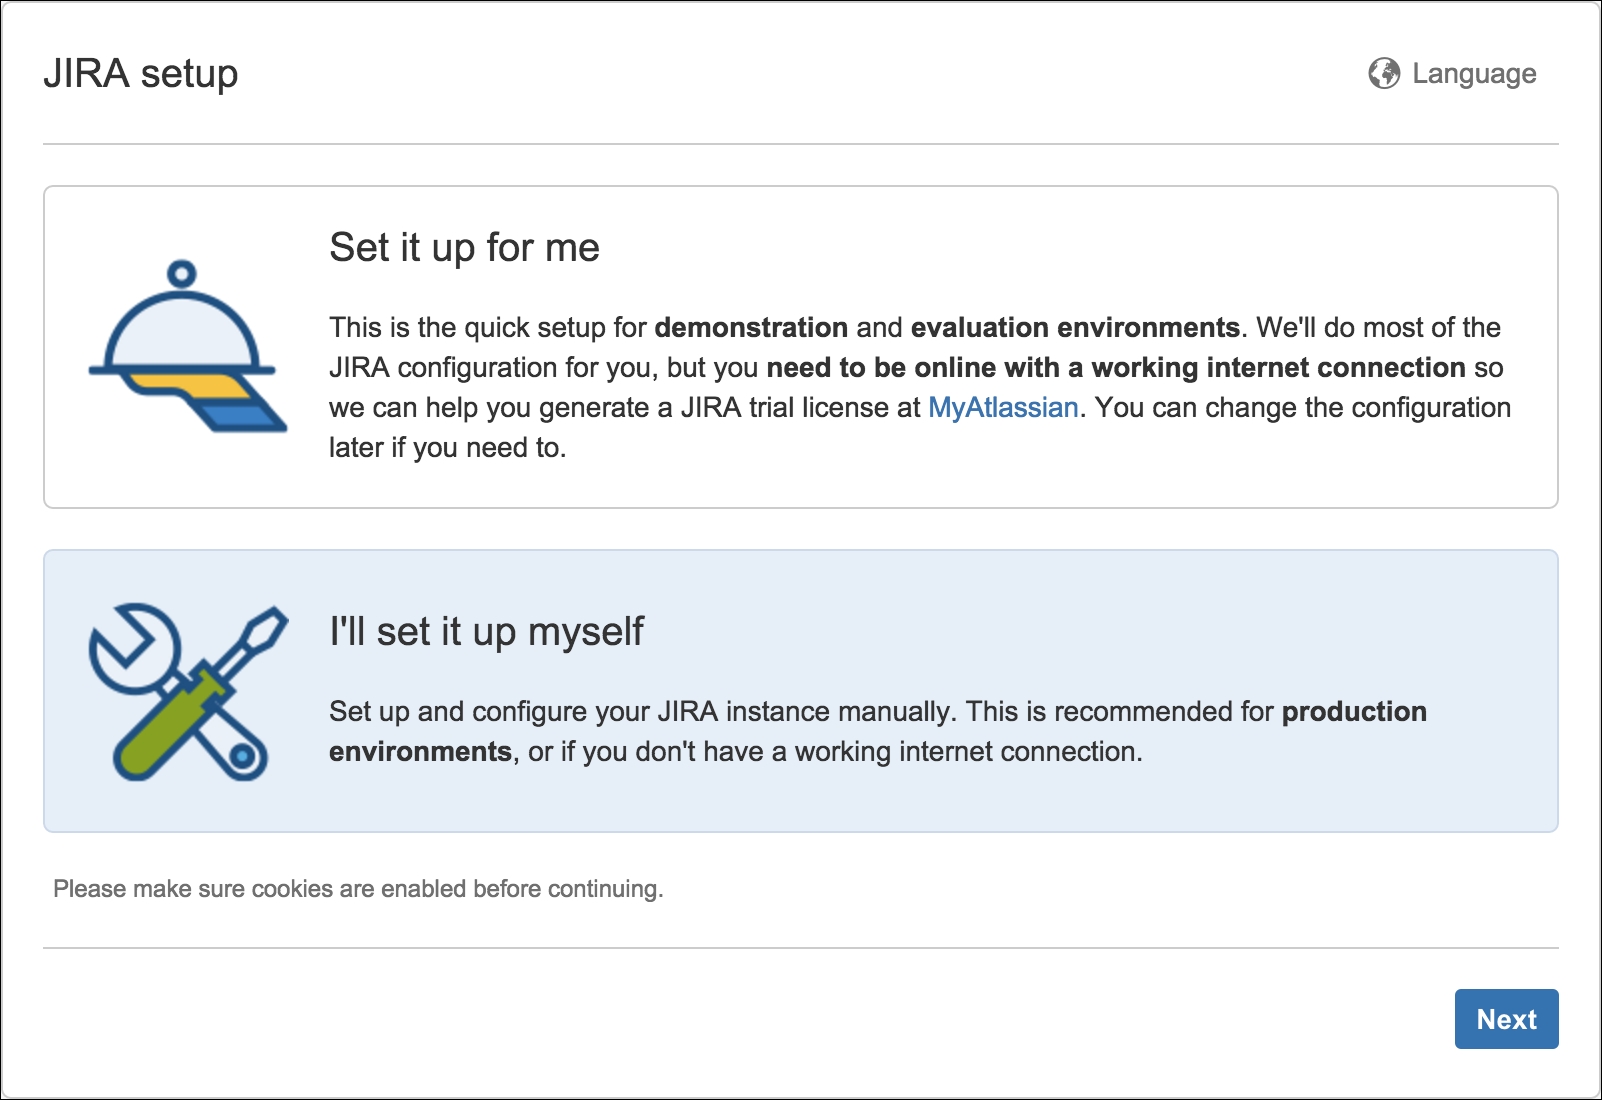
http://localhost:8080(replace localhost with the actual server name). By default, JIRA runs on port 8080. You can change this by changing the connector port value in theJIRA_INSTALL/conf/server.xmlfile.The first step is to select how you want JIRA to be set up. Select the I'll set it up myself option and click on the Next button.
The second step is to set up the database information. Select the My Own Database (recommended for production environments) option.
Select a value for the Database Type option. For this recipe, select the MySQL option.
Enter the details for our new
jiradbdatabase.
Click on Test Connection to check whether JIRA is able to connect to the database.
Click on the Next button to proceed if the database connection test is successful and move to the next step of the wizard.
Enter the Application title value for this JIRA instance.
Select Public if you would like to let people sign up for accounts or Private if you want only administrators to create accounts. For most organizations that use JIRA to track internal projects, this will be in Private mode.
Set the Base URL option. The base URL is the one that users will use to access JIRA. Usually, this should be a fully qualified domain name or the hostname—that is, not a localhost or an IP address.
Click on Next to go to the third step of the wizard, as shown in the following screenshot:

Enter your JIRA license key if you have one. If you do not have a license key, you can generate a temporary trial license by visiting https://my.atlassian.com and creating an account.
Click on Next to go to the next step of the wizard, as shown in the following screenshot:

Enter the details for the initial administrator account. The user account will have access to all the configuration options in JIRA, so make sure you do not lose its login credentials.
Click on Next to go to the fifth and final step of the wizard, as shown in the following screenshot:

Choose whether you want to set up an outgoing SMTP server Now or Later. If you do not have an SMTP server ready right now, you can always come back and configure it later.
Click on Finish to complete the setup process.
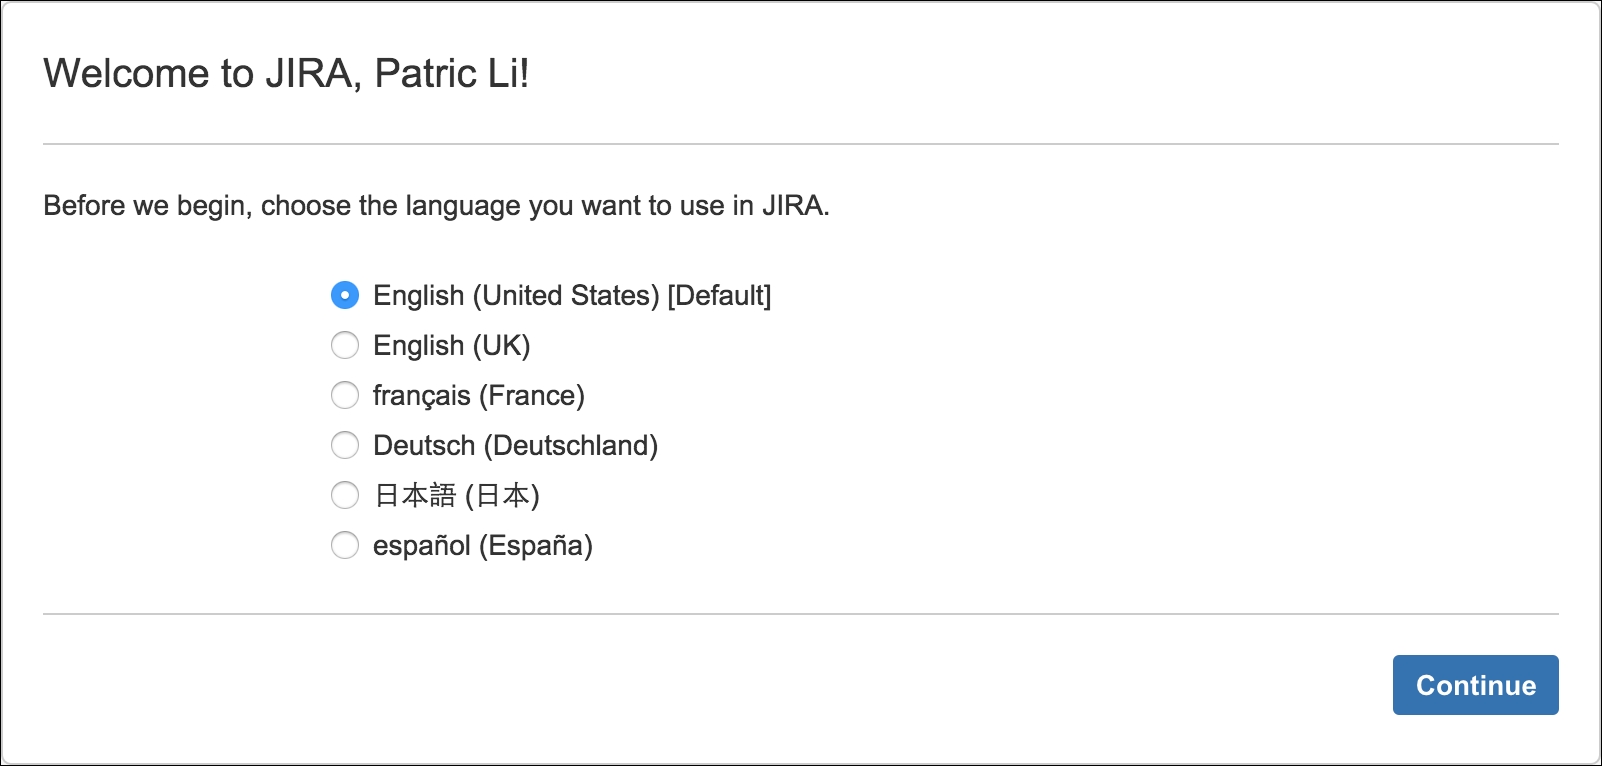
This ends the general configuration part of the setup process. Your JIRA system is up and running. Next, JIRA will walk you through its onboarding process as a first-time user. You will be asked to select the default language to use, upload a user avatar, and create your very first project.
By default, JIRA is set to use a maximum of 768 MB of memory. For a production deployment, you might need to increase the amount of memory allocated to JIRA. You can increase this by opening up the setenv.sh (on Linux) or setenv.bat (on Windows) file in the JIRA_INSTALL/bin directory and changing the value of the JVM_MAXIMUM_MEMORY parameter.
For example, if we want to set the maximum memory to 2 GB, we will change it to JVM_MAXIMUM_MEMORY="2048m". You will need to restart JIRA after performing this change. For production uses, it is recommended that you allocate at least 2 GB memory to the JIRA JVM.
If you are using LDAP for user management in your organization, refer to the Integrating with LDAP for authentication only recipe in Chapter 4, User Management.
Note
Detailed steps to download the code bundle are mentioned in the Preface of this book. Please have a look. The code bundle for the book is also hosted on GitHub at https://github.com/PacktPublishing/JIRA-7-Administration-Second-Edition. We also have other code bundles from our rich catalog of books and videos available at https://github.com/PacktPublishing/. Check them out!